


Thank you! Your comment has been submitted successfully. You should be able to view your question/comment here within a few days.
Error submitting comment. Please try again momentarily.


Videos are provided as a guide only. Refer to manufacturer installation instructions and specs for complete information.
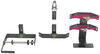
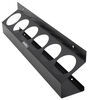
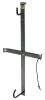
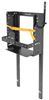
Today on this utility trailer we're going to install part number RA-2. This is a trim line rack for utility trailers. Okay, our first step is go ahead and take a spool and put it onto our trimmer rack. Then it's a good idea to do some tests at locations on your trailer to make sure you have plenty of room before you fully install it. We're going to go ahead and take ours apart. Take off the wing nut and lock washer, and the guide for the line. This is all one long bolt so I'll pull it out.
There's also a washer that you want to slide back here as well. We'll go ahead and remove this washer and then put our spool into place. Washer again, run our bolt through, and reassemble. Okay. Once it's installed you can actually lock this wing nut down, and this will hold its shape. For now we don't need it that tight.
We're just going to look for placement. We also have one of our trimmers in place just to give us an idea of how much room we have. Okay, we could put it there. Maybe check underneath the rail. It looks like it just barely drags on here.
Close, but maybe you have some spacers you could put it on I think we're going to put it on top. Once you set on location, basically we'll go ahead and disassemble it and we'll clamp it in place, and mark and drill our holes out. In this case I'm going to take my whole bolt out, and take the whole assembly out. Let's go ahead and put it back in place and clamp it. Any clamp will do, just to hold it in place so we mark our holes. Let's go ahead and get our trimmer out of the way as well. Our clamp is strong enough to hold it in place.
We'll just use the rack itself as a guide to drill through. We're drilling now to a 3/8 hole size. Let's take a moment and get rid of our tailings from our drilling. Now we'll be using 3/8 hardware and a great eight. We'll go ahead and put our hardware into place. Now we have our bolt, and then we're going to be using a locking flange nut as well. Go ahead and take our clamp off now. We'll go ahead and tighten down our hardware. Okay, once we have it tightened down we'll go ahead and reassemble. Once we have this loosely installed we'll go ahead and take our line and run it through the guide here. Let's leave it at that, and we'll just tighten it up for good. You can adjust it however you want this to mount. I think just for now we're just going to leave it like this. Okay, we got it in place. Let's go ahead and double check our fit with the trimmer. It's probably painfully obvious that we have a pretty small reel on here. The bigger the reel the more the spring will compress and give it tension to keep it from spinning around. With that, our trim line rack is installed. One other thing to know about this rack. This will either hold a three pound or five pound spool of line for your trimmer. Okay, that'll finish it for our install of part number RA-2. A trim line rack for utility trailers, on this utility trailer. .
Customer Satisfaction Score:
99% were satisfied with this product
1% of customers were not satisfied
Ratings & Reviews


Info for this part was:
At etrailer we provide the best information available about the products we sell. We take the quality of our information seriously so that you can get the right part the first time. Let us know if anything is missing or if you have any questions.





















Keith W.
2/16/2018
Its been great having my equipment organized.