
Curt Trailer Hitch Receiver - Custom Fit - Class III - 2"


To see if this custom-fit item will work for you please tell us what vehicle you'll use it with.


Thank you! Your comment has been submitted successfully. You should be able to view your question/comment here within a few days.
Error submitting comment. Please try again momentarily.


With a maximum gross trailer weight of 3,500 lbs and a tongue weight rating of 350 lbs, this Curt Class III 2" trailer hitch receiver is built for light to moderate towing and accessory use. It’s perfect for hauling small trailers, boats, or adding a bike rack or cargo platform when you need extra space. The 2" x 2" receiver opening gives you flexibility to use the most common towing and carrying accessories out there.
This hitch bolts directly to your vehicle’s frame—no welding needed. The precision, robotic welding ensures the fit is exact, and the included hardware kit means you’ll have what you need for the install. Whether you're setting up in a driveway or garage, the bolt-on design keeps things simple and secure from start to finish.
The sturdy square-tube design and gloss black powder coat finish resist rust and corrosion for long-term durability. A protective base coat sits under the gloss layer to keep the steel strong even after years of exposure. This fully welded construction gives the hitch its solid feel and strength you can count on every time you tow.

Videos are provided as a guide only. Refer to manufacturer installation instructions and specs for complete information.
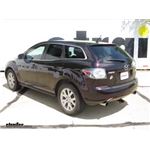
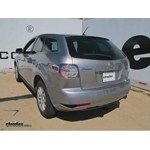
Today in our 2008 Mazda CX-7 we'll be having a look at the Curt class 3 receiver hitch part number 13953. Here's what our hitch looks like installed on the back of our Mazda CX-7. You can see there's a very minimal amount showing at all. The entire frame of the hitch is tucked up back underneath the bumper cover. The only thing hanging down is the actual 2 inch receiver itself. Now this class 3 hitch has a 350 pound max tongue weight rating and a 3,500 pound max trailer weight rating.
We have these nice loops here to hook our safety chains of our trailer up on to. They're real easy to get to. We have our standard 5/8s hitch pin hole here where you can insert your hitch pin or your locking hitch pin, whichever device you choose to use. Now for a couple measurements to help better assist you in choosing any hitch mounted accessories you may need. You're looking about 10 inches from the center of the hitch pin hole to the back of the rear bumper here. We're looking about 12 inches from the ground to the top of a 2 inch opening in the receiver itself.
Just keep those measurements in mind when you're looking for any hitch mounted accessories such as a ball mount, bike rack, or cargo carrier. To begin our installation we need to remove our exhaust hangers. There's 2 on either side of the muffler. Just spray some penetrating oil on them. Let it soak in there a little bit to help them slide off a little bit easier. Now we'll take a pry bar.
Wedge it up between the frame and the exhaust hanger, and we'll pry the hanger off. Push out the inaudible 00:01:43 hand, like so. Before we remove all of our exhaust hangers we'll take a strap here, put it around our tail pipe section, just to help support it so it doesn't droop too much. Now we can continue removing the rest of our hangers. There's 3 holes that our hitch will go into, but we need to enlarge our center hole here large enough for our spacer plates to fit in and we'll finish all 3 of our spacer plates on either side through the center hole.
Using our step drill bit make sure we have our gloves and our safety glasses on because this does throw some metal places. We enlarge it just enough on this side. We'll repeat the process on the other side. We'll take our fish wire here. Thread it through our front hole. Put a little bend on it so it's easier to grab. Pull out our fish wire, just like so. Put our spacer plate on. Push it up inside the frame rail, like so. Thread out one of our carriage bolts on. Our bolt threaded on, our spacer plate in the frame rail, we'll push the bolt on in, just pull it through our front hole, just like so. We'll take our feed wire off. Feed our wire through our back hole. Take another spacer plate. Insert it in the frame rail. Thread another carriage bolt on. Pull it through. Remove our fish wire again. Now the middle hole's slightly different. Take our basic plate. Already insert our bolt. Put our feed wire on. We'll do what we call a reverse pull. With that, feed the bolt in, then the spacer plate, and then pull the bolt on down, just like so. Remove our feed wire. Now we can repeat the process for the other side doing the exact same technique. We'll raise our hitch into position with our assistant, making sure we don't accidentally push our bolts into the frame, making sure we get all 3 of our bolts through the hole in the hitch. Now if all 6 of our bolts started. Now using our 3/4 inch sockets we'll tighten our 6 bolts up. Now we can torque our bolts to manufacturer specifications found in the instructions. With all of our bolts torqued to manufacturer specification, we can now raise our exhaust back into position, slide our hanger back on. Now with all 4 of our exhaust hangers reattached we can remove our support strap that we installed and our installation's complete. That completes our work at the Curt class 3 receiver hitch part number 13593 on our 2008 Mazda CX-7.
Customer Satisfaction Score:
97% were satisfied with this product
3% of customers were not satisfied
Ratings & Reviews


Info for this part was:
At etrailer we provide the best information available about the products we sell. We take the quality of our information seriously so that you can get the right part the first time. Let us know if anything is missing or if you have any questions.






















Dan L.
5/7/2018
Great but paint flaking off and rusting