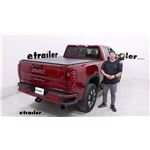
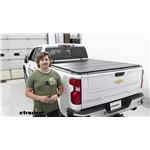
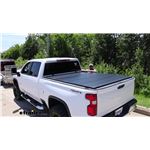
etrailer Hard Tonneau Cover - Folding - Fiberglass Reinforced Plastic - Matte Black
1994 Ford Mustang
Will this fit?
To see if this custom-fit item will work for you please tell us what vehicle you'll use it with.
- All Info
- Reviews (57)
- Q & A (0)
- Videos (5)
- Photos
etrailer Tonneau Cover - e45DR
- Fold-Up - Hard
- Not Rack Compatible
- Low Profile - Top of Bed Rails
- etrailer
- Hard Plastic and Fiberglass
- Matte
- Tailgate Lock
- Opens at Tailgate
When we decided to offer an etrailer hard, folding tonneau cover, we knew we wanted an affordable cover that would look great on your vehicle. It may not have all the flashy extras, but it's a quality cover that provides a lot of value.
Features:
- Custom-fit tonneau cover folds flat for 3/4 truck bed access
- Can be easily removed to haul bulky items that fill the bed
- Weather seals keep out water - no need for drain tubes
- Pinch levers let you easily open cover from either side of truck bed
- Cover shuts whether tailgate is open or closed
- Honeycomb-patterned internal structure makes cover strong and durable
- Easy, clamp-on installation inside truck bed rails
Specs:
- Height above bed rails: 1"
- Weight capacity: 200 lbs evenly distributed
- Construction: fiberglass-reinforced plastic
- Color: textured, matte black
- Limited lifetime warranty
A quality tonneau cover that respects your wallet


The first thing you should know about the etrailer tonneau cover is that it doesn't have Bluetooth, or any other unnecessary feature found on many of the other national brands' over-priced covers. When we decided to offer an etrailer hard, folding tonneau cover, we knew we wanted to keep it simple, to offer a quality cover that looks great on your vehicle and leaves money in your wallet. And because we aren't baking the cost of a national ad campaign into the price of our covers, we were able to do just that. The etrailer hard tonneau cover is a well-built, folding cover that will keep your gear dry, protect it from theft, and look great doing it. All this for less than some of the competition's soft, roll-up covers.
CT-027 etrailer Hard Truck Bed Cover - Folding - Fiberglass and Polymer
Installation DetailsThis Product Fits The Following Vehicles
- 2020 - 2026 GMC Sierra 2500 6-3/4 Foot Bed
- 2020 - 2026 GMC Sierra 3500 6-3/4 Foot Bed
- 2020 - 2026 Chevrolet Silverado 2500 6-3/4 Foot Bed
- 2020 - 2026 Chevrolet Silverado 3500 6-3/4 Foot Bed


Videos are provided as a guide only. Refer to manufacturer installation instructions and specs for complete information.
Video Transcript for Setting up the etrailer Hard Tonneau Cover on a 2024 GMC Sierra 2500
Hi everyone, Aidan here with etrailer. Today we're gonna be taking a look at and later be showing you how to install the etrailer quad fold hard tonneau cover on the back of our 2024 GMC Sierra 2500. Any hard cover is gonna be a great option for your Sierra, especially if you keep things in the bed like tools. Anything valuable that you don't want people getting to, it keeps it out of sight, out of mind. But compared to a soft cover, this is gonna be a lot harder to get into. Because with those soft covers, anyone with a knife can cut through that vinyl pretty easily.
Whereas, this is gonna be pretty thick. And it's gonna be plastic reinforced fiberglass. So it's pretty on par with most other hard covers. But the main draw here is that the material is quite thick and you're not gonna be able to cut through it. So it's gonna keep the stuff in your bed safe from prying eyes and really protected, especially when paired in conjunction with your locking tailgate.
And like the name suggests, this is a folding cover that will fold with four panels. You'll release those panels by pinching the release tabs underneath and folding the panel back. And just repeating that a couple more times until it's fully opened up. Something to be aware of with it is that the more you fold it, the heavier it gets. So by this third panel here, it is a bit heavy, especially considering that the Sierra 2500 is a taller truck.
And when it's fully opened like this, we can buckle it in to keep it held in place. Yes, it's a folding cover, but it doesn't fold fully upright. So about a quarter of your bed is always going to be at least somewhat occupied. You have space underneath, but if you wanted to take a big box and slide it as close to the cab as you could get it, this would be running in the way. You have the option to remove it if you need that full bed access.
But if that's something that you're not really interested in doing, then you might consider looking into a different style of cover. Whether it'd be a hard folding cover that does fold upright, it's gonna give you a lot more access to your truck bed, but it will block the back window. Or maybe you'll consider something like a hard roll-up, which still will stick out a little bit, but it's not gonna take up near as much space. A couple things to note about the fitment for our Sierra here is that our stake pockets are unobstructed. These rails are not very wide, so it leaves the bed rails pretty much unbothered. And if you have the MultiPro Tailgate present with the grab handle, that's gonna be totally unobstructed too. That rail isn't going to interfere with it. So that's a really big plus for me. The same can't be said for every cover out there. And for me, if I'm getting a tonneau cover, I want it to work with my truck and I don't wanna have to sacrifice features that I got from the factory. The installation is just gonna be a simple clamp-on installation, so no modifications to the bed are needed. You just get four of these clips that'll hold it onto the bed rails. And a few hand knobs, much like the ones you see right here will hold the cover to the rails. Should you ever need to remove the cover, the rails will stay installed and just be ready for you to drop the cover right back into place. So removal and readding it is a bit easier. And really this part with the clamps is pretty easy too. It's just part of the initial setup that you won't have to do beyond that first time. With your 2500, it's really possible that you have the factory prep package for towing and maybe you're keeping a fifth wheel back here. You wanna know height clearance in that case. And from the top of the bed corrugation to the lowest point on the tonneau cover, you've got 21 inches of clearance which is really good. This isn't the most low profile cover out there. I'll fully close it and we can see that it's sticks up from the bed rails about an inch. So some people really like that low profile look, but by not having that, you do gain a little bit of bed clearance. The other thing is this will work well with the MultiPro Tailgate like I mentioned with the handle earlier, but also if you wanted to have it partially opened. A lot of people like to drive around with their covers closed for the fuel economy benefits, but leave this small section open maybe for some two by fours that they're carrying around or a ladder when they need to carry it somewhere just for a little bit of transport, making it easier. But I know I mentioned earlier that the install is pretty straightforward and you're probably wondering what that looks like. So follow along and we'll show you how we got this installed on our Sierra today. To start the installation off, you wanna assemble your side rail which comes in two pieces. And you can find out which piece goes to which side of the vehicle just by looking on the end of those sections where there's a small sticker that will say left or right. Left will be our driver's side and that's the side we'll be showing you right now. Now to join the two pieces together, it's pretty straightforward. The other end will have this clip with two set screws. And then the larger section will have a square block where we can slide the two pieces together. You might have to loosen up the set screw if you find that it's binding. But just get that track aligned, it's pretty tricky. But once you get it sized up, that clip will go into the square slot. There we go. So that will click in and we can take the included Allen key from our kit to tighten down this set screw. And just double-check that the one pre-installed is fully tight as well. The side rail is gonna sit just on the lip of our bed rail like this, but we need to install some clamps first. So I'm just gonna briefly set it on top of the bed rail and take these halves of our clamps that have this T-shaped block at the top. It's gonna line up with some release and tracks on the inside. You're gonna have four of these in total. And just based on the vehicle, you're gonna have certain areas they fit better. Because we have this whole handle assembly in our way, I'm gonna move this outer clamp a bit inward where we have clearance. We wanna just space all four evenly apart as best you can. And generally have two kind of in the middle and then two on the outside edges. Now one thing I will do over here first is actually take another piece, this little L bracket facing up and slide that into the channel on the cab side first and follow it up by my last clamp. We're gonna get to that a little bit later in the install, but we're gonna want it pre-installed for right now. With those pre-installed, we're gonna set this rail down and push it forward towards the cab. Then we can take the other end of our clamp with the threaded hole in the back and these teeth. We want the teeth to bite on the upper inside edge of the bed rail. This part may be a little tricky, kind of going in blind, but you just wanna feel underneath the bed rail for any potential obstructions. And once you've got a place where you feel like it's gonna work out pretty well, just line the two halves of the clamp up together. Take your included hardware and feed it through into that threaded hole. Now an extra set of hands could be helpful here, but I find that the rail is pretty balanced so it's not too bad. And then you'll just wanna go back through with the included Allen key and tighten these down enough to just hold the rail upright so you can repeat this process three more times. Once all the clamps are loosely in, I'm gonna go back and fully tighten them down. When I do that though, I'm just gonna provide a little bit of downward pressure and push out so that it sits really flush with our truck bed rails. And I'll just repeat that for all the clamps. And once I do, the last thing we need is just this small hand knob. That's gonna go thread from underneath the clamps and apply a bit of upward pressure to the inside edge of that clamp that's biting behind our bed rail. And this we don't need to tighten down super tight, just enough to apply some pressure to keep it from turning. Once both rails are in place though, grab yourself a friend. Matt's gonna help me lift this cover up into place. And we're just gonna get this over the edge to the front of the truck and just loosely set it down for now. We can make further adjustments later. Matt, thank you so much for your help. The first thing I'll do here is just lift the cover up and get the weather seal pulled out, starting from the middle and just working my way to the edges here. This is much easier to do on your own once the cover's already in place. We want that to lay over the bulkhead. And it's pretty long so it'll go down in between the cab as well. We just don't want it to be folded over 'cause we're not gonna get very good weather protection that way. Head underneath the cover where we can pop down this stud. It's just gonna be located on the rear end really close to the cab of the truck. And we want it to be right next to the plate on the front edge of our tonneau cover rail. Not the one we installed ourselves, but the one that was pre-installed. Your kit's gonna come with these two spacer blocks, one for each side that will slide onto that stud. And what we need to do is push it up and pass that all through the plate, trying our best to keep it lined up straight so it doesn't pass through at an awkward angle. Your extra set of hands could be really helpful here, but it's certainly doable on your own. Just watch out for the weather strip that it doesn't become folded back under again because of how much you have to lift up. Once both are in though, you can come back through with your hardware. It's gonna be this hand knob first that we run all the way up to the plate. And I'm gonna leave this somewhat loose for now. My general rule is tight enough so that it doesn't move on its own but loose enough that I can move it by hand if I need to make an adjustment later. And we'll come back through and fully tighten it later. But after that hand knob, we're just gonna get a wingnut. This one won't spin up as quickly, so you'll have to run it down just by hand most of the way. And we'll finish off with a little end cap so those threads aren't exposed. At this point I'm gonna test for fitment. Just being very careful to not shift the cover around too much because our hardware isn't fully installed and we don't even have all of our hardware installed yet. But I'm just looking for those latches to smoothly secure around the rails. And once it's all folded out, I'll make sure everything's straight and we don't have any crooked edges. And while we do that, we can always pull out the packaging material that's still remaining there. But this end one is really what I'm looking for. I want those latches to engage smoothly on each end. Over here is a bit of a funky fit, so I might just need to skew it to one side a little bit. I'll still check my tailgate clearance though. And yeah, this corner here is just a bit of a problem for us. It's a bit loose so it's not grabbing on. I'll just need to move that back corner over to the edge a bit more. So after you make your adjustments and you're happy with the fitment, we can go back through install the rest of the hardware and fully tighten everything down. That last piece of hardware I alluded to is that plate we installed in the very first step. And that's just gonna get slid right in line with this bump-out right here on our tonneau cover's front panel. Once you've got it lined up, you can take your smallest Allen key from your kit and tighten up a set screw that's really tucked back in here. Now this one will take a couple of turns. I've tightened mine most of the way off camera here so I can just get the final bit after I've moved it in place like that. And take your remaining hand knobs from our kit and thread it into the cover to hold it down firmly. This will of course get repeated on the other side and we'll go back to the hardware closest to the cab and fully tighten that down. We're gonna do one final fit check now that everything is tightened down fully. Just to make sure that nothing's shifted on us from our initial fit test. But as we fold this out, everything's feeling really good. And I definitely want to check for tailgate clearance since we did have a little bit of an issue there before. That corner does feel like it's catching a little bit, but tailgate clearance here is pretty good. I might just need to shift something a little bit. But once you're happy with the fitment, it's really not too bad. Really the hardest thing is just getting things lined up and making sure that the cover is straight. And while it might take a bit of back and forth, it's not necessarily a difficult task. Overall though, it's a pretty solid install and I think the etrailer hard folding tonneau cover is gonna be a really solid fit on the back of your 2024 GMC Sierra 2500. My name's Aidan and thanks for watching.
Customer Satisfaction Score:
96% were satisfied with this product
4% of customers were not satisfied
- Arrived Damaged
Ratings & Reviews
4.6
56 reviews

It took about 1 Hour to put on looks good great
Just installed it in less than an hour. Love the fit!
Excellent company and product!
The cover leaks water in the folds. I may return it if I can’t fix it
Simply assembling. Even though there are gaps in the front, it is to be highly recommended.
The cover could use a couple more latches at the folds to help it lay flatter.
Love the way it looks and it was super easy to install.
Great customer service and the products (truck bed liner and cover) fit perfectly.
The cover was delivered in just a couple of days. The instructions were clear with the exception of what the piece of rubber seal and the roll of seal was to be used for. The cover looks good and works as described. I had my truck in a hard rain and the bed was 99.9% dry. Nice so far. Time will tell though.

This cover has held up well and served me well for the last year. I highly recommend it.
A bit of a funky method of attachment and very definitely not waterproof. Looks great and will get the basic job done.

It fit perfect! Simple to install, just what I was looking for. I get lots of compliments!
Great buy for the money, the directions were good, I also viewed the online video, looks great, I expect it to last for years. The one thing I would change is the front flap should be an inch wider on each side, but with the supplied butyl tape, its fully sealed
See what our Experts say about this etrailer Tonneau Cover
- Recommended Folding Tonneau Cover for a 2024 Chevrolet Silverado 2500 Pulling a 5th Wheel TrailerHard to say for sure given the differences in 5th wheel noses but that's a pretty safe assumption you're going to run into clearance issues with a folding tonneau cover like item # e45DR. A better folding cover option would be the BAKFlip G2 Hard Tonneau Cover item # BAK226133. This one folds all the way up and sits vertical at the end of the bed. This cover has been confirmed to fit a 2024 Chevrolet Silverado 2500 with a 6-3/4' bed.
view full answer... - Availability of etrailer Quad Fold Tonneau Cover for 2016 Chevy Silverado 3500Hi Bob; at this time we do not offer the etrailer Quad Fold Tonneau Cover for a 2016. We may come out with one in the future, but I don't have an ETA on when that might be since these are relatively new and a lot goes into adding additional fitment. The # e45DR only fits the 2020-2025 GM 2500/3500 with a 6-3/4' bed. Unfortunately, we don't have a low cost alternative for the 2016 either. The best I can offer right now for your Silverado 3500 is a tonneau cover like the BAKFlip MX4 # BAK48121.
view full answer...
Do you have a question about this Tonneau Cover?
Info for this part was:


At etrailer we provide the best information available about the products we sell. We take the quality of our information seriously so that you can get the right part the first time. Let us know if anything is missing or if you have any questions.


Thank you! Your comment has been submitted successfully. You should be able to view your question/comment here within a few days.
Error submitting comment. Please try again momentarily.