
 Product Experts Available Now!
Call 1-800-940-8924


To see if this custom-fit item will work for you please tell us what vehicle you'll use it with.


Thank you! Your comment has been submitted successfully. You should be able to view your question/comment here within a few days.
Error submitting comment. Please try again momentarily.


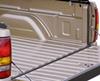
When you need your whole bed for hauling big loads, the LiteRider rolls up in seconds and stores neatly behind the cab with Quick Clip straps. The aluminum bows and Velcro side seals make it easy to open and close while keeping the cover tight and secure when it’s down. Because it mounts inside the bed rails, you still have space for stake pocket and rail accessories like racks or tie-down anchors.

Rain, snow, and harsh sunlight don’t stand a chance against the double-coated, reinforced vinyl. It’s UV-blocking so it won’t fade, and it stays flexible even down to -40°F. A reinforced flap runs along the tailgate to keep out dirt, rain, and ice, so whatever you’re carrying stays covered and cleaner.
Closing the cover automatically engages the AutoLatch, and a simple pull-cord releases it with one hand when you’re ready to open up again. A slide lock on the opposite side adds an extra layer of security. With the tailgate locked, your bed stays secure without extra hassle.


The cover sits 1-1/2" above the bed with a contoured Slantback edge that angles toward the tailgate. That shape not only gives your truck a streamlined look but also helps reduce wind drag, improving gas mileage by up to 10 percent.
Fine-tuning the fit is simple with the EZ-Dials—just twist to tighten or loosen the tension, no tools needed. The contoured black powder-coated aluminum rails resist rust and clamp securely inside the bed with Tight Bite clamps that grip flush and tight. It all comes together for a sturdy fit that stays looking good over time.


Videos are provided as a guide only. Refer to manufacturer installation instructions and specs for complete information.
Today on this 2011 Ford ranger, we'll be installing the axis light rider tonneau cover part number 834532000890. You can see I'm in the bed of the ranger here and the first thing we need to do is clamp our drivers side rail into place. If you look at the rail you can see there's a flat edge that the tonneau will rest on. On the other side we have the hook and loop fasteners that will secure the tonneau and the next edge will have the weather striping on it. This side will be sitting plush against the inside of the truck bed. We'll go ahead and set it in place now.
The end with the hole in it will be facing the front of the vehicle. Slide it all the way forward until it butts up the side of the bed. We'll be using spring clamps to hold it in place while we get the rail lined up properly. With the clamps in place, we're going to close our tailgate ensuring that the edge here is aligned plush with the tailgate. With that checked we go back to the front and install the first clamp.
You can see on the clamp that it has teeth on both sides, one going behind the frame rail and the other is going to be sitting in these grooves here. We want the front clamp to go as far front as possible, then we'll tighten it down. With the first one in place, we're just going to move onto the middle one, installing it the same way. We'll finish up with the third clamp towards the rear. With all clamps in place, we'll do one last check to make sure the rail isn't bowing up or down and with that ensured we'll repeat the same process for the passenger side.
Next we'll assemble the tension adjusters to the tonneau cover at the front header portion. Put that over and you'll see this track here with two nuts in it, this is where the adjusters will connect. If you look at the adjuster here, you'll see an L which indicates that its for the left or drivers side. If you look at the bottom you'll see a groove here that will fit into the track for the connection point. So start by press fitting it into place or test them by using 1 and 1/4 inch bolt and flat washers, only hand tight for the time being until our final adjustments are made and then we'll tighten everything down.
With an extra set of hands, we'll put the cover into place, lining the hole we mentioned earlier on the rail with the adjuster. We will slide the adjuster into place grabbing the side rail. Next well align the other end of the adjuster with a hole in the rail and attach it using a provided bolt and nut then tighten them down. We'll repeat this for the other side. From there we'll want to check our header and make sure it's centered then tighten it down. Now we can unfold our cover, when you get to the rear here, it will latch into these hooks. These are friction mounted so we'll rotate that over and push down. That will complete our install of part number 834532000890 on our 2011 Ford ranger.
Ratings & Reviews


Tyler M.
12/8/2020
Hi Lee, Thank you for your comment. The owners manual for the cover says that if the latch system doesnt engage, then the first step is to check the side rails for height and level, referring back to a step in the initial setup process, as well as inspecting the latches for jammed or broken parts.

Brooke M.
3/1/2025
Thats great to hear! What will you be towing or carrying with the new addition?
Mike Q.

12/21/2020
Cover is showing wear from being rolled up to tow 5th wheel. Even with it strapped tight. Hoping it doesnt wear through

Jenny N.
3/7/2022
You mentioned that the tab on the cover had rubbed the paint off on your truck. I wanted to see if would be able to send a picture?
Glenn
3/7/2022
I will take one and send it to you as soon as I get a chance
Info for this part was:
At etrailer we provide the best information available about the products we sell. We take the quality of our information seriously so that you can get the right part the first time. Let us know if anything is missing or if you have any questions.

















William
12/13/2024
Have had the cover for 2 years and it is still in great shape and it looks like new. Definitely worth the price!!