


To see if this custom-fit item will work for you please tell us what vehicle you'll use it with.


Thank you! Your comment has been submitted successfully. You should be able to view your question/comment here within a few days.
Error submitting comment. Please try again momentarily.


Rain, snow, or dust—none of it gets through easily with this cover sealed tight across your bed. The Revolver X4s uses 1/4" thick, rustproof aluminum slats wrapped in a textured matte black vinyl skin to keep your gear safe and dry. Those slats add real strength and can hold up to 400 lbs of evenly distributed weight when closed. The vinyl layer blocks UV damage and keeps a clean look while the integrated seals keep out water without needing drain tubes.


You don’t have to take this cover off when you need your full bed. It rolls up in seconds by hand and secures behind the cab with nylon straps and sturdy buckles. The aluminum slats hinge smoothly so the cover rolls up evenly every time. Because it mounts inside the bed rails, you keep access to your stake pockets and tie-downs for other gear or accessories.


Opening and closing the X4s is easy. Drop the tailgate and pull a release cord from either side to roll it up. When you shut it, just press down on the rear slat—no snaps or Velcro to mess with. The latches lock automatically along the rails, and when the tailgate is locked, the cover is too. The integrated rail teeth hold the cover down from front to back, so it stays tight and secure while you drive.


Some covers sit high above the rails and look bulky. The Revolver X4s sits nearly flush for an ultra-low profile that blends right in. The matte finish and even roll keep it looking smooth all the way across. Felt strips protect the vinyl as it rolls up, and rubber seals along the cab rail and tailgate keep water and dust from creeping in.

Getting this cover on is simple. The clamp-on side rails bolt inside the bed with a wrench—no holes to drill. Slotted brackets and pre-installed shims help line everything up so the fit is snug and square the first time. Once it’s tightened down, the cover rolls smoothly and seals cleanly from edge to edge every time you close it.


Videos are provided as a guide only. Refer to manufacturer installation instructions and specs for complete information.
Hi, everyone, Bruce here at etrailer. Today we're gonna take a look at and install our Bak Revolver X4s hard tonneau cover on our 2024 GMC Canyon. This tonneau cover would be a great choice to keep your gear nice and dry and secure. Nice thing about this cover, it acts like a hard cover, but it's like a soft cover. If we go ahead and open it up, we see our latches here, we pull down here and here. Flips up, and our cover goes ahead and we can roll it up just like a soft cover.
And we do have straps to tie that down. Straps come over the top and hook behind it. Now, with your tonneau cover rolled up, something I wanna mention is you still have visibility outta your rear window. Now, you're not necessarily gonna see the actual tailgate like you normally do in your rear-view mirror, but you still can see out the rear-view mirror. Another great feature about this cover is you can close this with the tailgate up or down.
(cover clacking) If I go ahead and close the tailgate, we can still shut our cover, just latches down just like that. Now, this is constructed of aluminum and vinyl, and we have a nice textured finish on the top of it. And you can put 400 pounds on top of this tonneau cover, evenly distributed. This cover is a no-drill installation, which makes it very simple to do. But if you don't wanna tackle that, check out our dealer locator on etrailer.com.
For you DIYers, stick around, I'll show you how it's installed. Before you start the install, go ahead and lay out all your parts and pieces, and make sure you've got everything in your kit. And we've got everything here we need, so let's get started. If you notice on our truck, we do not have a drop-in bedliner, we've got a spray-in bedliner. So in the kit you'll have a 1/4-inch seal for your bulkhead if you do have a drop-in bedliner.
Again, ours does not. So we are gonna use a 3/4-inch-thick seal and we're gonna go across the bulkhead. Before we do that, we do need to clean it with some alcohol, and get it nice and clean. Once we do have the top of the bulkhead cleaned with alcohol, we need to go ahead and take our weather strip, and we're gonna peel this back a little bit. And we need to go right to the edge of the bulkhead, just where it starts getting rounded right here. We just go a little bit at a time. The thing is, you don't wanna stretch this either because it'll pull back on you. So try not to stretch it, just kinda laid it on here. And once we get it all lined up, we'll come back and make sure it's nice and tight to the bulkhead. All right, we're at the end, we're gonna go ahead and cut this to length. And then go ahead and push that down and make sure we got a good connection to the bulkhead with the sticky tape. Now that we do have our bulkhead seal in place, it's time to take one of our rails. And we are starting on the passenger's side, you're going to do the same thing that we're doing on this side on the opposite side. So we're gonna take this and we're gonna run it all the way up against the bulkhead here, like that. So this piece right here, it's gonna be flush with the bulkhead. This is the piece that needs to go ahead and slide all the way up flush against the bulkhead, just like that. Now we're gonna go ahead and take one of our clamps and we're gonna go ahead and mount it here. The closest place to the rear, you need to be less than 12 inches to the front of this. And we can put a clamp right here. And we're just gonna hand-tighten that for now. If you notice on the clamp, make sure the teeth are in its grooves right here. And you can see that there. And we're just gonna snug that down with a 9/16-inch wrench, just hand-tight. We'll come back with a torque wrench and tighten 'em down later. You're gonna have three clamps per side, and this one's gonna go in the center. Again, keep in mind, those teeth need to go into those grooves. And we do need to push down on the actual rail before we tighten it all the way up. That's just gonna seal the seals in there. And the last clamp needs to be less than 12 inches from your tailgate. And we're able to go right here, which is about eight inches. And again, just make sure your teeth are in there. Now that we've got our passenger's side rail mounted, we're just gonna repeat that process on the driver's side. Once you do have both of your rails installed, you can throw this up on top and just roll it out for now. We're gonna go ahead and remove this packaging first. Once you do have all the packaging material off of here, we're gonna go ahead and roll this back up so we can get access to our bolt pieces we need to bolt down. Once you do roll this back up, it's gonna be sitting like this. You're gonna take the front part here, roll it back over. And we're gonna take two supplied bolts. One's gonna go in this track and one is gonna go in this one. You're gonna do the same thing on the other side. Now, these bolts that we just put in do need to go into these slots here. And you're gonna have one of these plates on either side, we're working on the passenger's, or the driver's side right now. You'll do the same thing on the other side. We just need to make sure we get those in that bracket. Now, you may need to get underneath here to go ahead and line these bolts up with the slots, like we did here. Now, once we go back up underneath there, on those two bolts, you're gonna put the rubber washer first, then the metal washer, and then you're gonna have your knob that's gonna tighten that up. Going back underneath towards the front of the bed, you'll see our bolts sticking out. Again, you're gonna wanna use the rubber washer first, then the metal washer. And we're gonna put our knob on. Again, you will do the same thing on the other side. Now, if we take a look at our bed cover here, we do need to make sure our alignment with the rail is even. So we're looking at the actual bed rail right, or the bed cover right here, to the bed rail. If we look at that, that needs to be even, not this piece, these two pieces here. So once you do have the front of those lined up, the actual bed cover lined up with the bed rails, we can go ahead and open this up, make sure everything works smoothly, and there are a couple things we need to look at. Right here on this edge too, this edge here, we do need approximately 1/8 of an inch, which we do have. So we do not require any extra shims. Once we do have our alignment where we need it, we can go ahead and tighten up our knobs underneath. Just get 'em snug, hand-tight. You don't need to go crazy. On both sides. And we're good to go. Now we're gonna go ahead and unroll this again and roll it back up just to make sure everything's working smooth. And if we come up here to these pieces, that's where our locks go for our bed cover. Just need to make sure those set in there perfectly. (cover clacking) And go ahead and latch it down. We can close the tailgate. (tailgate shunting) Good solid connection on the tailgate. Good seal on the back. (cover clacking) Now we've got these D-shaped foam pieces that we're gonna go ahead and lay up under here, just in case this does roll forward, it's not gonna contact our window. But we do need to take those off and clean underneath before we stick 'em on. Get some alcohol. (rag rubbing) And again, we're just gonna do the same thing to the other side. Now it's time for our clamp that has the actual strap on it that holds our cover when we got it rolled up. We're gonna place that one right next to the other one that we placed, and tighten it up. (wrench clacking) Now we need to take our clamp that has the strap on it, and we're gonna go ahead and lay it next to the very first clamp on the front. Just put that right next to it. Go ahead and tighten it up. We're just gonna snug it 'cause we're gonna come back by with a torque wrench and torque these down to the manufacturer specifications. Now we're gonna go ahead and take our torque wrench and torque all of our clamps down to the manufacturer specifications. Now, you don't necessarily need to do this, but it will keep you from over-tightening or under-tightening those clamps. And if you don't have a torque wrench, we do have them here at etrailer or you can rent one from your local auto parts store. (torque wrench beeping) Now that we do have all of our brackets torqued down, we take the one with the strap, once we've got our tonneau cover rolled up. This is what's gonna secure our tonneau cover if we wanna drive with it open. The little T's gonna go in its slot just like this. And give it a twist, and then you tighten it down. Again, you'll just do the same thing to the other side. Once we've got everything set and everything's completed, if you do notice, we've got on our rubber stripping here, how it's up a little bit. Now, the sun will take care of most of that, but there is another nice trick. You can take a hairdryer or a heat gun. (heat gun whirring) Just don't get it too hot. And you can go ahead and heat this up a little bit, and it will actually get rid of those wrinkles, just like that. This does complete our installation of our Bak Revolver X4s hard tonneau cover on our 2024 GMC Canyon. I'm Bruce, thanks for watching.
Ratings & Reviews




Lazer S.
2/24/2026
Glad to hear you are still happy with it, Todd! These hard roll up covers are definitely nice and durable. What are you keeping in your bed? I have a bunch of survival type gear in a milk crate. Can never be too prepared!
Brian P.

6/14/2023
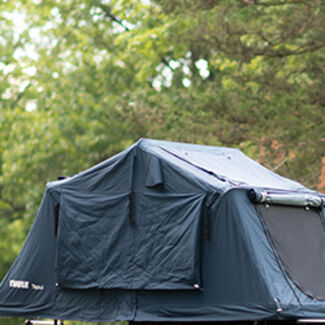
The cover has been on my truck for a little over a year now. It looks exactly as it did the day I installed it. By far the best tonneau cover I have ever put on one of my trucks. Also, the roll up is much more convenient than the older tri-fold models I have had before. This thing looks good and is tough as nails. It has not been babied over the last year, but shows no signs of weartear. My one year review is 5 STARS!! I highly recommend this cover!
Tim
8/24/2023
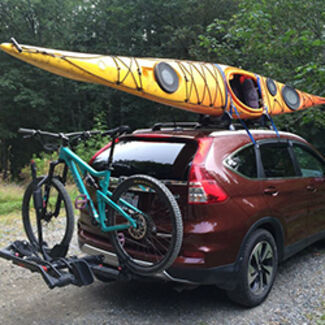
My previous review still stands. I have to reposition cover at least once a month. Still love the cover other than that issue. I believe a redesign of the connector would be in order for this product to get 5 stars.
Tim
9/7/2025
Not great anymore… the glued on waterproof liner started peeling up about 1 year into service, the the pivot points on the tool up part started to separate towards the back and now it doesn’t roll back flat or seal properly.

Roger
9/21/2023
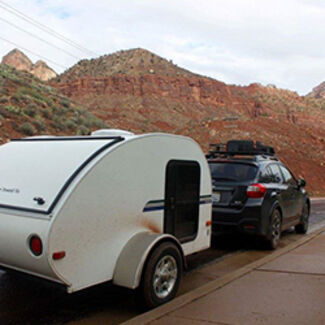
I had a second warranty claim in June 2023 due to the same issues. I contacted BAK warranty claims and once again they were quick to respond. I asked them to replace my cover with a BAKFLIP MX4. They agreed and shipped the replacement very quickly. So far the new cover is working fine. Im interested to see how it works in cold and freezing conditions. My personal belief is the BAK Revolver is too heavy when rolled up against the cab on an 8 foot bed. The weight causes it to flex, stressing the hinged ribs. The ribs then start to separate. Im guessing a cover for a shorter bed would not cause the ribs to separate due to less weight when rolled up.
Jerry
9/20/2025
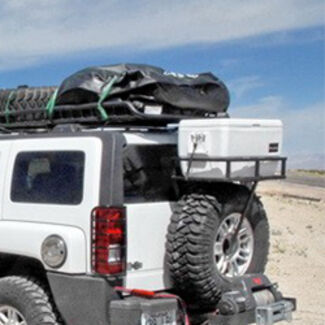
One year later and still doing well. I highly recommend them & would purchase again.

Katrina B.
2/7/2023
Holy wind strength! Luckily this has a 5 year warranty. I will send you more detailed information about contacting BAK in an email.
Katrina B.
2/23/2023
Holy wind strength! Luckily this has a 5 year warranty. I will send you more detailed information about contacting BAK in an email.
Steven
1/18/2024
The Tonneau Cover has been working Great no leaks. I really think this product works as advertised. I would and have recommended this product to other people.
Tim B.
8/25/2023
Two years in and still very pleased. I get compliments frequently for the tidy appearance and minimal bed capacity impact. One more gotcha I should note: when below freezing, it’s rigid and can be difficult to roll away. Generally a minor issue for me in the mid-Atlantic mid morning sun warms it enough that it’s OK. However, having spent time in NY last winter there were times I simply couldn’t roll it away without concern about damage. If you’re in a more northerly climate, be aware.
Jonathan
1/21/2025
After one year of owning and using this thing is still amazing. It may have faded just a little bit but looks great and is holding up extremely well.

David
6/11/2025
I have bought two of these toppers. I like the ability to throw stuff on top while I open the tail gate and not worry about damaging it. It doesnt take up room in the bed when it is rolled up. It is secured with two straps and never contacts the cab. It doesnt like being rolled up for extended travel. The tabs along the side that fit into the rails come out and prevent the topper from fitting flush into the rails.
Info for this part was:
At etrailer we provide the best information available about the products we sell. We take the quality of our information seriously so that you can get the right part the first time. Let us know if anything is missing or if you have any questions.


















Brooke M.
7/25/2025
Lauren is great! So glad she was able to help you with this. The cover looks right at home on your new truck! Thanks for sharing the pics :)