
Curt T-Connector Vehicle Wiring Harness with 4-Pole Flat Trailer Connector


To see if this custom-fit item will work for you please tell us what vehicle you'll use it with.


Thank you! Your comment has been submitted successfully. You should be able to view your question/comment here within a few days.
Error submitting comment. Please try again momentarily.


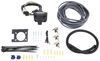
Wiring up a trailer doesn’t have to mean cutting into the vehicle’s wiring. This Curt T-Connector harness uses factory-style plugs that connect directly to the existing tail light wiring. It’s a clean, plug-and-play setup that keeps you out of the factory loom and gets your trailer lights working fast.
Some trailers can overload the vehicle’s lighting circuits, but this harness avoids that with its integrated powered converter. It draws power directly from the battery instead of the tail light system, keeping the vehicle electronics protected while giving steady current to the trailer lights every time you tow.
At the back end, the harness provides a standard 4-flat connector that runs brake lights, turn signals, and running lights on your trailer. It’s the common connection used on most small to mid-size trailers, so you can plug in and go without extra adapters or wiring changes.
Once installed, the harness sits neatly behind trim panels and routes through existing grommets for a hidden look and solid connection. The factory-style plugs lock in tight so they won’t shake loose, even when towing over rough roads.
This will not affect how the tail lights on your vehicle operate.

Videos are provided as a guide only. Refer to manufacturer installation instructions and specs for complete information.
Hey guys, this is Jake here with etrailer. Today, we have a 2015 Chevrolet City Express and we're gonna be taking a look at and I'm gonna show you how to install the CURT four-pole wiring kit on it. Now the main reason why you want to put four-pole wiring on your vehicle is so that you can send the proper signals to your trailer to let others know your intentions are when you're pulling a trailer. The functions that are gonna come on a four pole are gonna be your ground, your running lights, your brake lights, and both of your turn signals. The kit is going to come with a control module that'll go on the inside so you'll never see it. That is going to help protect the trailer from sending feedback to your vehicle and causing any harm to the vehicle.
The whole system is also going to be fused so if anything we're to go wrong with the towed vehicle itself, it'll blow that fuse rather than frying any of your wiring. The kit is going to connect directly to the back of your taillights so you won't have to cut into any factory wiring. So if you have a lease vehicle or you just don't want to cut into factory wiring, this is gonna be a great kit. Now if you have a lot of trailers that you'd like to tow that have a seven pole on 'em, we do have a kit available that you can install with this kit. It'll connect directly into it and then that will have your four-pole functions taken care of.
And then you'll just have to connect all your braking functions to the cab of vehicle and then you'll be able to run a trailer with brakes on it. The installation for this wiring kit is not gonna be too bad. It might take you a couple hours at home so I would at least set aside an afternoon to get it done. The installation that we're doing today is on a work model so it's gonna be very, very simple because there's nothing inside of the vehicle. We just have to lift up a mat in order to run some of our wiring.
And then the other main wire which is the most difficult part of the installation is running a power wire up to our battery. But we've got this video to show you how to do it. So let's go ahead and get into it. To begin our installation, we're gonna be starting in the rear of our van. We'll need to start by removing these fasteners.
There's going to be seven of them across the back here. Actually, there's only six. We'll take a screwdriver. These don't have a center like a normal push-on fastener does. They just pop out. We'll take a screwdriver and pop all those out. Then we can take this panel and pull it up and set it to the side. On both sides, we'll have these black grates that we need to take out so it slides up. So we'll just need to do the same to the driver's side. And now we have our wiring harness, we're gonna need to disconnect this plug here. There's a tab on the backside, you push it down and pull back. It's very tight quarters Might help if we pop this off of here so we can get back there. Here we go. So we'll take this, plug our connector in. You'll see there will be two tabs here and two prongs on the inside. That's shows up. We'll take this and connect it to the factory harness. And then next we're going to be routing our green wire over to the passenger side. Now because this is a work model, we're just going to, per the instructions, route it out of our opening here 'cause this panel is gonna cover most of it. And then we'll lift up this mat, run our wire under here, staying away from all of these clips, and then run it up into our passenger side. So we ran our wiring underneath this mat. You can see it here. We are gonna have a little bit extra space here about a foot. That's what we're gonna need to pull back over there to be able to attach our control box to the side panel inside. But I left it nice and long so that we can make this connection a lot easier. So we'll just pop that tab, pull it out, make that same connection we made on the driver's side, then plug this back in. Okay, now we can pull this slack out. You just wanna be sure don't pull it too hard. That cord will straighten out underneath the mat. There we go. So you can see we've got a little bit of slack here. And then all we're gonna do is we're going to notch out this panel whenever we get it back in place. Well let's notch it out for our wiring at the bottom. In order to get your control box mounted up inside your wheel well bay there, you can use a sticky pad that comes in your kit. Sometimes they will not hold as well. So what we'd like to do is we're gonna use a zip tie to tie this off. Actually, now that I say that, I might wait to do the zip tie. We're gonna do the ground first. Next we're gonna have our ground wire that will come with a ring terminal on it. You'll get a self tapper in your kit and we're going to take that and drive it into our sidewall here. We checked on the outside, there's a plastic panel that gives us about an inch of space and that should be all we need. We will pop this grommet out to give us access to the wheel well We do have some factory wiring already running through the wheel well. There's gonna be a small protecting box on the other side. And that's how we're gonna get our power wire and our four pole down to our hitch. That will take our long power wire and connect it to the black power wire on our control box. And this butt connector will come in your kit. And since it's gonna be inside, we can use this. If it we're outside, we'd wanna use a heat shrink butt connector, but we'll take this line and feed it through a slit that we just cut in this grommet and then we'll pull the remainder through, run it with the factory wiring in the wheel well and pull it out underneath. We're also gonna take our four pole and do the same thing. Just making sure none of your wires are tangled up here. And we'll take our four pole and we'll push it through the grommet. With our wiring run through our grommet, we can now secure our control box to the existing wiring in here. You can use the adhesive pad, but sometimes from the manufacturers, they're not super sticky so it may not hold on for very long. Tighten this up and chuck all this wiring back here and cut our zip tie off. And we can put our covers back on and then start running our wiring. Now what we're gonna do is we're gonna go ahead and run the wiring, then we'll come back and show you how we did it. The way we ran our wiring is we started by following our existing wiring coming out of our wheel well, took this plastic cover off, put the wires behind it, and then pulled out this panel. Our screw was missing from here but we tucked our wires back in this groove and then came along here, zip tied to existing wiring, continued on with our four pole, it's just loosely sitting here 'cause we're eventually gonna be putting a seven pole on and a bracket. And then we took our power wire, followed our hitch up zip tied it a couple times, zip tied it to brackets and existing lines all the way up to the front of the vehicle. Went over top of our heat shield here, tying it off to existing wiring, and then we ran a airline tube down through this cavity. The nice part about this vehicle is that the engine bay is really wide open. So we ran an airline tube down through here and then pulled it up into the engine bay, which is where we're gonna go now and make some connections. Up here in the engine bay, we recommend using a heat shrink butt connector to make this connection because it's up under the hood. But we'll take our power wire, connect it to our inline fuse holder, which we already put our ring terminal on, crimp this down and then heat it up so that it's protected from the elements. Next to our ring terminal, be sure that your fuse is not in your fuse holder. And then reinstall the nut. And then there must have been an accessory installed here before because there's already a slight tear in the boot. Then we'll put that back on and we can install our fuse. The reason you don't wanna put the fuse in first is because if you just barely tap that positive post with the fuse installed, it could think there was a short or something and it might pop the fuse and you may not have another fuse at home. Now with that all in place, we can tuck this wiring out of the way and test it out. Now we can test out our wiring. We'll run through the basic signals, our brake lights, our left turn, right turn, and our running lights. Now that we know everything's working properly, all we have to do is get any loose panel we have left back in place and that's gonna do it for installation. Well guys, hopefully this video helped you to decide whether or not the CURT four-pole wiring kit is right for you in your 2015 Chevrolet City Express.
Customer Satisfaction Score:
97% were satisfied with this product
3% of customers were not satisfied
Ratings & Reviews


Stephen M.

12/12/2019
Very well. Just like day one!
Info for this part was:
At etrailer we provide the best information available about the products we sell. We take the quality of our information seriously so that you can get the right part the first time. Let us know if anything is missing or if you have any questions.
























Richard
6/14/2023
It has worked out well. I would buy it again. The pigtail inside has kept the trailer light connector clean.