

 Arrives before Christmas
 To see if this custom-fit item will work for you please tell us what vehicle you'll use it with.
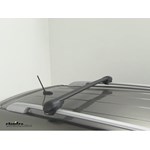
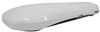
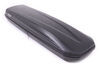
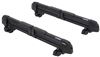
Low-profile, aerodynamic crossbar lets you build an aftermarket roof rack for your vehicle. Aluminum bar has a T-slot that lets you mount channel-mounted carriers and accessories. Rubber strip in T-slot keeps out dirt and won't need trimming.
Features:
Specs:
This low-profile Inno Aero crossbar lets you build a stylish, aerodynamic roof rack for your vehicle. The crossbar requires 2 Inno Flush or Through feet to mount the rack to your roof. You may also need a custom fit kit to mount the crossbar. A built-in T-slot in the top of the bar lets you easily mount carriers and accessories on the rack. A flexible rubber strip in the channel keeps out dirt and requires no trimming or adjustment. The crossbar is also constructed of strong yet lightweight aluminum so it won't rust.
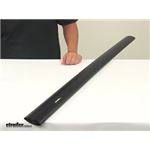
This lightweight bar has an elliptical shape. The aerodynamic, low-profile design helps to reduce wind noise and drag when you drive. This means you won't need to add a fairing.
The Inno Aero crossbar is constructed of sturdy, lightweight aluminum. An internal extrusion adds strength and structural rigidity without adding a significant amount of weight. The bar is rustproof so you can leave it on your roof all year long, wherever you go. The sand-blasted powder coat finish resists corrosion, scuffs, and scratches. And the matte black color will look good on any vehicle.
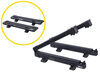
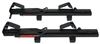
This crossbar has a channel in the bottom that lets you install Inno feet (sold separately). Slide the channel cover over to reveal a mounting hole for the foot. Clip the foot into the crossbar and then slide it into place along the channel. A built-in stop in the channel will keep the foot from sliding off the end of the bar.
To complete installation, mount the feet to your roof. This may require a custom fit kit (depending on your application). Attach the locking covers (included with the feet) to secure the roof rack to your vehicle. Locking the covers also secures T-slot-mounted accessories to your crossbar.
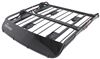
This bar has a built-in T-slot that allows you to mount bike racks, watersport carriers, ski racks, and more. The EZ-Slide rubber strip in the bar lets you mount accessories without the need to remove or trim the strip. Just press down on the ends of the flexible strip and slide your accessory's mounting hardware into the T-slot. This strip has a plastic coating so it's easy to slide T-bolts along the channel. The strip runs the full length of the bar, so it helps keep dirt out of the channel when you're not carrying accessories.
You can also attach most clamp-on accessories to the bar, and the rubber strip provides a no-slip cushion for any accessories that rest on it.
Videos are provided as a guide only. Refer to manufacturer installation instructions and specs for complete information.
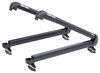
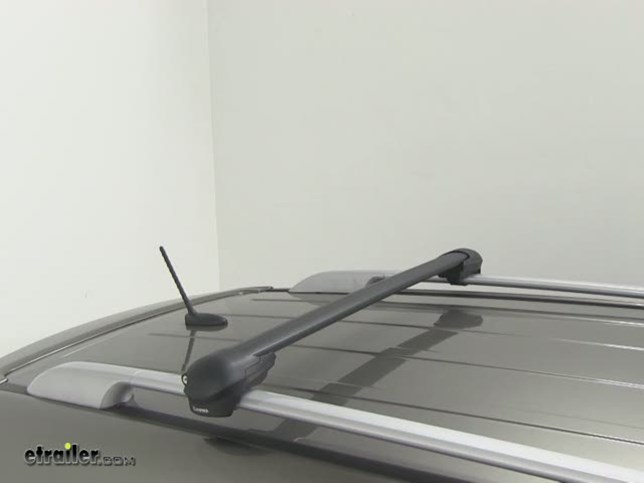
All right. Today on this 2011 Kia Sorento, we're going to show you an Inno Aero Bar in sand-brushed black color, part number INXB108. With this part number, you get 1 Aero Bar, like you see here, so if you need 2, you need to order 2 of same part number. It's actually shaped a little bit like a wing. This is a leading edge right here. It goes towards the front of the vehicle.
This end would go towards the back of the vehicle. You can also see a rubber strip inside here. This will help work with your accessories. You can cut this out to install your rooftop accessories that go inside the track. It also helps keep the air from whistling over the bars to go drive down the road. Overall, it's going to be about 3 inches acrossed front to rear and the length of this bar is for vehicles that can use a 42-inch length.
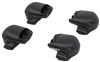
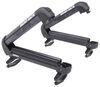
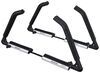
Now, base rails aren't going to attach themselves. To attach them to the raised rails like we have on our Kia here, we're going to use part number INXS100. These are the Inno Stays for the Raised Rails, and with this part number, you get a quantity of 4. Let's go ahead and install on our crossbar. Now, I already have the other side installed, but it's very easy. First off, you notice back on our crossbar here, there's a plastic insert and moves very easy.
What you want to do is make sure this plastic insert is pushed all the way towards the center. There's a little tab you want to push down here first and then slide it all the way back, and we'll just go ahead and put it into place. We line it up. It kind of fits into its own track, which is cool, makes it feel secure. Basically, you pull it out towards the end til it snaps.
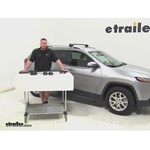
Okay, and yes, it is designed to have this amount of play so it fits a variety of different roof racks. Let's go ahead and put it into our car. Make sure the strap is easily accessible, that way we can route it underneath the factory roof rack on the other side. Let's just carefully place it over the top. Okay. Now, do the same thing with this side. Route our strap underneath the rail. Okay. I'll just go ahead and take our strap, put it into place, and just take up the slack for now because we still want to be able to move it back and forth. All right. Now, let's go ahead and do the same thing on the other side real fast. Now, once you have them both loosely installed, it's a good idea to go ahead and get a measurement from whatever rooftop accessory you're going to use with these guys and set the distance. Typically, when you set the distance, you want to go from center of one crossbar to center of the other. Once you're satisfied with the placement of rails, just simply go ahead and tighten them down finger tight. Then, make sure the handle points down. Let's go ahead and install our cover. Now, on our covers, there's a left and a right-hand side. If it simply doesn't go onto one side, then chances are you had it backwards. Now, these covers are locked into place, so you may have to unlock it to make sure it goes fully in place, and then lock it. Once you have it locked into place, you have a nice smooth finish on the end here, it matches the lines of the vehicle, and it's secured to the bar from inaudible 00:03:14. Okay. One side is done. Let's basically repeat the same process on the other side. In really just a few moments, we got our vehicle ready for your favorite rooftop accessory. That'll finish it for the Inno Aero Bar in 42 inch length in a sand-brushed black, part number INXSB108, and also our Inno Stays for Raised Rails, part number INXS100, on our 2011 Kia Sorento. .

Info for this part was:
At etrailer.com we provide the best information available about the products we sell. We take the quality of our information seriously so that you can get the right part the first time. Let us know if anything is missing or if you have any questions.


Thank you! Your comment has been submitted successfully. You should be able to view your question/comment here within a few days.
Error submitting comment. Please try again momentarily.