


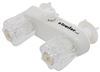
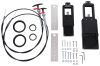
RV shower valve lets you attach a handheld shower set (sold separately) so you can wash up after a long day at the campsite. Vacuum breaker makes sure that your dirty shower water won't flow backward and contaminate your clean water supply.
Features:
Specs:
The vacuum breaker lets you attach a handheld shower set (sold separately) to make cleaning mud and sand off the kids, pets, and shower walls even easier. The vacuum breaker also has an anti-siphon device - a small air hole that drains water back out of the hose to prevent your dirty shower water from contaminating your clean water supply.
To install, use the inlet shanks to drop the new valve and deck plate in place of your existing valve. Then hand-tighten the included mounting nuts against the back of the wall, and connect the hot and cold water lines. You'll need to keep some tub and tile caulk (not included) on hand to help prevent any leaking.
California residents: click here
Videos are provided as a guide only. Refer to manufacturer installation instructions and specs for complete information.
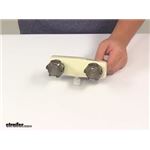
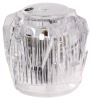
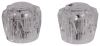
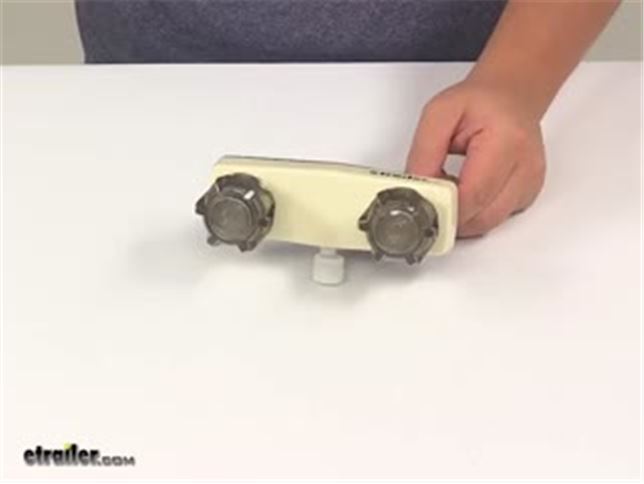
Today we're going to be taking a look at the Phoenix faucets four inch dual-handle RV shower valve. This unit adds or replaces a shower valve in your RV shower. It's going to feature the dual smoked acrylic knobs. It gives the unit a really nice look. Here on the bottom, it's going to have the vacuum breaker outlet for attaching the handheld shower. Your handheld shower is not included.
The unit is also designed to prevent water back flow, which is going to help prevent contamination of your fresh water supply. This is made from a durable plastic construction and the color name of that mounting base area or the base of the unit, color name is biscuit. The mounting area does require two holes for your installation. These are going to be the connection points for your hot and cold water lines. This area is going to give us a separation on the center of right on four inches. They're going to measure, take a length measurement of those, they're going to measure about two inches long.
They're going to have an outer diameter of thirteen-sixteenths of an inch, with an inner diameter of around a half inch. The shower hose connection right here, that's going to have an outer diameter of thirteen-sixteenths of an inch. Taking a look at some of the overall dimensions, right here in the center it's going to give us a height measurement of about two and one-eighth of an inch. That's just the base area. Measuring edge to edge, we're looking at a measurement of about six and one quarter. Then measuring from that mounting base, or the base of the unit, to the outermost point of the hand knobs, we're looking at pretty close to three inches. It's a pretty simple installation.
It's going to come with the mounting nuts on it and it's going to come with the backing plate. It's also going to come with your detailed installation instructions. Right here, it's going to walk you through that process. It's going to show you the size of diameter holes that you need to have at the mounting location. It's also going to give you the appropriate height, which on here says about 45 to 48 inches above the floor line.
Then it just walks you through how to connect your water lines, and it's just going to go ove rsome helpful cleaning tips. You've got operating instructions, goes over the handles, cleaning tips, and just some helpful hints. That's going to do it for today's look at the Phoenix faucets four inch dual-handle RV shower valve.


Do you have a question about this RV Showers and Tub?
Condition: Like New
Notes: May have damaged packaging or minor cosmetic blemishes.
Info for this part was:
At etrailer we provide the best information available about the products we sell. We take the quality of our information seriously so that you can get the right part the first time. Let us know if anything is missing or if you have any questions.


Thank you! Your comment has been submitted successfully. You should be able to view your question/comment here within a few days.
Error submitting comment. Please try again momentarily.