


Thank you! Your comment has been submitted successfully. You should be able to view your question/comment here within a few days.
Error submitting comment. Please try again momentarily.


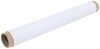
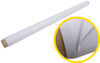
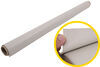
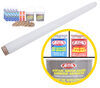
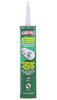
Bond an EPDM, PVC, TPO, or Hypalon membrane (sold separately) to your RV's roof with this water-based adhesive. Long-lasting adhesion with a moderate dry time is perfect for DIYers. Covers 160 to 200 sq ft per gallon.
Features:
Specs:
How Do I Use Adhesive?
Alpha's 8011 adhesive provides a strong bond between your roof membrane and your RV's roof. How you apply the adhesive will depend on the surfaces of the materials you are bonding together.
If 1 of the 2 surfaces is porous - a surface with empty spaces that allow the passage of water or liquid - apply the adhesive to the membrane only. An example would be a roof made of untreated wood and an EPDM membrane. The untreated wood is porous, meaning coating it with the adhesive could cause it to seep into the wood. So, apply the adhesive to just the membrane, let it dry for 45 minutes to an hour, and then lay it onto the wood for a leak-free roof.
If both of the surfaces are non-porous, apply adhesive to both the membrane and the rooftop. For example, if you have a metal roof and you are laying down an PVC membrane, you can put the adhesive on both materials because their non-porous construction will keep the adhesive from seeping through.
After applying and laying the membrane flat, squeegee out the air bubbles that will inevitably form to ensure full contact between surfaces.
Customer Satisfaction Score:
99% were satisfied with this product
1% of customers were not satisfied
Ratings & Reviews


Do you have a question about this RV Roof Repair?
Info for this part was:
At etrailer we provide the best information available about the products we sell. We take the quality of our information seriously so that you can get the right part the first time. Let us know if anything is missing or if you have any questions.




















Kate F.
4/9/2026
I am sorry to hear that the install did not go more smoothly for you Zafer. I am curious on how you did the install? The easiest way is to roll it out, make your cuts, then roll both sided to the middle of the camper going out just small sections at a time, then use a floor squeegee just to get the bubbles out, you should not put a lot of force down when getting the bubbles out. As for the non sag sealant, yes it is messy and hard to make it look good. I am a bit of a perfectionist so I feel your pain on this. Less is more my friend =)