


Thank you! Your comment has been submitted successfully. You should be able to view your question/comment here within a few days.
Error submitting comment. Please try again momentarily.
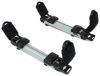
These Rapid Crossroad feet let you install Thule crossbars on your vehicle that has raised railings. Quick and easy installation with rubber-coated steel straps.
Features:
Specs:

Thule Crossroad adapters strap on to the factory roof rack.
The strap is tightened by turning a screw hidden behind a lockable door.
Turn the factory installed raised rails on your vehicle into a versatile, multipurpose rack system. The iron grip of the Rapid Crossroad, provided by the flexible steel clamping strap, allows for unmatched strength and security when mounting carriers to the roof of your vehicle. Whether you are biking, boating, skiing, or packing up for a well-deserved weekend away, this mounting system is the perfect base for safely transporting whatever you need to your next destination.

Videos are provided as a guide only. Refer to manufacturer installation instructions and specs for complete information.
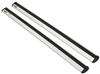
Hi everyone, it's Collin here at etrailer and today we have a 2019 Toyota 4Runner and we've been test fitting some roof racks on it and right now we have the Thule Wingbar EVO roof rack system installed. Now this is a roof rack that's going to mount to the raised side rails of your 4Runner and it's going to give you an option to get your favorite rooftop accessories loaded up, whether you got a kayak carrier, cargo box, maybe even a cargo basket. Now up top, we have our 53 inch long Wingbar EVO crossbars. These are in black but they're also available in silver, so if that will match your 4Runner better, just go ahead and check out the website. These are going to have a nice aerodynamic shape. It's going to help cut down on wind noise and drag, especially if you compare it to a standard square or round bar roof rack system.And we also have this nice rubber strip up top that's also cutting down on that wind noise and drag, but it's also a T slot and how we access that is flip open the cap right there and all we have to do is slide our T slot accessory between the two strips to the desired location on our roof rack, tighten it down and we're good to go.
There's no need to pull the rubber strip out anymore and cut it to length. You just slide it in and you're good to go. All right, here we have our Rapid Crossroads foot pack. These are going to connect your crossbars up top with your raised side rails. These are really easy to install.
It's a lot easier to get this installed on this roof than a naked roof where you have a padding clamp system that goes in your door jamb.This is going to be very easy to assemble and get installed. One of my favorite things about the crossbars . Or about the end caps I should say, is that the tools are actually included on the end cap. So we'll just pull off this end cap like so. Is a little bit tough at first.
We pull that off. We've got the tool to be able to loosen it up or tighten it down if we need to do so. The bolt is right here, once we tighten that up, our rubber coated steel strap that comes underneath our raised side rail, gets pulled down.You can see we've got a really nice secure fit right there and the rubber coating on that steel strap is going to help protect your raised side rail and your vehicle from any type of scratches or abrasions. Put the end cap back on and if we come over to the other side of the foot pack, you'll see we have these nice rubber layers underneath. So really all the way around where the Crossroads foot pack is making contact with your raised side rail, there's rubber all around it so you don't have to worry about it harming or scratching your raised side rail.Now I want to go over a few measurements for you guys.
First, from the top of our roof to the bottom of our crossbar, it's going to be three and a half inches. That should be more than enough space to get your clamp on accessories underneath of your crossbar without risking damaging your rooftop. Now this measurement's going to be a little different. We're going to go from the top of our side rail to the top of our crossbar, that's two and a half inches. That's something to keep in mind for any low clearance situations like maybe parking in your garage, if you have this added height to your raised side rail.Now that we've gone over some of those features, let's show you guys how easy it is to get this installed. Now like I said, assembly is very easy on this roof rack system. We don't have to deal with those pads and clamps like you would for a naked roof, so we'll just flip our crossbar over. We do need to take the end cap off. Just push down on that tab and cap comes right off. And then what we'll do is take our foot pack right here and the slot up top is going to slide into the channel on the bottom of our wingbar. You want to make sure that this open side is facing out away from the crossbar. Now at first it may be difficult to get in there, but what you can do to kind of loosen up this push down right here where a strap comes out. That'll loosen up the channel so that you can slide it in there just like that. You want to put the end cap back on. And from there we're ready to throw it on our roof.So we'll just set it in place on our raised side rails. Now because the strap is a little bit stiff, we're going to have to go over there and get that underneath the crossbar in a little bit. But over here we can just bring that rubber coated steel strap underneath like so. Just leave it there and we'll go to the same on the other side. Now from here what you want to do is measure your crossbar spread and make sure that's even on both sides. With this roof rack system, there's no set measurement, but you do want to make sure it's at least 24 inches. So what we'll do is measure from the front of our back crossbar to the front of our front crossbar.Again, as long as it's over 24 inches, you're good to go. I usually like to base it off of whatever accessory I might be using that day. If it's a bigger accessory, then you're probably going to want a bigger crossbar spread. And before you start tightening down, you do need to make sure that the arrow on the bottom of the foot right here is over the center of your raised side rail. Sometimes it helps out if you can just climb up on the doorframe on a tire tire like I just was. You can look directly above it and make sure that it's in the right spot.Right there, we're going to be all good to go. We'll take the steel strap, kind of put it in that little pocket where it's supposed to go. We're going to have to hold that there for a second while we tighten it down. Now you don't want to over tighten it, you just want to make it pretty snug. No need to try to cinch it down. Once you start feeling a good amount of tension on it, then you just go a couple more turns and you should be good.There we go. Few more. That'll be all right, right there. And then we just put the end cap on and then you want to make sure you tighten down the other side as well. Now when you're done installing it, I always recommend grabbing hold of both of your crossbars, give it a good shake. You can see the entire 4Runner is moving. Go up and down, back and forth. You can see everything is secure. So we're ready to load up our favorite rooftop accessories and then hit the road.Well, thank you all for watching and I hope this information helped you out. That's going to do it for our test fit of the Thule Wingbar EVO roof rack system on our 2019 Toyota 4Runner.
Customer Satisfaction Score:
74% were satisfied with this product
26% of customers were not satisfied
Ratings & Reviews



George M.

6/8/2016
Still three stars. Very fiddle-y to get right. The older clip in footer type is much easier to use.
Condition: Like New
Notes: May have damaged packaging or minor cosmetic blemishes.
Info for this part was:
At etrailer we provide the best information available about the products we sell. We take the quality of our information seriously so that you can get the right part the first time. Let us know if anything is missing or if you have any questions.












































Mike M.
7/31/2021
We have logged about 15000 miles with the Thule roof storage rack and have not had any problems. It is a great product.