
AeroTread Running Boards w/ Custom Installation Kit - 5" Wide - Aluminum - Polished Stainless
Item # AA2051028
Retail:$733.95
Our Price: $446.58
You Save: $287.37
Confirmed to Fit
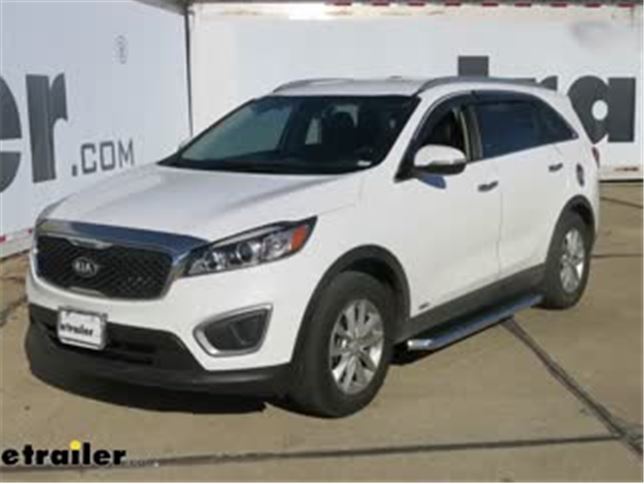
2018 Kia Sorento
excluding SX models
SX models
Will this fit?
To see if this custom-fit item will work for you please tell us what vehicle you'll use it with.
In Stock


Need help with installation?
Locate installers near me- All Info
- Reviews (113)
- Q & A (0)
- Videos (1)
- Photos
2018 Kia Sorento - AeroTread Running Boards w/ Custom Installation Kit - 5" Wide - Aluminum - Polished Stainless
- Running Boards
- Fixed Step
- Silver
- Aluminum
- Aries Automotive
- Polished Finish
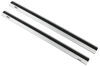
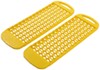
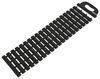
These 5" wide steps with rounded ends mount close to your Kia Sorento for a streamlined look. Full-length plastic pads create non-skid surfaces. Constructed of rustproof aluminum with polished stainless steel trim. Custom installation kit included.
Features:
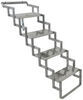
- Running boards provide a solid step for entering and exiting your vehicle
- 5" Wide step area offers ample surface to gain a firm foothold
- Full-length step pads with hard plastic treads create non-skid surfaces
- Sleek step boards with rounded ends mount close to your vehicle for a streamlined look
- Extruded aluminum frame is strong and rustproof
- Polished stainless steel trim adds a touch of style
- Easy installation with custom mounting kit
- Brackets simply bolt onto vehicle's frame - no drilling required
- Carbon steel mounting brackets have a black powder coat finish for durability and rust resistance
Specs:
- Weight capacity: 500 lbs
- Step pad width: 5"
- Board length: 67"
- Quantity: 2 running boards
- Limited lifetime warranty
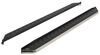
2051867 Aries Aero Tread Runningboards - 5" Wide - Polished Stainless Steel - 67" Long
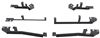
2051177 Aries Aero Tread Mounting Brackets - Carbon Steel - Black Powder Coat - Qty 6
Installation Details
California residents: click here


Video of AeroTread Running Boards w/ Custom Installation Kit - 5" Wide - Aluminum - Polished Stainless

Videos are provided as a guide only. Refer to manufacturer installation instructions and specs for complete information.

Video Transcript for Aries AeroTread Running Boards Installation - 2016 Kia Sorento
Today on our 2016 Kia Sorento we're going to be taking a look at and showing you how to install the Aries AeroTread running boards with custom installation kit. These are going to be your five-inch wide aluminum polished stainless steel boards, part #AA2051028.They're also available in black using part #AA2061028. So, here's what our running boards are going to look like once we have them installed on our Sorento. Now, these are not only going to look good, but they're going to make it a lot easier when we're getting in and out of our vehicle.Our boards are going to be five inches wide, and they're going to have a step on the top that's going to span the entire length of the board. So, no matter where we or our passengers get in and out, we'll have a secure footing.The boards themselves are going to have an aluminum construction, so they're going to be rust-proof and they'll have a rolled edge here that will come really nice, close to the body, giving it an OEM-type look.Between the board and the body here, we're going to have this rubber weather stripping. It's going to take up that unsightly gap in between, help it blend in a lot better, and give it more of a sleek appearance.Our running boards are going to have a 500-pound weight capacity, which is a lot more than most boards on the market and they are going to come with a custom bracket so we can get them installed.To install our boards, it's not going to require any kind of drilling, however we are going to have to do some minor cutting, if you have an underbody panel that goes along the edge here.And now that we've seen what our board looks like and gone over some of the features, let's show you how to get them installed.To begin our installation, we're going to want to find the three mounting points on each side.
We'll have one right behind the front tire, one just before we get to the back of the front door and then we'll have another one right in front of the rear tire.Once you have the positions mapped out, you're going to want to grab the specific bracket for each location. Double-check the instructions, because some of them do look very similar, but they're only going to fit one way.So, we'll start on the front here, and if we come underneath, right by the pinch weld, and we look directly up, we're going to have a rubber plug that's going to be the bottom of the painted section towards the outside. We're going to want to pull that plug out.And just grab a small flat-blade screwdriver or something that you can get to work that plug out and we'll pull it out. So, we can loosely take our bracket now. We're just going to dry-fit it, align it up with that hole, and you can see that, that back bracket on the arm is going to be right behind this mount here.Now, we're going to have this underbody panel on here, so we're going to have to trim that section out to expose the hole.
Now, this is just cardboard, so I'm going to use a utility knife. And I'm just going to cut, kind of in the section that's already recessed in a little bit, just cut that notch out there to expose the hole underneath.And that'll expose a plug underneath and we can pull that plug out as well. So, now we're going to grab one of our T-bolts. And we'll take the handle section and we're going to feed it into the hole just like that.And then, to help make sure that it's not going to fall out, we're going to take the plastic retainer and we're going to slide the bolt into the round section and press it up against the bottom of the frame.And this will help hold everything in place and make sure the bolt doesn't fall out. And now that we have this one in, we're going to repeat the process of putting our bolt in on the outside hole as well.With both the bolts in place, we'll take our bracket and we're going to slide it in.
You want to make sure that it goes directly against the bottom. You don't want to catch that plastic on there.Then we'll take the hardware . we'll have a flat washer, a lock washer, and a hex nut to secure everything down. So, we'll just loosely put our hardware on. Let's get it about hand-tight where the bracket can still move a little bit, but we don't have to worry about it coming off.Now, if we start moving back from our front bracket and we look on the liner here, we'll have a plastic nut.
And we'll move back one more and we'll have a metal bolt going into the bottom of our vehicle. That first metal bolt towards the front is the one we're going to want to remove.So, we can grab a 10 millimeter socket and pull that out. So, we're going to grab our middle bracket now and we'll line up the outer hole where the bolt we just pulled out was. And that will give us an idea of where the inner bolt is going to land.We're going to have to trim out the shield down here so we can expose the area for the bolt to go through. Now, if you cut that section out, you should be able to see a threaded hole in the bottom there. Those are going to be our two mounting points. Right here and then the spot where we took the bolt out towards the outside.So, now we can take our bracket and one of the included bolts in our kit and we'll go through the bracket. And we're going to go directly into where we pulled that one out.You want to get this loosely in place so it'll hold the bracket, but still loose enough so we can get the second one in. And since the hole is recessed underneath the cover, it may help to use a small extension to start the bolt.Now, the rear bracket is going to go on relatively the same as the front. We'll have a plug towards the outside here. Just take a screwdriver and pop it out. And then we're going to have another plug, but we'll need to move underneath to get to it.Now, the other plug we're looking for is going to be underneath the body, just on the other side of our emergency brake cable here. So, we'll pull that plug out as well and we can get our T-bolts in place.So, now we can put our bracket in place. This rear one is going to go in that rear bolt, however, we're going to have to move our emergency brake cable temporarily, just to slide everything in place. And again, make sure they go fully-seated against the bottom of the frame here. Then we can put our flat washer, lock washer, and nut in place.We can grab our board now and we're going to have six bolts that are in two tracks here. We're going to want to remove the nut, washers, and everything, but leave the bolts in the track.You can use a 13 millimeter socket to pull the nut off. Hold onto all this hardware, but again, we're going to be taking off each one of these bolts.Once you have the nuts and washers removed from the bolts, these do slide in the track. So, we'll have two for the front, two for the middle, and two for the back. So, we're just going to slide our bolts close to where they're going to be, so when we put our board up, it'll make it a little bit easier.So, we can take our board and you're going to kind of want to come in at an angle so that rubber strip can get underneath. And then, we're going to line up our bolts with the holes in the bracket on each one.Now, it may be a little difficult to get all of them to line up. You may have to slide the board back and forth, but just take your time and you should be able to get them all to line up.Once you have all the bolts going through the brackets, we'll take the same hardware we took off, that flat washer, lock washer, and nut. We're just going to get them on there hand-tight so we don't have to worry about the board moving around too much.Once your board is loosely attached, you're going to want to slide it back and forth to make sure you have it centered where you want it on the vehicle.Now we'll start tightening up our bracket bolts first. So, the middle one . you'll be using a 10 millimeter socket to tighten up those two bolts. And for the nuts that are on our T-bolts, we're going to be using a 17 millimeter socket.Then we can come back with that 13 millimeter socket and tighten up the nuts that are attaching the board to the brackets. With this side done, we can move to the other side and repeat the same process.That'll finish up your look at the Aries AeroTread running boards with custom installation kit, part #AA2051028 on our 2016 Kia Sorento.
Customer Reviews
AeroTread Running Boards w/ Custom Installation Kit - 5" Wide - Aluminum - Polished Stainless - AA2051028
Average Customer Rating: 4.8 out of 5 stars (113 Customer Reviews)
These 5" wide steps with rounded ends mount close to your vehicle for a streamlined look. Full-length plastic pads create non-skid surfaces. Constructed of rustproof aluminum with polished stainless steel trim. Custom installation kit included.by: Marlon C10/04/2020
Before and After .I am satisfied with the product it looks very nice now..


by: Paul 08/20/2020
Running boards and brackets look great. I will send pictures when installed. I'm hoping there is no interference when I go to the automatic car wash.
by: Daniel03/05/2023
The installation was very easy thanks to the instructions that came with the order. It took about 30 minutes per side. They look fantastic and my wife is very happy with them. I wish other companies would follow your lead. Thank you very much.


by: Diane 04/25/2023
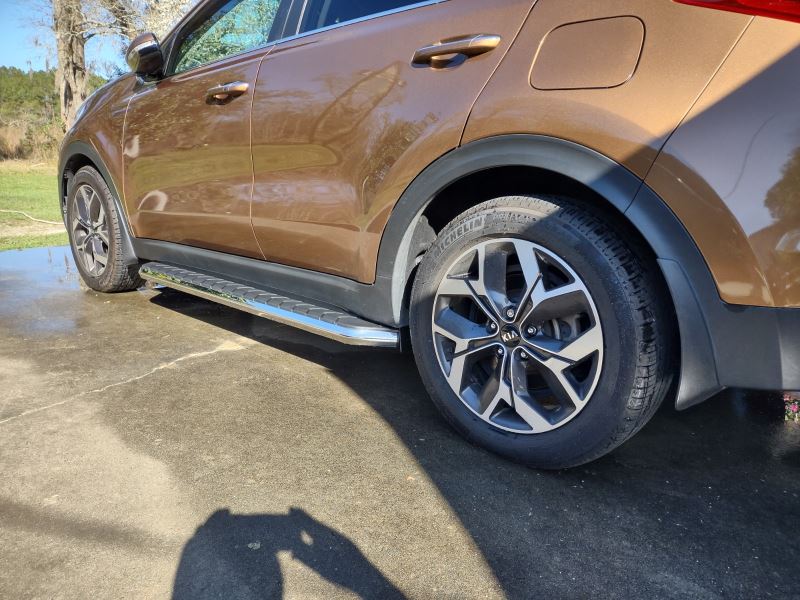
One year ago I purchased these running boards to be installed on my 2022 KIA Sportage. I was having trouble getting in and out of my SUV when my sciatica nerve was acting up. These running boards not only put more style on my vehicle, they are a blessing that I can get in and out of my vehicle when I am unable to twist and turn. If I didn't purchase these step boards, I would have had to trade my SUV in for a car that I would have been able to get in and out of. I definitely recommend these running boards for several reasons and as I use them everyday after 1 year, they still look as new as they did a year ago when I had them installed.
by: Bruce04/26/2024
Boards look great, and the installation was fairly easy. 1st side took me about an hour and second side was on in 30 minutes.


by: Rod02/17/2024
Followed etrailer video to install. Installation was easy. I did it on a cold day so it took longer than expected but overall, satisfied with the product.


by: Stephen C05/16/2022
Very high quality product and installation was a snap. etrailer delivers once again. Delivery was earlier then stated.


by: Donny03/29/2024
I have instructions that are to follow, but these are terrible. You must think that the average person will know how to use the pull through nut. Your instructions tell you where to it and that is all. And what does it mean to put M 10 bolt plate in the rear mounting hole. Please show these instruction to someone who has never put these running boards on and ask what he thinks It would be easier to drill holes
by: Wayne 11/01/2022
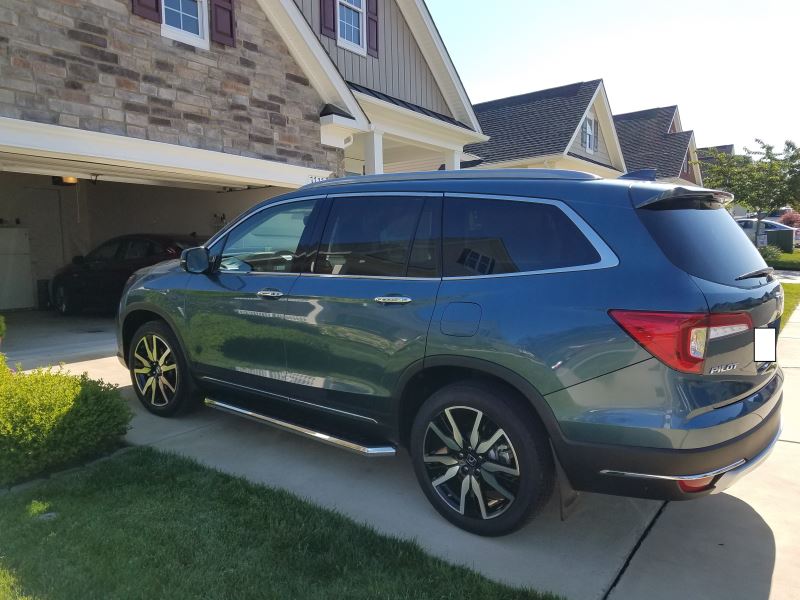
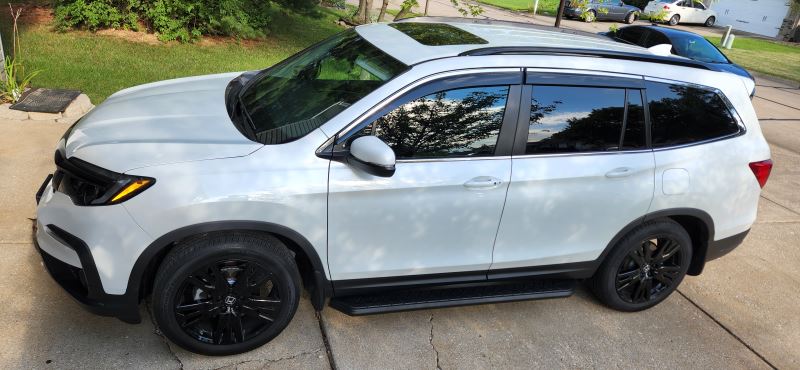
The running boards bolted right up to the vehicle with no problem. They seem to be sturdy and are tucked in as to not protrude past the body.
My wife is short and likes the assistance they give her entering the Pilot.
I enjoy the prompt delivery and service from etrailer.
Thank You for my wife's birthday present for her 2020 Honda Pilot!
by: Jennifer04/08/2021
Boards look great and appear very sturdy. I installed with no elevation of vehicle in 2 hours 5 minutes which included removing the passenger board for the correct one. It wasn't yet tightened so not too hard. Instructions are ok and provide basic info but I learned more in the comment section here. The brackets are not labeled correctly and face one way on the passenger side and the opposite on the driver side. Don't worry, it all works. The instructions did clarify that forked brackets go to the front and that all others worked middle and rear regardless of stamped markings. Very little room to work under car but I managed. Boards look durable and are very good looking. Mount is sturdy but it would help if boards were marked for Passenger/ driver. I saw the tread pointing toward the front in a picture and so I removed first board and swapped. Screws don't move as freely in the tracks but sufficiently so. All in all, I would buy them again and do it again. Not sure if they are lined up right but an easy fix if they need to move a little forward or back; for now they are centered.


by: Roscoe01/05/2020
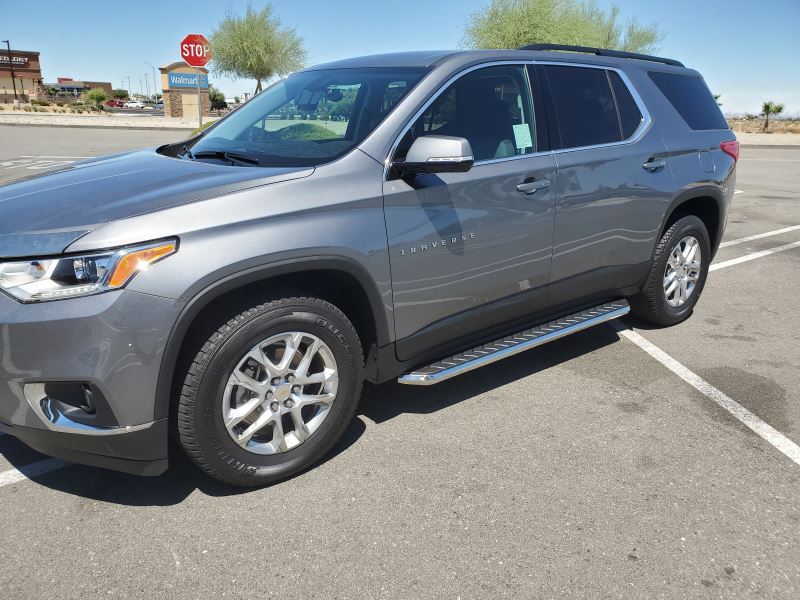
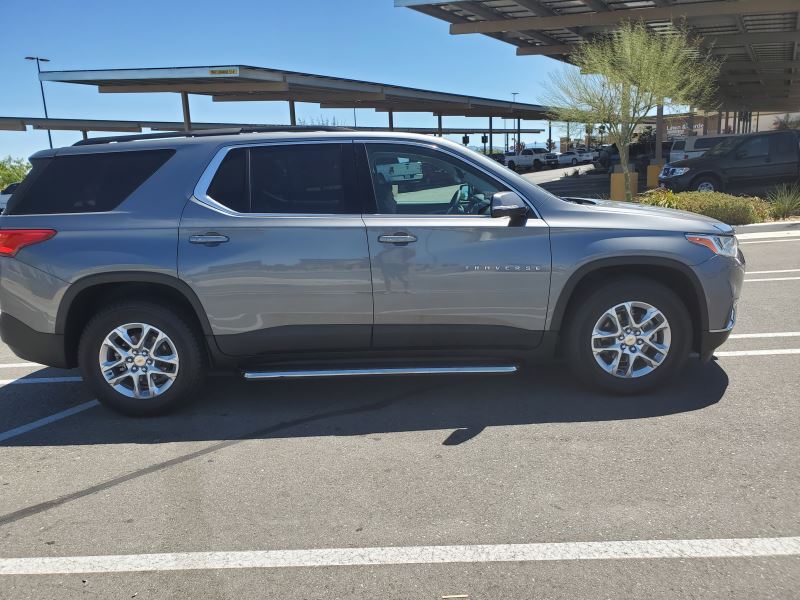
Running boards have a very good appearance they improved the looks of my 2020 Traverse the middle and rear mounting brackets take a little time they are tricky to mount however I was successful in getting them mounted. We love the product


by: Yevgeniy11/04/2022
I like the way they look however, the corner on of the running board came in damaged. I did not even wanted to open the other running board.


by: Benny R.05/08/2021
Better than expected, Perfect fit, I wanted something that didn't stick out too far and I think 5 inch is the perfect size, Good packaging, box had a couple of holes from shipping but no damage to product. Only thing as mentioned in other reviews front and rear brackets labeling is reversed but easy to figure out.


by: Ray Y.08/22/2019
These running boards are very good quality and fairly easy to install. Make my Traverse look much more nice. Oh, and perfect for assisting in entering the vehicle. Well worth the price.


by: Scott06/26/2020
Again, etrailer.com knocks it out of the park! Other than one pain in the butt issue, this was perfect. The running boards are much higher quality than I thought they would be, solidly built and look awesome on my 2019 Honda Pilot.
Installation was easy - after I watched the installation video. However, the brackets marked "F", which I assumed meant "Front" like over reviewers, was actually the rear and the brackets marked "R" were actually the front. Brackets marked "M" were for the middle. Fortunately, I figured this was the case after reading other reviews. But, with my vehicle, it was really obvious when I looked at the mounting holes. The entire installation took about 40 minutes (plus an hour and a half to go to Home Depot, but I'll get to that).
The running boards look awesome on my vehicle! They look factory installed. I like that they have a thick rubber strip that seals them again the vehicle, preventing rain, snow, ice from getting in between the running boards and the side of the vehicle.
This is the first time I've ever had something go wrong with a product I ordered from etrailer, though. One of the mounting bolts was defective -- see the picture I posted. This is absolutely not etrailer's fault and is on the manufacturer, but it was a major hassle for me as I didn't notice until I had the driver's side running board installed and had one of the brackets already installed on the passenger side. It is a fairly standard sized metric bolt and I spent $0.92 at Home Depot for a replacement -- but, it was still a major hassle. If it weren't for that, I'd rate this 5 stars.
Suggestions -- use a round wire brush to clean out the weld nuts before attaching the brackets. A couple of mine were full of dirt, which I expected and I cleaned them out first. Second, check the bolts!! My defective bolt was probably a fluke, but checking all the parts would be a good idea anyway.
Shipping was very quick, extremely well packaged as usual. Love etrailer!!


by: 22 Pilot, unexpected next day delivery08/13/2022
Decided we needed running boards because I am short. I struggled finding something I liked with a reasonable price. I saw these and was a little unsure but they had good reviews so I thought I'd give them a shot... so worth it. They were literally delivered the very next day. My husband installed them today and said our 12 year old daughter really could have done it. Best part is I can now get into the pilot without any issues.


by: Darrell11/03/2019
I had purchased another brand of running board for just about the same money and the overall quality was poor. I returned them and bought from etrailer because the quality of the last item I bought from them was very good. I love the way they look on the Pilot and they are already proving useful for the shorter family members and assisting them getting into the Pilot easier. I was sent the wrong hardware first off , etrailer offered to let me go to my local store and purchase it and they would reimburse me or they would mail me the correct hardware. I chose the second option since I wasn’t in a hurry. Not awesome but they resolved it so no biggie. One other thing that confused me was that the brackets were marked “DSF, DSM & DSR” and additionally “PSF, PSM & PSR”. I assumed this meant “Drive side and Passenger side “Front, Middle and Rear”. But the brackets were stamped incorrectly. The DSRear was actually the front one. It wasn’t hard to figure out which ones matched with the holes in the frame because they are all very different but it’s weird they were stamped wrong. Maybe the letters don’t stand for what I thought they do and I’m open to that possibility.
All that being said they went one easily enough. It took about 90 minutes with and extra pair of hands at times. I really do like the look and they just sort of make a plain looking Pilot look sharp.


by: Owen 08/15/2023
I purchased a pair of Aero Tread Running Boards for my Nissan Murano over a year ago. I am very happy with this purchase. They arrived well packaged and were relatively simple to install. Installation took about an hour for each side. Most importantly, they have enhanced the appearance of my vehicle. A very happy customer!
by: Bonita04/14/2024
Shipping was fast. Installation was fairly simple and didn’t take much time. They look great on my Durango! Just what this vertically challenged girl needed!!! Thank you!!,
by: Andres11/08/2020
Very reliable product and the installation was as easy as they advertised, the finish coat is also very attractive! Thank you etrailer.


by: Cesar10/27/2021
Wow, great running boards, very sturdy and well made. Follow the video instructions on the etrailer webpage and save a lot of time with installation. I watched the video and had both sides done in less than an hour. All the hardware was included in the package and it was extremely easy to install. These are great running boards that will greatly improve the look and functionality of your vehicle.


by: Tim05/11/2021
Super easy install on our ‘21 Pilot Black Edition, didn’t even need to trim out the plastic tabs that the OEM boards would have needed. Even easier if you have a second person to help you straighten the mounting brackets and thread the hardware while you ratchet, but that’s just icing on the cake.


by: Kent R09/14/2022
There is a little confusion over these boards. After a lot of research, I have found these boards/hardware Part# PT93889200 should be marketed to fit 2010-2022 LIMITED, TRD SPORT, and Night Shade ONLY. I own a 2021 SR5 Premium 4Runner, & a 2022 TRD SPORT. Neighbor has a 2021 Limited. The Aris Aero boards are better quality and look/fit better than my OEM Factory SR5 Premium boards.


by: 04/07/2022
These running boards fit my 17 acadia slt. They look great and it's so much easier for my kids and I go get in and out of the back. However, the instructors are completely useless. The brackets are labeled all wrong. Left is right and front is back. Once we figured that out instalation went a lot smoother.


by: John K.03/25/2019
These were easy to install and they look great. Just got the 2019 Pilot and found out the kids would have an easier time with some running boards. Instructions were straightforward enough, but I watched the installation example video anyway. Just as easy as it looks. The quality and construction seems to be very good. Hoping they last the life of the vehicle. Kids, and wife, like the ease of getting in and out of the Pilot now.


25
113
Show More Reviews
See what our Experts say about this Aries Automotive Nerf Bars - Running Boards
- Aries Nerf Bars that Fit 2020 Kia Sorento SXThe Aries Nerf Bars part # AA2051028 does fit the SX and non-SX models of the 2020 Kia Sorento so it will work great for you.
view full answer... - Recommended Chrome and Black Running Boards for 2020 Kia Sorento EXI may have a solution for you, but there is not a chrome/black combo running board for the 2020 Kia Sorento EX. However, the AeroTread Running Boards w/ Custom Installation Kit - 5" Wide - Aluminum - Polished Stainless # AA2051028 are a polished chrome running board with black treads that would fit on your Sorento. These are the only running boards currently available for your Sorento EX, but they're a really nice solution. I've linked a review video of these on a similar Sorento for...
view full answer... - Aries Aero Tread Running Board Fit for 2019 Kia Sorento EXFor your 2019 Kia Sorento, the compatible running boards are the Aries AeroTread Running Boards w/ Custom Installation Kit - 5" Wide - Aluminum - Polished Stainless # AA2051028 or Black # AA2061028.
view full answer...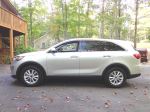
Do you have a question about this Nerf Bars - Running Board?
Info for this part was:

Expert Research:
Jameson C

Video Edited:
Joshua S

Video Edited:
Jacob T

Updated by:
Wilson B

Edited by:
Daron K

Video by:
Jonathan Y

Test Fit:
Robert C

Written by:
Jessie B
At etrailer.com we provide the best information available about the products we sell. We take the quality of our information seriously so that you can get the right part the first time. Let us know if anything is missing or if you have any questions.
Product Experts Available Now!
Call 1-800-940-8924
Thank you! Your comment has been submitted successfully. You should be able to view your question/comment here within a few days.
Error submitting comment. Please try again momentarily.