


 Arrives before Christmas
 To see if this custom-fit item will work for you please tell us what vehicle you'll use it with.

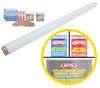
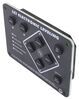
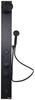
Make your truck more accessible with running boards and adjustable height mounting brackets. The 6" wide boards can be set at 4 different heights depending on your needs. Raised tread provides excellent traction. Custom fit for your Ford F-150.
Features:
Specs:
Videos are provided as a guide only. Refer to manufacturer installation instructions and specs for complete information.
Hi, this is Scott with etrailer. Today we're taking a look at and installing the Romik running boards for our 2011 Ford F-150. If you have these or you get these installed, let us know what you think of them down in the comments. One of the things I like about our Romik running boards for our F-150 is it kind of gives it that factory look, almost like an OEM appearance to it. It matches our trim really well and it doesn't have a lot of flash to it, so it doesn't have the chrome or anything like that that's gonna get scratched up, but it does have a really nice flat black coating on it. And if you're not gonna get a bunch of corrosion or rust, like some of you times you do with some of the older style running boards, these are also gonna give your paint some protection from rocks and debris flying up and hitting up under your rocker panel here.
So that's a really nice option. What's really good about 'em is they're gonna help you get in and out of your truck a lot easier and safer. So what it's gonna do is give you more footing and it does have a little band of grip right here on the edge, so it's gonna give you a little more grip. Say it gets a little wet or it's snow on the ground, that's gonna really help you out with your footing as well. So if you're interested in these running boards, just enter in your year, make and model into our fit guide and make sure you have the right cab options in there and we'll help you get the right running boards for you.
As far as installation, these are pretty straightforward and it comes with everything you need to get 'em done. Just stick around and watch our video and we'll help you get 'em installed. To start our installation for our running boards, we have taken a look at our brackets and we've decided that we're only gonna be using three rows of our bolts. So what we're gonna do is pull off one of our end caps and we're gonna remove two of our bolts 'cause we won't be needing them. We're just gonna use a Phillips screwdriver and we're gonna have two screws.
(drill whirring) Yeah, we can just pull off our end cap and those will just slide right out of the way. For our items in our kit, we're gonna have these little clips. What we're gonna do is see that they're far apart. We need these to be able to slide onto our body and hold in place. So what I'm gonna do is just squeeze this down and try and get it to center up as you can see, it comes off center so I'm gonna get it squeezed down a little bit.
I'll take my pliers and get that hole centered up and that's gonna make it easier for us to line up our bolts. And I'll do that with all of our clips. On each side you're gonna have three brackets and these are gonna be side specific. So this side is our passenger side and if you look at your instruction sheet, it will show you the orientation of your brackets. Just make sure you have each set on the correct side when you're putting them on. Now once we get under there, we're gonna wanna hold our bracket up into place and that's gonna give us an idea of which holes we're going to use. You're gonna have maybe some stickers over the holes. You're gonna want to get those out of the way. Or if you have other factory clips that are just hanging in the holes, you wanna remove them as well because they're gonna get in the way of your bracket when you install it. So what I'll do is I'll just crawl under there and get figured out which holes we need to use and then I can get my clips slid onto those holes that I'll be using. Now we did install the other two brackets. It's gonna be the same process all the way around our vehicle. Now I have my bracket figured out where I'm gonna go. So right here we have a hole that we're going to be using and it lines up with my rearmost hole. So what I'm gonna do is just spread this bracket apart or our clip apart I should say, and just get that slid up over our rocker and just spread it far enough to go on and get it pushed up and centered on our hole so you can see all of our threads. Now for our rearmost hole, this is where we're gonna end up putting our clip, so we'll just spread it apart just a little bit there and we'll push that in place and just get it lined up with your hole. Now we can take our bracket and when we're putting our brackets on, we're gonna leave them all loose. We just want to go finger tight with them until we get the rest of our running board on. Then we can come back through and tighten everything up. Now what I like to do is take off all my hardware on down the bottom of my running board. You can probably do it with them backed up and just slide it on, but I like to take 'em all the way off. It just makes it a little easier for me. Now we can just get our running board set in place. Usually what I'll do is just set it on there and then I can line up my bolts, get it put into the slot, and these are able to slide up and down your running board. So just slide 'em in place and we'll just do that all the way down. Now with our hardware we'll take one of our washers and our nut and we'll get 'em put in place and just the same as with our brackets, we're just gonna put 'em in place finger tight for now. Now we'll go back through and just snug up our bracket side of our hardware just a little bit. When we're doing this part, we wanna make sure our bracket's staying straight, kinda hold it in place and snug it down. Now that we have our brackets to the body tightened up, what we want to do is make sure we have our running board where we want it. Now it is slotted so you're gonna be able to move it in or out. What I like to do is kind of look down the body line and make sure we have it where we want it front and back. Now from the rear of this one, I'm gonna go from the back of our body line here and almost to the back of our running board. And I just wanna make sure it's straight and then I can come back through and I'll snug 'em down. Now we'll go back through and torque down all of our hardware to the specified torque settings in our instruction manual. Now if you need a torque wrench, you can check 'em out here on etrailer or you can take a look at 'em at your local auto parts store. And that was a look at the Romik running boards for our 2011 Ford F-150. I'm Scott with etrailer, thanks for watching.
Info for this part was:
At etrailer.com we provide the best information available about the products we sell. We take the quality of our information seriously so that you can get the right part the first time. Let us know if anything is missing or if you have any questions.


Thank you! Your comment has been submitted successfully. You should be able to view your question/comment here within a few days.
Error submitting comment. Please try again momentarily.