
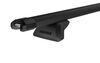
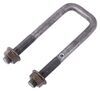
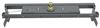
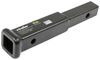
Draw-Tite Max-Frame Trailer Hitch Receiver - Custom Fit - Class III - 2"


To see if this custom-fit item will work for you please tell us what vehicle you'll use it with.


Fully welded vehicle trailer hitch is strong and durable. Draw-Tite's Tested Tough guarantee ensures that this hitch exceeds industry standards. The combination of an e-coat base and a powder coat finish provides excellent rust protection.
Features:
Specs:
Draw-Tite's Tested Tough program provides testing standards far superior to those outlined by the Society of Automotive Engineers (SAE), the go-to source for engineering professionals.
Each Draw-Tite trailer hitch receiver undergoes extensive fatigue testing and static testing with the ball mount that is either supplied or recommended for use with that particular hitch, thus ensuring results that are applicable to real life use. Fatigue testing is also conducted on hitches rated for use with weight-distribution systems.
In addition, Draw-Tite performs static testing on a simulated automobile, as opposed to the rigid fixture used for SAE testing, resulting in a more true-to-life scenario.
At etrailer.com we're committed to the products we sell, and to our customers. Our experienced and knowledgeable staff are available via both phone and email to address your questions and concerns for the lifetime of your hitch. The technicians at etrailer perform hitch installations on a daily basis, making them a valuable resource for do-it-yourselfers. The one-on-one, personal service you'll receive comes straight from an expert in the towing and automotive field. We've installed it, we've wired it and we've towed with it, so whatever your question, we can answer it.

California residents: click here
Videos are provided as a guide only. Refer to manufacturer installation instructions and specs for complete information.
Hi everyone, Jesse here with etrailer. Today we're gonna take a look at and I'll show you how to install the Draw-Tite Custom Fit Trailer Hitch Receiver on our 2023 Buick Envision. The Envision is a nice good looking car, so it's nice to have a hitch that doesn't really take away from the looks of it. And with the way this hitch is installed, it's installed behind the fascia so its cross tubes are completely hidden, you'll only be able to see that receiver opening down there. And a question we get asked a lot is, "Once the hitch is installed, will my hands-free lift gate assist still function properly" And the answer with this hitch is, "Yes, it will." Let me unlock it. You just kick in the same spot as you did before and that lift gate will open up for you.
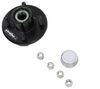
And with that receiver, that's gonna be your standard two inch by two inch opening. So, most of your accessories will fit in there just fine. And behind that we have a five eighths inch pin hole. Your pin and clip will work just fine. That's another standard.
The pin and clip not included with the hitch. However, most accessories will come with one included. Also, if you needed one, you could always pick one up here at etrailer. And our safety cable loops are just your standard wire type. Very easy to access with whatever style safety cable you have.
For example that S there (clevis hook clangs) or even a large clevis like this. Now, for some measurements. We'll start with our ground clearance. And this car does sit on the low side and so does the hitch. Looks like we're at about 12 inches, so keep that in mind.
You might wanna look for accessories that have a slight rise to them. Then from the center of the pin hole to the edge of the bumper here is at about four and a half inches. You wanna keep that number in mind for any folding accessories that you might add on to ensure they don't make contact with the vehicle. And for the weight capacities with this hitch, we have a gross trailer weight of 3,500 pounds. That's the amount of weight that you can pull behind the vehicle. And a maximum tongue weight of 525 pounds, and that's the amount of weight pushing down on the hitch. Always be sure to double check your owner's manual to ensure that your vehicle can handle that weight safely. All in all, if you're looking for a hitch that's gonna look great on the back of your Buick, you really can't go wrong with the Draw-Tite option. One thing I do wanna mention is, if you plan on doing any kind of towing with it, you will need to add trailer wiring. Our neighbor opted for the Tekonsha Custom Fit Trailer Wiring and to get that installed, the plug is actually tucked back here behind the fascia. So, it's something that you're gonna want to do at the same time as you're installing the hitch, just because you will have that fascia off. It's gonna be a lot easier to get that plug plugged in. You can do it without taking the fascia off as far as the trailer wiring, but it's gonna be a little more difficult. If you have any more questions or concerns about this hitch or anything else we have here at each trailer, feel free to reach out to us. We'd be happy to get you pointed in the right direction. As for the installation, I mentioned earlier you do have to remove the fascia, so, it does become kind of a project because you do have to take that whole rear end off. If it's not something they're looking to do yourself, check out our dealer locator. You can find someone local to you that would be happy to get this set up for you. If you are looking to see how this gets installed, follow along and I'll walk you through. We'll begin our installation inside of our cargo area here. We need to remove this plastic trim panel. So, it's gonna be a push fastener. You can use a flathead screwdriver or a tool like this, get up under it and pop it out. And from there we're just gonna work this out of position. It's just held in by some clips, so work around the outside. And then this bottom clip here, you wanna make sure that you pull straight out and it is gonna be pretty tight so it'll take some force. (clip pops) Pop that out and set it aside. Now, underneath the vehicle, we have some T15 screws to remove. We're gonna remove (tool buzzes) the two on the outside, on both sides. (tool buzzes) (tool buzzes) So, you can see there's two more here but those aren't holding anything up. So, we'll just move on to these. (tool buzzes) (tool buzzes) Now, back on top of our fascia, we have a T15 screw to remove on both sides. (tool buzzes) (tool buzzes) Now, the inside of our wheel well here, we have some T15 screws to remove. They're pretty tucked in there so it helps to have a tool like this, or remove the wheel to get it out of your way. And I'll start taking those off. (tool buzzes) (tool buzzes) (tool buzzes) So, we'll just remove the three lowest screws and then start peeling our wheel well out, (panel clicks) just kind of work it up out of our way. And then we do have this light here that I'm actually going to unplug and take out. So, on one side of this plug, there's gonna be a red locking tab, I'll just pop that up. So, I'm struggling getting my hand back to unplug it. So, I'll actually just pop this out. There's gonna be a tab on both sides. If you push it down and then kind of push the light and pull it towards you at the same time. Get the other one, (tab clicks) get that popped out. That's gonna give us better access to this plug. So, as I said, there's a red locking tab, pop that up and push in on that pin and unplug it. I'm gonna leave this off because next we're going to be pulling back on this plastic trim piece here and I just don't wanna risk breaking it 'cause it's not as flexible as this plastic is. So with this, it's just gonna be held in by clips, so you just have to pull out on it pretty hard. Sometimes you can reach in behind and squeeze the pins together, or if you take an eight millimeter socket, just kind of feel for that pin, push the socket over that, that'll squeeze the tabs and allow you to get this popped out. Once you have those bottom ones popped out, we'll just go one tab at a time. (tabs pop) The second one you can also reach back and squeeze. So, if you just squeeze on both of those, that'll kind of release it. But the rest of 'em, we will not be able to get to the back of, so (tab pops) just gonna have to pull back and we'll do one more, (tab pops) pop that out, and that's gonna reveal a seven millimeter bolt. We'll take our socket and loosen that up, (socket rasps) take it all the way out. And anything that we do on this side, we will also be doing the same thing on the other side. Now, at this point, I'd recommend grabbing an extra set of hands. I have my friend Daniel here to help me. We're going to start peeling back the fascia, starting on the corners, just held in by (tabs pop) some plastic tabs. Just work your way towards the middle (tabs pop) and once you get here it's hard to get leverage on it. So, there's a tab by that plastic panel that we removed. We kind of push in on it, it should help it release. (tab pops) That popped out. (fascia pops) And then we don't wanna pull it too far, we wanna make sure we're disconnecting all of our electrical connections. So, it looks like we have one on both sides. This one here has a red locking tab, push the pin in and separate the two. And the other one's pretty similar with that same locking tab, then pin. (plug clicks) We got those both disconnected and then we'll set our fascia aside. Now, we can remove our bumper beam. There's gonna be four 15 millimeter nuts and bolts holding it in. (tool bursts) (tool bursts) Then these bottom two are supporting the exhaust, so- (tool bursts) just be careful as you're taking 'em out. These tabs down here will catch it, but I like to just support it, (tool bursts) make sure it doesn't come slamming down. (tool bursts) And we will have to work those exhaust hanger brackets around that tab or off the exhaust (bracket rattles) to be able to remove the bumper, (bracket rattles) (bracket crunches) get that dropped down. Then we'll pull this out and we'll set it aside. (bumper beam clangs) Now, we'll take our hitch and line it up with those studs. (hitch rattles) Do have some plastic pieces that we have to work around here. (hitch rattles) Get it lined up and slid into position. (hitch clatters) And we'll just take those factory nuts and thread 'em off. For the bottom bolts, you wanna make sure that your exhaust hanger bracket is getting lined up with the bolts and thread on those factory bolts. (hardware rattles) Now we can snug all of our hardware down. (tool bursts) (tool bursts) (tool bursts) (tool bursts) We need to go over everything with a torque wrench to make sure that it's torqued down to the specifications in the instructions. (torque wrench beeps) Next, we'll need to trim our fascia to make room for our new hitch. So, the diagram in the instructions, it's kinda hard to tell what's going on, but we wanna find center. So, I used these two plastic rivets. I just found the center between the two of them and that's my center mark there. We went four and a quarter inches across and two and a half inches up. Made that as straight as possible. And then I'm gonna use a multi-tool to make that cut. You could use a Dremel or just whatever you have that will cut through this. (tool buzzes) (plastic flaps) And there's two layers of plastic, so just cut out one at a time if you don't go through all of it. (tool buzzes) (tool buzzes) (tool buzzes) And once you have both of those pieces popped out, we'll come through with a razor blade and clean up our cuts. All that's left is to get the fascia reinstalled. It's just the opposite of how we took it off. But otherwise that's gonna do it for our look at and installation of the Draw-Tite Custom Fit Trailer Hitch Receiver on our 2023 Buick Envision.

For 2023 Buick Envision. Fast delivery. Well made, installation went as described. I would have given it 5 stars, but the pictures in the instructions were too small to be of much use. Larger pictures would have made the install easier. Diagrams or pictures of which way to pull on panels to release snaps would have helped. Rather than unplug the connections, I just hung the rear bumper cover from a couple ratchet straps above the bumper to swap in the hitch. The install took like 5 hours, as I was unfamiliar. Doing it now that I've done one would be 1/2 that time.
very easy order process
great service
.
Info for this part was:
At etrailer we provide the best information available about the products we sell. We take the quality of our information seriously so that you can get the right part the first time. Let us know if anything is missing or if you have any questions.


Thank you! Your comment has been submitted successfully. You should be able to view your question/comment here within a few days.
Error submitting comment. Please try again momentarily.