


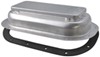
You step on your plastic floor vent and it cracks or sinks in, catching your foot or sock every time you pass. This metal replacement vent covers the opening with rolled edges that keep feet from catching and holds its shape where plastic ones fail.
Broken or sharp vent edges catch your foot or sock as you walk across them. This vent uses rolled edges around the opening. You step across it without catching on exposed edges.
Plastic vents crack or sink in after repeated use. This vent uses metal construction to maintain its shape. You step across it and the surface stays level over the opening.
Replacement vents need to match the existing cutout to install correctly. This vent fits a 4" x 10" opening. You set it in place and align it with the floor cutout.
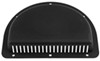
Flat openings do not guide airflow through the space. This vent uses fixed, rolled ribs angled for circulation. Air moves through the vent and into the room.
Videos are provided as a guide only. Refer to manufacturer installation instructions and specs for complete information.
Hi everybody, Andy here with etrailer. Let's take a quick look at these LaSalle Bristol RV floor vents. Now, at the time of the recording of this video, we have these offered in three different colors, brown, gray, and black, and that's how I have 'em laid out here on my tabletop. So whichever color is going to work best for the inside of your RV or camper, just take the associated part number that you see there on your screen, pop it in the search field of our website, that will take you to the color that you're looking for, and you can add that to your order. So these floor vents are designed as a simple upgrade or replacement for your standard steel or plastic vents that come in most RVs. These are gonna fit right into the existing space, so you're not gonna have to worry about complicated modifications.
Before I go any further, let me see if I can give you some measurements here. I'm gonna use my ruler here. So looking at the overall length, I hope you can see that there. Get my hand out of the way. Looks like we're sitting pretty close to about 11 1/2 inches long.
The width, right at about 5 1/2 inches wide. Looking at the cutout, about 10 inches long, it looks like. And the width, about four inches. Again, those are the cutout dimensions. Now, what makes these a bit better than the basic vents is the design of the ribs.
They're fixed and slightly angled to help direct and circulate air more efficiently throughout your RV. So it's not just a cover. These are gonna actually help improve airflow. And these are built to handle real use. The construction is sturdy enough to hold up to regular foot traffic, which is gonna be important since they're gonna be sitting right in the floor.
The edges are slightly rounded, so that's gonna give you a cleaner, more finished look, and it's gonna make it feel less harsh underfoot and less chances of the edges snagging on your sock. Visually, they're each powder-coated, so they're gonna blend in well with most RV interiors, depending on the color that you choose. And they're gonna hold up well over time without wearing down easily. But again, installation's gonna be very straightforward. This comes with pre-drilled holes, as you can see. You'll just need to supply your own hardware to get these mounted into place, and you can probably just reuse the hardware that are holding your current vents in place. But again, you are going to have these three color options. I think that's gonna wrap up our quick look today. I do hope that it was helpful for you. Again, my name is Andy. Thank you for joining me.
Info for this part was:
At etrailer we provide the best information available about the products we sell. We take the quality of our information seriously so that you can get the right part the first time. Let us know if anything is missing or if you have any questions.
















Thank you! Your comment has been submitted successfully. You should be able to view your question/comment here within a few days.
Error submitting comment. Please try again momentarily.