
Summer Starts Here - Save up to 70%
# 1
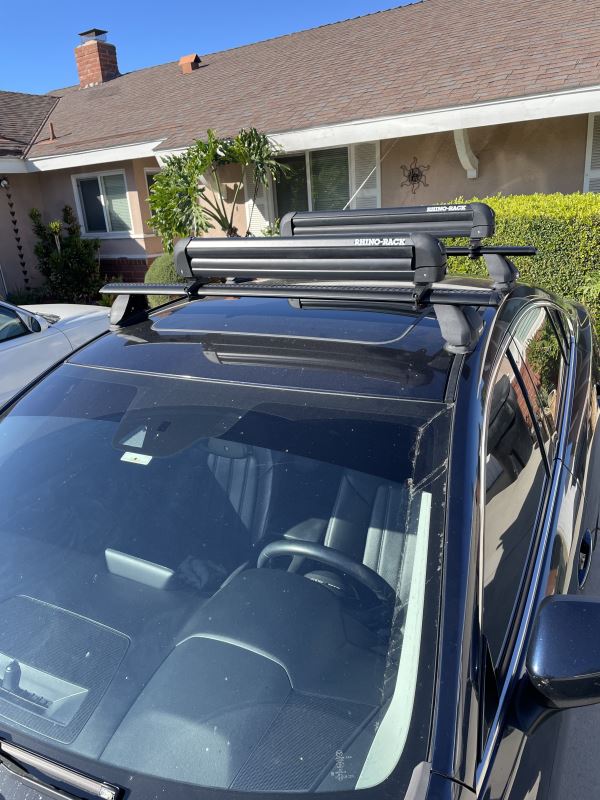
Rhino-Rack Ski and Snowboard Carrier - Locking - 6 Pairs of Skis or 4 Boards
E trailer I have a 2019 Mazda6 and purchased the rhino rack series 2500 parts (fit kit #DK289, foot pack #RRRLKVA, aero crossbars#RRVA126B-2), and the rhino rack snowboard/ski carrier #RR576. My car does have fixed mounting points underneath the strip on the roof so I opted to add them to my roof and not use the clamp for kit that goes in the door jam. Every time I entered the year, make, and model of my car, the parts came up with the clamp fit kit part #DK387 which I did not want. But after some research, I found the correct fixed mounting point fit kit. The site of course told me that this part wouldn’t fit my car but after looking at the customer reviews, I saw them used on Mazdas. All of the rhino rack instructions were not the best. We did have to make some adjustments. One of the instruction packs tells you how long you’re supposed to cut the rubber pieces that go into the crossbars based on your car but unfortunately, the measurements were wrong for my car (picture- front 166mm is wrong). The front bar length was about an inch too short and I had to add more rubber to make it longer to fit the fixed mounting points on my roof. After some time of trying to interpret the instructions, and looking up whatever available instructional videos were online, we finally finished installing them and they do look really nice. At higher speeds on the highway I can definitely hear more noise. The actual snowboard carrier is fine, fits all 4 boards fine. It is a little difficult to close once I have my boards in there because you have to push the top bar all the way down and hold it down to be able to turn the key to lock it. I’m just happy I don’t have to shove the boards in my trunk. I do like that all the parts in this series come with locks and keys. So far no problems. Overall good product.
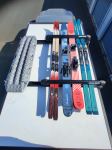
This rack works great with the four pairs of skis I lugged from Oregon to Alaska. I'm using it on the beef rack cross bars that came with my go fast camper which are very difficult to find mountings for. This one worked great though with a little bit of metal grinding on the bolts that slide into the t-slot of the rack. It locks and unlocks fairly easily (with a little bit of jangling involved), but so far so good!
Thule Roof Rack Review - 2013 Volkswagen Jetta SportWagen
Today on our 2013 Volkswagen Jetta Sportwgen, we're going to be doing a test fit of the Thule Aero Blade Roof Rack System and it's going to be part number THARB47 and the foot pack is going to be TH450R. Again that's going to be THARB47 for the Aero Blades and then the foot pack is going to be TH450R. All right really simple to put together especially if you already have that factory roof rail installed from front to back and then all you need to do is get the crossbars. On the back side here we did mount up the bottom foot pack to the backside of that bar to give us a nice reference point to place our next one. Really simple to put on. First thing we'll do is we'll take off the end cap, you just rotate that around, deep press the little piece here and pull the end caps right off. Once you have the end caps off, notice you will have your scale in here but we won't be using that for this because they are already are set. We'll remove the end cap off the 450R which will also have our tools included on it and then simply slide those on with the strap towards the inside and the tool access to the outside which is going to be that bolt right there.
Thule AeroBlade Edge Roof Rack Installation - 2011 Volkswagen Jetta SportWagen

Today on our 2011 Volkswagen Jetta Sportwagen well be test fitting the Thule Aeroblade Edge Roof Rack System for raised factory side rails, part number th7502-th7502. To begin our test fit well grab our front bar and place it onto the front part of our roof. Well find a fixed point on the side rails so that we can make sure that our feet are in line with each other. On this Jetta Sportwagen theres a line here at the front of the side rail. With our bar in place we can grab our strap, place it into the foot of our carrier and wrap it around our side rail. Youll notice that on your strap on one end you have four slots numbered one through four.
Thule AeroBlade Crossroad Roof Rack Installation - 2011 Volkswagen Jetta SportWagen

Today, on our 2011 Volkswagen Jetta SportWagen, we'll be test fitting the Thule Aeroblade Crossroad Roof Rack System, using part numbers THARB47 and TH450R. With our vehicle already equipped with the factory roof rails and our load bars already pre-assembled, we're going to go ahead and fit them to the vehicle. We'll begin by setting the front load bar on top of the vehicle. We need to go ahead and center it from left to right to ensure that the triangles on each foot are over the side rails. You do need to make sure that your load bar is square. To do this, find a fixed point on the side rails and measure to the foot with a tape measure.
Rhino Rack Vortex Aero Roof Rack Installation - 2010 Volkswagen Jetta SportWagen

Today on our 2010 Volkswagen Jetta Sport Wagon we'll be doing a test fit of the Rhino Rack SX Series Leg Kit with the Vortex Aero crossbars. These are part numbers RRSX004 and RRVA118B-2. We'll begin our test fit by placing the front crossbar onto the front of our roof. Now there's a small slot in the side rail where the parallel bars connection down to the piece which anchors to the roof. I'm going to use that as a location mark to where we're going to place the feet on both the passenger and driver side of the vehicle. Once we have the front bar in place i'm going to use the included tightening tool to tighten down the silver bolt on the inside of the bar, which will bring the two clamps together tightly around the side rail.
Thule Crossroad Roof Rack Installation - 2010 Volkswagen Jetta SportWagen

Today on this 2010 Volkswagen Jetta Sportwagon, we'll be installing a Thule Crossroads Roof Rack System. We already have our crossbar assemblies put together so we're ready to mount them up on the factory rate side rails. First, we're going to set the front crossbar into position. We're going to make sure that the bar is overhanging the feet evenly on both sides of the rack. We also need to make sure that the bar is running perpendicular to factory rate side rails so we're going to find a fixed point on our side rails and measure to the edge of the Crossroads to make sure that we're even on both sides so that we know that we're running perpendicular. One the side of the Crossroad feet, there's a small triangle that indicates the center of the foot and we want to make sure that that's pointed towards the center of our factory rate side rails.
Thule AeroBlade Crossroad Roof Rack Installation - 2010 Volkswagen Jetta SportWagen

Today on this 2010 Volkswagen Jetta Sportwagon, we're going to be installing a Thule Crossroad and AeroBlade Roof Rack System. We already have our crossbar assemblies put together and now we're ready to mount them up on our vehicle. First, we're going to install the crossbar assemblies up on top of our factory raised side rails. The Crossroad fit has a rubber coated steel band that's going to wrap around our factory raised side rails to secure a new system. Once we've laid the crossbar assembly up on top of our side rails, we need to check to make sure it's positioned correctly. We want to make sure that the overhang on either side of the Crossroad foot is even and we also want to make sure that our AeroBlade bar is running perpendicular to our factory raised side rails.
Rhino Rack SXB Roof Rack Installation - 2010 Volkswagen Jetta SportWagen

Today on this 2010 Volkswagen Jetta Sportwagon we will be installing a Rhino-Rack Roof Rack, part number SXB3. We already have our cross mounts put together, and we are ready to mount them up on top of our vehicle. This system is designed to attach to our factory raised side rails so there is not specific cross bar spread that we need to setup for. However, you may want to check the owners manual or the instructions for whatever accessories you will be using to see if they have a required cross bar spread. You need to make sure that the Rhino Rack cross bars run perpendicular to our factory raised side rails. To do this we will find a fixed point on the side rails and measure from there to the end of the clamp on the bottom of our Rhino Rack bar.


What our customers are saying:
"Very easy process, good prices and my products were shipped on time and were delivered on time. The instructional videos online helped make installation easy!"