


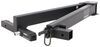
Once you add a spare and trail gear, the back of the vehicle gets crowded fast. This Pivot XD kit puts both on the swing arm so you're not unloading just to get inside and still have space for the rest of your gear.
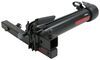
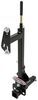
This kit combines the Pivot XD accessory hoop with MOLLE panel and the 250 mm spare tire adapter to carry trail gear and a spare tire in one place.Everything mounts to the swing arm and moves out of the way together, so tailgates and rear doors still open fully without filling the cargo area or relying on roof storage.
The MOLLE panel provides a dedicated mounting area for tools, recovery gear, and trail essentials, supporting up to 50 lbs of mounted gear.The included 250 mm spare tire adapter supports a full-size spare up to 100 lbs.Both the mounted gear and the spare count toward the Pivot XDs overall capacity, making load planning straightforward.
The spare tire adapter depth must be greater than your wheels backspacing, which is the distance from the wheels mounting flange to the inside edge of the tire.To check fit, place a straight edge across the inside of the tire and measure from the mounting flange to that edge.If your measurement is close to the adapter depth, stepping up to a deeper mount provides additional clearance between the tire and mounted gear.
Videos are provided as a guide only. Refer to manufacturer installation instructions and specs for complete information.
Hello, neighbor, this is Curt with etrailer, and today we're gonna take a look at the MOLLE panel and spare tire mount for your Kuat Pivot XD. Now this is a kit with the MOLLE panel and the tire mount. It's gonna come in three different sizes. You can get it in 150 millimeter, 200 millimeter, or 250 millimeter. And we're gonna be showing you how to measure your spare tire wheel in order to get the correct size. This is going to be a powder coated steel, so it's gonna hold up really well to the elements, and it's gonna have a 100-pound weight capacity that does not go against the weight capacity of the MOLLE panel itself.
So with those three different sizes, there is a minimum for clearance that you're going to need, but sometimes you have the option of going a little bit longer, especially if you want to create some space to use the MOLLE panel itself. So what we have on here right now is the 200 millimeter. If I was to put this on the 250 millimeter, I would get another two inches of clearance back here. That might give me room to go ahead and mount a gas can shovels tools, whatever it might be on the MOLLE panel itself. But where I'm gonna sacrifice though is the ability to use the hitch portion of it.
If I go two inches further out, there's a chance that whatever hitch accessory I'm using isn't going to work. And specifically, I'm thinking about things like bike racks, mainly because you got a certain distance of the bike, the bike pedals, the handlebars, things like that that you're gonna have to take into account. So just double-check your measurements and make sure that you're gonna be able to utilize that space as best you can. Now for installation, what I would recommend that you do first is go ahead and open up the arm to your Pivot XD. It's just gonna be a lot easier to manage from there.
And also, always double-check your hardware, make sure you've got everything. So what you're gonna end up with provided from Kuat is going to be an 18 millimeter wrench. We're gonna get this hex tool, three different bolts. Two of them are longer than the other. We'll have five washers and two nuts to go along with it.
Now a couple of tools that you'll want to provide on your own just to make installation go a lot easier would be an 18 millimeter socket as well as a torque wrench because there is a specific torque spec in your instructions in order to get your MOLLE panel on securely. So with all that being said, we're just gonna go ahead and take our MOLLE panel, and what we'll find at the top of our swing arm are these three separate holes for our bolts. So as we lift up our MOLLE panel, we're just gonna bring this around the front, like this, get it on the arm, and get those bolt holes lined up. Now with our bolt holes lined up, we're gonna take the two bolts that are longer along with a washer for each of them, and I'm gonna go ahead and drop those right through. Now this one here, because there's not any clearance with this, you're gonna wanna set the washer down first and then drop your bolt through. And we're gonna finish up each of these bolts with a washer and a nut. Now I'm gonna go ahead and get these tightened up, and I'm gonna do that with the Allen key or the hex key, and I'm gonna try to hold it in place with this wrench down here. If this doesn't work, like I said, the socket is a bit easier, in my opinion, to use, but this will do a good job of getting it started. (ratchet cranking) Now the socket that I had originally picked out, there's a lot of exposed bolt under here as you put it through, so I went ahead and switched to a longer socket. So just a heads up on that, a longer socket's definitely gonna be a better application for this installation. (ratchet cranking) Now our shorter bolt is going to go through up from the bottom, and there's already a pre threaded nut in there for us so we don't have to cap it off at the other end. So we're gonna take our last washer, feed it up, and we're just start, gonna start getting it threaded into place here. Now, once I get it hand tight, I'm gonna go ahead and grab my hex tool and get that finished up. Now once you got 'em tightened down, grab your instructions and double-check your torque spec, grab your torque wrench, and get them tightened down completely. You're gonna need to put in the hex key up at the top to hold these in place. So I'm just using the MOLLE panel itself to kind of brace it. (torque wrench beeping) And as far as this solo bolt over here goes, you're gonna wanna get a 10 millimeter hex bit for your torque wrench in order to get that torqued down to spec. So that just about does it for putting that on our Pivot XD. I'm gonna go ahead and pull our safety pin, we'll get this shut. And just for planning, this is gonna end up giving us a pretty good idea of what kind of visibility and stuff we're gonna have coming out with this MOLLE panel on. Of course, depending on what you're putting on it, it could change some of the visibility back here. And depending on the vehicle as well, but this gives you a pretty good idea of what everything looks like empty. So it's pretty simple to install that tire mount onto your MOLLE panel. We're gonna walk you through that process right now. Now before doing anything, you need to figure out which size of tire mount that you are going to need. And there are three different sizes. We've got 150 millimeter, or 5.9 inches, 200 millimeter, or 7.8 inches, and we've got 250 millimeter, which is going to be 9.8 inches. And that size is in reference to how much recess we have in our wheel right here. So if you take out your spare and you lay it face down to where the backside of the tire is facing up, what you'll wanna do is just get something really flat, a board, you know, anything that's flat and straight enough to go across here, and you're just gonna measure from that mounting plate to that spot. We're right at seven inches. So for this, I'm just gonna keep it as close as possible to the vehicle, and I'm going to go ahead and use the 200 millimeter. This is about the bare minimum size that I'm gonna get for this. So next thing I wanna do is determine my bolt pattern. In which case, right now, I'm gonna kind of determine which is the best alignment to use three studs in order to get this up. So I'm gonna maneuver this around until I find a way to use three of the bolt holes. Now it's easiest if you line up this kinda lone long slotted one up here first and then twist it around until you find the other two, because ideally what you want to do is have these studs set up in a triangle fashion rather than, you know, three on the top. So with your holes identified, go ahead and grab your bolt, washer, and nut. Now there are two different hardware packages that you get in your kit. The longer of the bolts is going to be the studs on here. So that's what we're using here along with that washer and nut. And we're just going to take the washer and the bolt, drop it into that remaining hole. Now at this point, we're just getting the hole identified. I'm gonna go ahead and take this off and turn it over. So you'll see, we already have two installed. We're gonna go ahead and take our nut and hand-thread it down on the bolt. And once it gets into this recess here, it's gonna hold it steady for us so that we can get it tightened up from the top. And this is a huge help because what we really wanna make sure that we're doing is getting this centered in the holes of the wheel. We don't really want this, you know, we just wanna make sure that we guarantee every time we take this heavy tire on and off of here, we wanna make sure we're not gonna have any trouble getting it to fit. So going off the center of the holes in the wheel is gonna be the best way to do that. So I'm gonna get it here. I'm just gonna drop it down. And as you can see, I'm threading it or tightening it up from the bottom but it's holding the stud in place. And I'm gonna get this to the point where it's snug, but I could still move it back and forth, so I can get it centered in that hole. All right, so we're just gonna get that back in here. Make sure we're centered up on these two holes that we set. And then we're gonna make sure that our floating one here does the same. So I'm gonna, that's one edge, that's the other edge. I'm just gonna get it right in the middle and I'm gonna tighten it up a little bit so that it's not gonna move on us. And now I can pull it right out, and we've got our spacing set. And before we get it mounted up onto the MOLLE panel, we just want to make sure that we got these tightened down as much as possible. So we're gonna use our included hex tool and just work these completely tight. We just don't want them accidentally being knocked off center 'cause if we're gonna lift up this heavy tire and get it up there and it's not quite fitting the way we want it to, we're gonna be pretty upset about that. The mounting plate here is at a slight slant. We wanna make sure that it's slanted and tilted, so that the top of the tire is leaning toward the back of the vehicle. So that is where we've got our solo stud up top there. And we're gonna mount these on using those shorter bolts, the nuts along with those, and the washers. So the first thing that I'm going to wanna do is put this in here through the top, follow it in the back by the washer and nut, and we're gonna do that on all four mounting points. Now truth be told, the easiest way to get this mounted on your MOLLE panel is to have the MOLLE panel removed. If you're going to mount it while it's still on your Pivot XD, you're gonna need an extra set of hands to keep everything steady while you do it. So I had my friend, Sam, come over and help hold this down. I got some of my bolts tightened up. In order to do that, we took our included hex. And while they give you a 17 millimeter wrench, I find it a lot easier to do this if you have your own 17 millimeter socket, added to the fact that there is a torque spec for all of these bolts. So double-check your instructions from Kuat and make sure that they are torqued down to the appropriate spec. (ratchet cranking) And for these bolts, you'll need your Allen key as leverage. (torque wrench beeping) And once everything is tightened down, we're ready to go ahead and grab our tire and get it mounted. And finally, you're going to get three different lug nuts here with your kit, and we're just gonna make sure those are cone facing in toward the wheel and get those tightened up as well. This is where your 21 millimeter wrench that is included in your kit is gonna come in handy. This has a torque spec as well. So double-check your instructions for that torque spec and get these torqued down accordingly too. Cool thing about this wrench is it's pretty small. It's gonna be easy to keep in your glove box on the occasion that you might actually need to get this off and replace one of your tires. Now with everything tightened down, I always like to give things a bit of a shake test. And there is nothing loose or rattling anywhere, not from our MOLLE panel, not from our mount, not from our tire. The only movement we're getting is from the entire back of the vehicle itself. And I always like to kind of test it out and pop it open too, just kind of get a feel for what kind of added weight it's giving. But this is coming out very, very smoothly. And even with this weight on it, it's not doing anything to droop or dip down or Pivot XD. This looks like a really good tight fit. And that was a look at the MOLLE panel with the spare tire mount for your Kuat Pivot XD. I'm Curt with etrailer. Thanks for stopping by.
Info for this part was:
At etrailer we provide the best information available about the products we sell. We take the quality of our information seriously so that you can get the right part the first time. Let us know if anything is missing or if you have any questions.













Thank you! Your comment has been submitted successfully. You should be able to view your question/comment here within a few days.
Error submitting comment. Please try again momentarily.