
Roadmaster Direct-Connect Base Plate Kit - Removable Arms


To see if this custom-fit item will work for you please tell us what vehicle you'll use it with.



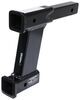
This setup keeps your vehicle’s front end looking tidy when you’re not towing. The direct-connect brackets mount on the frame and sit farther back than standard brackets, creating a clean, low-profile look with no obtrusive crossbar. Once the drawbars are removed, the remaining brackets are virtually invisible and protected within the grille area. It’s a design that stays out of sight and out of the way.
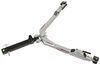
The removable arms make connecting your tow bar quick and easy. Each arm inserts into the bracket, twists to lock in place, and clicks securely so you know it’s ready to go. When it’s time to unhook, built-in pull rings let you unlock the arms with a simple tug, twist, and remove. It’s a simple connection system that takes the hassle out of lining things up every time you tow.
You can count on this base plate kit to handle long hauls without worry. The computer-cut, all-steel construction provides exceptional strength, while a black powder coat finish adds corrosion resistance for long-term durability. The design spreads towing forces evenly through the frame, giving you a solid foundation for safe and reliable towing.
No welding is needed—this system is built for a simple bolt-on installation using your vehicle’s frame mounting points. It comes complete with installation instructions and hardware so you can get everything set up without hunting for extra parts. Once installed, it’s ready to pair directly with your Roadmaster motor-home-mounted tow bar for a secure connection every trip.

Videos are provided as a guide only. Refer to manufacturer installation instructions and specs for complete information.
Hey, neighbors, Kevin here with etrailer. And today we're gonna be taking a look at and showing you how to install the Roadmaster direct-connect base plate kit here on our 2025 Ram 1500. So when it comes to flat towing, there's gonna be five main components that you're gonna need to do so. And the first one's gonna be your tow bar and the second one will be your base plate. And those two components are gonna make up our physical connection between our motorhome and then our towed vehicle. Along with that, we'll also need some safety cables so that if there ever was an issue with our tow bar or base plate, we had a breakaway situation, then we have another set of cables that are gonna pull on this and prevent our vehicle from just taking off by itself down the road.
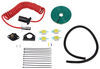
Along with that, we'll also need to have some diode wiring so that way it can transfer our light signals from the motorhome back to the taillights on our towed vehicle. And then finally, we will need a supplemental braking system so that way it'll stop the brakes in our vehicle as we're making those stops in our motorhome and we're not gonna put all that stress over on the motorhome. So taking a closer look at our base plate, this is going to be that direct-connect style from Roadmaster. So if your tow bar is a different brand or you just don't have the direct-connect style, maybe you have the crossbar style, you got a older tow bar, then you are gonna make sure that you're either switching over to a newer tow bar or you're picking up the correct adapter so that you can make that connection. Our neighbor today has an etrailer tow bar, which he actually has on the back of the vehicle right now, but he's already got those connectors because this is the second vehicle he's gonna be flat towing, so we didn't have to put as much into this install because he already kind of had some of the components already in place.
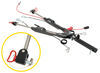
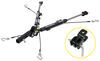
Now the cool thing about this one is it's gonna come with a bracket on either side. So on this side, you'd have a bracket for your six-pole socket to go into. And then over on that other side, they have another bracket that's set in a little bit more so that it can have the breakaway switch sit just where it needs to and be mounted up nice and tight. When putting in our tow bar, we would put that connection right up. There's gonna be a pin and clip that'll go right through here, clip going through here to lock that pin in place.
And then over on this side, we're gonna have our safety chain loop. So we'll have one of these on both sides, and it's sitting out pretty far so it's gonna be really easy to connect to. So there shouldn't be any issues or interference, even though we do have our six-pole socket pretty close. As far as installation and removal of the arms, it's very simple. You just pull back on that pin, you'll twist it 90 degrees, and you can pull it right out.
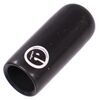
We can set 'em aside, that way we don't have these out there for you to hit your knees on or your shins on when you're walking in front of a vehicle, or just out in the weather getting all rusted up. There's also some caps that you can get Roadmaster offers that'll cover up the inside here so that way you don't get any water inside just sitting inside that tube, rusting it out. When you are ready to tow, installation's as simple as just putting it in with the back portion kind of sitting horizontal. With our pin up, we'll push it up, turn it, and you can hear it locks right into place. As far as installation goes, this one can be a little bit challenging. The bumper, we had a few issues with. The studs that run through it that actually attach the bumper to the frame rails are just held in with a sort of star washer that got really loose. So every time we we inchesre trying to put the bumper back up, we we inchesre noticing that we were about 1/2 inch off with our studs and we couldn't get it back into the frame rail. After a little bit of investigating, we determined that it was those bolts just sliding down in the slot. So you may end up having that same issue. We talk about it a little bit during our install, but you'll definitely wanna check those out once you pull the bumper off. The only other thing that's kind of challenging really is also that you're gonna be cutting a small portion of the bumper out on the metal frame that's on the backside here. And there's a wire harness that's pretty close to it, so you are gonna have to be very careful when you're making those cuts. So because of that, if you don't really feel like this is something that you're up to the task to do, then please feel free to use our dealer locator and you can enter in your zip code and find a shop near you. They can get it professionally installed. Now if you are gonna do it, stick around, and I'll show you how I got this base plate put in. Starting off our install, we're gonna have three bolts we're gonna need to remove from the wheel well liner here. This is this plastic trim piece that just at the front here, there'll be these three, and then there's another two over on the other side, which we'll get from under the vehicle. And in the instructions, they say it's gonna be a 10 millimeter socket, but we found with ours, it's a eight millimeter instead. That might just be a trim package deal. This one is a big horn. So maybe that has just a slightly different fascia here. (ratchet cranking) And the two others on the inside are right here. Pull these two out. (ratchet cranking) (trim panel clacking) And with all five screws out, we can now remove our trim panel. All right, now we'll remove this wire harness. And to do so, we'll pry back on this little red tab. We'll press down on this black tab here and then we'll be able to lift this collar up. And with that up, we should be able to disconnect our harness. There we go. And then we're gonna repeat this process over on our passenger side as well. The harness on the other side was a little bit easier. It didn't have this white clip with it. It was just a pop out and then depress to pop the harness out. Next, we're gonna remove the nuts that attach our frame to our bumper. So in the instructions, they said there's gonna be four. Ours only has three. So one here up top and then up top over here. Now the inner one, I've already tried or taken off the ones on the passenger side. That inner one up top is gonna be a hassle just because there's not really a lot of room to get in there. So I ended up using an 18 millimeter socket on the outside ones. And then that inside one, I had to switch over and use a ratcheting wrench. And I'm not gonna lie, it is hard to get off, so you'll have to put some muscle behind it to get that one out. Now, for these outer ones, I did use an extension, and I'm coming between the fascia and the front of our wheel so that I can get to 'em. (ratchet cranking) (ratchet cranking) (metal clacking) (ratchet cranking) So there's gonna be nine screws that we're gonna remove from the wheel well. So right here at our exterior here. And then there's gonna be a few more on the inside. So I found two more right back. There's one right above the tire here towards the back right at the center, and then a second one hidden over here towards the front. And then there's these Christmas tree push pins. I found three of those as well. So one here, one at the front that's attaching to a cross beam. And then a third one back here. Where was it Right here. So we're gonna pop all of that out, that way we can remove our wheel well liner. (drill whirring) (drill whirring) Not really anything sturdy to pry against here, so I'll have to keep working this back and forth. (push pin fastener popping) There we go. Forgot to mention this one as well. Right down here at the bottom is another one of these push pins that we'll need to pry out. See if I can get under it. (push pin fastener popping) Now with all of our fasteners out, we can pull out the whole wheel well liner here. (wheel well liner popping) And we'll set that aside. Now that we have everything off, we can pull out our bumper. You just wanna pull straight out. And just be careful, you might find you might have some harness or something still in the way. All good Co-worker Yep. All right, so we can set this aside. Next, we're gonna need to remove our valence. And to do so, we will pop out our wire harness for it. It's gonna be a little push tab, and you'll press it in once you have that tab pushed up. And we're gonna have to pop out the plugs for it as well so that way we can slide in our base plate. (metal clacking) And once that's loose, we'll just leave that hanging. On the other side of this, there's gonna be two nuts that we're gonna remove from both sides, and then that will allow us to fully remove the valence. So here are those two nuts I was talking about. We'll remove both those from both sides and then we can drop this down. (metal clacking) (drill whirring) (metal clacking) Now we're gonna come back over to our front bumper and we're gonna removing this lower air dam right here, and there's gonna be 14 screws. There are some bigger ones for the braces. We're not touching those ones yet. So just these smaller guys, there'll be, you know, seven as you lead up to the halfway point, and then another seven running down the other side. And that's gonna be a 10 millimeter socket. (drill whirring) (drill whirring) Now we can wiggle this free. There are a few clips too, so you'll have to compress 'em. It's just a straight shot with two little tabs sticking out, one going that way, one going that way. So if we press in on that, should be able to sneak it through. (plastic popping) There we go. For our next step, we're gonna be removing this brace that's right here. They tell you it's two 10 millimeter socket nuts here, but it's actually 1/2 inch on ours. And then on the front here, you're gonna have two push pins you're gonna need to remove, and that's gonna reveal two Torx bit screws right there. And that's gonna be a T40. And then there's another one up top right here. So we'll get all that popped out and we can remove our brace. (ratchet cranking) (drill whirring) (drill whirring) And we're just gonna repeat this process over on our other braces. Well now at the braces removed, we are going to put those clips back in that we just took out right here. So one and two on both sides. And then we're also going to reattach that lower trim panel. So all 14 of those nuts, these little black ones that we have, we're gonna be putting those right back on. So I'll get started on that, push that in. Now you won't be using those Torx bits again just 'cause there's, obviously, nothing to actually drill into, and the other larger nuts that we inchesre right here. You will wanna hang onto this though. If for any reason, you go to sell the vehicle later on and you don't wanna have it set up the flat tow, you wanna remove the base plate, then you'll want to have those braces to put back in. So for the next step, we're gonna be getting our wire harness flipped around to the other side here. This one's a little bit different than the instructions. They're saying there's gonna be eight of these, but we've got extra ones, we've got an extra two, and those are already facing in. So all we're gonna do is get these 1, 2, 3, 4 in the middle here, and then one on either side, and we'll flip those on the inside. Pry that out. So this one is way too tight, like, I can't really get this back around to clip into there. So what we're gonna do is just use a zip tie. I'm gonna get it as far back as I can. And we will use the zip tie to help hold that in place behind our bumper here. (zip tie cranking) Now, we're gonna measure over from the center of our bumper. We wanna be at 16 inches. So I'm gonna pull that up a little bit higher, right there. We'll take a paint marker right at that 16, and then we're gonna go another six inches from there. So right here. And we're gonna do a half inch cut. Should be pretty small here. So looks like we're pretty much right there with that mark. Maybe even a little bit over right there. So we'll calm down just slightly. Then we'll check this side, right there. My paint marker's a little too thick for this. There we go. And we're gonna cut this all the way down. And now there is a wire harness in the way. You'll wanna pop that out, just the two prongs that were already sticking in that we didn't have to flip already. And we're gonna cut around that and notch out this little piece because our base plate's gonna have to stick through here through our tow hook hole. (angle grinder whirring) (angle grinder whirring) All right, now we've got both sides cut out. I sprayed a little bit of black spray paint over this too to help protect the metal. And once we have both sides done, then we're gonna come over and take out our cover for our tow hook. And to do so, I'm just using a little pick. I'm gonna pray up a little bit. We're gonna press down on this gray tab and then that'll allow us to push out this piece, which is also kind of pinched by the cover itself. There we go. Now on these tabs, these are a little bit stiffer. So what I had to do was use a little right angle pick, and it's got more of a triangle shape where it's slanted down, and that's where it's biting onto this cover here. So what I did was I got my pick in and I took it up to that top side, to the slanted portion of it. And then now that we have a little bit of a gap, I can take my flat head, try and push it through. We can also pry up too. And we'll just keep doing that with the other two. And we're gonna get both our passenger and our driver's side off. Now back at our vehicle, we're gonna be marking up the holes that we're gonna drill through the framing rail with. And when you're looking at your base plate, you're gonna want it so that the portion that's mounting up to the frame is angled outwards. So this is gonna be our driver's side. (metal clacking) And it will pop right up into place. (metal clacking) Now on this side, I did remove this just to give us a little bit more room that was mounted right there. Technically, it wouldn't really be in your way, but just so that we can see better with our camera felt that'd be better to get out. We'll just paint marker that up. And we're gonna be drilling a 9/16 hole. So I'm gonna start out real small here, and work my way up just to make this process a little bit easier. (metal clacking) I won't be getting the inside as well. It's gonna be a little bit harder to get my paint marker in there. (drill whirring) (drill whirring) (drill whirring) (drill whirring) All right, so now right now I'm drilling through to that other hole so that way we can mark it out and have our center, and then we can usually smaller bit, go all the way through, and then get it. Because this is a really tight area on the other side, there'd be no way for me to get my drill in on this back hole. So now that I have my center marked, I'm gonna be using a smaller bit. That way I can punch through and then we'll work our way back up. (drill whirring) (drill whirring) (drill whirring) (drill whirring) Now that I have both holes drilled out, I'm gonna spray some black spray paint on our exposed metal just to help protect the frame. And while that's drying, I'm gonna go and drill out the passenger's side as well. (spray paint hissing) Now we have our hole cut out, we can get our hardware ready so we can mount up the base plate. And before we get it up there, we're gonna wanna put a little bit of red Loctite on here. And then we will have a washer. This will slide through our frame and our base plate. And then when it comes out on the other side, we're gonna have a flat washer, a split lock washer, and then a nut to finish it off. So lift up in place, (metal clacking) set a bolt through. And then like I said, flat washer, split lock washer, and then a nut. And we're gonna not tighten these down just yet. If you want to get it just a little snug by hand, that's fine. (metal clacking) Next, we'll be taking these bolts right here. They're more of a gold color and they've got a shoulder on 'em. And these are gonna be running up into the weld nut that's in the frame right here. And we're gonna be doing a split lock washer and then a flat washer with that. And before I forget, we're gonna run some red Loctite up that and thread it in. All right, so once you have both sides ready, we don't have it torqued down or anything, tighten down anything like that yet, just hand tight. We're gonna put on our cross brace. And you definitely wanna have a little bit of wiggle room because it's not gonna wanna fully meet up. You might have to kind of pry in on it so that you can get both holes to match up here. But I'm gonna get my hardware ready because this is actually gonna sit on the bottom. So I'm gonna have to hold this up while trying to get all the hardware in. So it's going to be our smaller bolts, the 1/2 inch ones. We're gonna put a washer on it, and it's gonna go face down. And then we're gonna have another flat washer, a split lock washer, and then a nut. So let's get this ready, tuck that in. (metal clacking) Flat washer. And we are also using some more red Loctite on here. And right now, I've got the other side leaning up on the top just to help hold it. So if you look, you got it sitting up over there. We'll leave that loose so that we can push this other bolt through. (metal clacking) And like I said, I'm just slightly off here. (metal clacking) Yeah, it looks like we're like 1/16. So I need to kind of pull over a bit. (metal clacking) Whew! Okay, good. Lock washer, split lock, and then our nut. (metal clacking) So now that we have everything installed, we will tort down all of our hardware. I am going to start with the ones going vertical into our weld nut. And then I'm gonna move over to our pass-through bolts that go through the frame, and then we can finally do that cross member. And the torque settings for all of this hardware is gonna be listed on the final page of your instructions. (torque wrench cranking) (torque wrench beeping) If you don't have a torque wrench at home, then we also have one here for you as well that you can pick up. Or if you go to your local auto parts store, they'll typically have a rental program where you can just rent one out for free. You typically just have to put a safety deposit down. That way they can make sure they get the tool back. (torque wrench cranking) (torque wrench beeping) (torque wrench cranking) (torque wrench beeping) All right, now we have everything torqued down, we can reinstall any wiring that we've popped off. So like I took this guy out, the little push pin, we'll pop that back into place. Our wiring for our valence is gonna be a little bit different just because the spot where that was plugging into is no longer there. So once I get the valence back up on here, we'll see how we can secure this and make it sit nice and tight. Maybe we will zip tight to our base plate here. But let's get this up in place and we'll just reinstall those four flange nuts that we took off. (metal clacking) That side. There we go. (metal clacking) (ratchet cranking) All right, make sure that when you reinstall your valence that you're reinstalling that harness as well. And I was wrong. I could have swore that we we inchesre blocked, but we do have a hole right here and right here for those push pins to go right back in for the valence wire harness. So should be good to go without having to make any special alterations. Now with an next set of hands, we will reinstall our bumper. This is gonna go just straight on with our base plate sticking out through our tow hook. The bumper was fighting us quite a bit because those bolts that run through into the frame rail that had the three nuts on each side, they're held in with just a tiny little clip, and that clip kept allowing it to drop down 'cause it was too loose inside that hole. So every time we'd go to put the bumper on, we we inchesre about a half inch too short. So if you start to notice this isn't wanting to fit back on right, check those bolts because that little clip holding the bolt in is probably loose and it's allowing that bolt to drop down in the slot, and then it's not gonna line up with the hole in our frame rail, and that's gonna cause a whole lot of frustration when you're trying to put this back on. So what we did was we took a, so it's kind of like a little split lock clip or washer almost. And what we did was just use a flathead screwdriver to kind of try and twist it more on just 'cause it's running up the threads of the bolt. And then from there, we also used some painter's tape to help make sure that it was gonna stay in place as we go to put this back on. But with all that being said, once you do finally have this back on, then you can get under there, put those three nuts on on each side and tighten it back down. I do need to install the six pole mounting bracket. So we will bend this down 90 degrees. So putting in a device, so if you have pliers, you can probably work this down. And we'll just keep going. So we have that at 90. And for this it's gonna have some hardware, you'll have a little bolt, a flat washer, another flat washer, and then a nyloc nut. And we are going to place it with the bolt side down, or like bolthead up, so I should say. Throw on our flat washer. And this has a slot to it so you'll be able to kind of adjust it out if you need to. Maybe it's in your way if you have it in too tight to where it's blocking your safety chains. So if you need to, you can always adjust it just by loosening that up and then sliding it back and forth. And they have you bend this, but that immediately strips all the paint off. So I'm gonna come back with a paint marker and touch that all up. (ratchet cranking) And this looks like it's probably gonna also interfere with the boot on our six-pole plug. So I think I'm gonna come back and just notch that off as well with our grinder. That way we can not have any interference. So that way when we stick our plug in, it's gonna go straight in with no problem. And if you wanna keep it matchy-matchy, take that paint marker and kind of go over the hardware they give you too. Now that we have our bracket on, our bumper's on, it's all tightened down, everything's good to go, we can get back to putting in the wheel well liners and then that first trim piece that we took out. So everything just back in reverse order. Well I think that does it for our look at and installation of the Roadmaster direct-connect base plate kit here on our 2025 Ram 1500. My name's Kevin. And if you still have questions about what's the best base plate for your Ram 1500, please feel free to reach out to us via our asked the experts link, a comment on this video, or a phone call to our customer service department, we'd be happy to help you out on your journey.
Customer Satisfaction Score:
85% were satisfied with this product
15% of customers were not satisfied
Ratings & Reviews

The folks at etrailer are fantastic. I didn't know everything I needed to tow my car behind our RV... but they did! Everything I needed was in the boxes and the videos made it all come together. Thank you to everyone at etrailer!
Excellent base plate, just as my wife requested, she didn’t want too much metal visible in front of the bumper. Installation instructions were a bit confusing for me, but I’ll clarify, for me.
Very fast shipping, and the install was easy. Great product
2002 Honda CR-V. Easy to install. Two and a half hours, and stopped to eat a sandwich. To install the spacers inside the roll frame on the car I used an extension magnet to reach in there and position them. As you can see NO cutting was needed on the bumper cover!
Now I have to figure out the easiest way to run the wiring for the lights.
Thanks Lauren A for your help!
I installed this base plate on a 2018 Miata RF. I think I recall something about it taking 3.5 hours and my initial estimate was 3.5 days. It actually took a bit longer than that, but I was not pushing myself and did not have the luxury of having the vehicle on a lift but had it up on two ramps for the front wheels.
The order came pretty quickly, probably about 4 or 5 days between the time I placed it and UPS delivered it. The parts were well packaged and it came with a printed set of instructions. I had watched the video install on another Miata and if it weren't for that I'm not sure I would have tried it. I'm not a pro mechanic by any means but have worked on my own vehicles now for over 40 years. And I'm not a spring chicken either, so all the up and down working on the car can tire me fairly quickly. But if you are not in a rush and go carefully it can be done.
It took a day to do most of the disassembly. I removed both headlights and the intake tube on the passenger side. That tube came out much easier then it went back in.
The next day I got the baseplate mounted which helped to start visualizing how it all would work. All of the holes for the 6mm bolts did not quite line up with the holes in the frame. I had to file one sides worth for a bit of extra clearance. From my experience on this install you really want to leave all the bolt on the loose side till you get everything situated.
A couple of days off for rain and the then I got to work on the bracing. Initially I though I didnt need to cut the top lip of the frame but I decided to go ahead and do it anyway since that part didnt seem to sit flat when bolted from the back end. I'm still not sure its really necessary as the hump clears the metal lip without cutting it.
I also ordered a 14" long 1/2" drill bit to cut the holes in the frame. It was a Bosch bit, wasnt very expensive and it went through the metal like the proverbial hot knife. I managed to get all the big bolts installed in a day with a great sense of satisfaction.
The next day I torqued down all the bolts and the mount felt very solid. They stress that you need to install all the bolts, but honestly I can't see the 6mm bolts doing much compared to the half inch bolts that do most or all of the work. But I put them in and tightened them all the same.
A couple of days spent to install the tail light wiring and then I got back on to putting the front clip back on. My car must have had an aftermarket grill since it did not match the pictures or the video. I tried to position it carefully to see where the parts that were going to stick out would be so I didnt cut out more than I needed to. So there was a good amount of back and forth, cut and fit. In the end I had to make some extra cuts for clearance for the safety cable tabs as well as the mount for the 6 wire connector. Until I made the extra cuts the lower part of the front clip would not seat correctly. Getting the clip in the right position so it fits under the lights also takes some finagling.
Figuring out where all the bolts go back in can be interesting. Take pictures where you can. Dont be too aggressive when working with plastic parts. Overall I'm satisfied with the install, but I have yet to try and hook it up to tow.
The Roadmaster Direct-Connect Base Plate Kit has performed flawlessly over the past year. With almost 10k miles logged during our 3 month trip across the US, the components have remained as installed and operated as expected.
I really like the way it is hidden and doesn't stick out like a sore thumb. My Rubicon X has a metal skid under the bumper that I cut holes in for the base plate tabs to protrude. I made 5 or 6 trips to my shop to get it right. Would be nice if it came with a paper template showing where to trim. It bolted up perfectly and seems well made.
Great Base plate, had to modify the non-oem bumper a little to get the clearance needed to get mounting holes lined up. Once that was done, everything went pretty quickly finished and tested. Towed 600 miles and worked flawlessly. Much better than using the bumper tow points, as they were elevated causing a very bouncy towed on bridge aprons. Bumper tow points also let the towed have minor side to side movement, this does not, so a lot better towing experience.
The product is great - I gave 4 vs 5 stars only because I had to drill the rear holes out as they did not align with the holes in my frame and I had to drill out the hole in the bracket to align with my frame extension hole, again bracket did not align with the existing hole. However, in general it appears to be a solid mount.
It’s a super strong and wonderfully engineered addition to my new Maverick pickup.. Couldn’t be happier with it!!!!! Well done!!!!
I have lots of issues with this tow bar. Initial installation was difficult due to a tight fit. Had to have my mechanic cut holes in frame to get bolts attached. After a few times of use the bolts failed causing the bar to fall fwd that then damaged my hitch arms. To fix I drilled new hole through bar and frame securing it with a #8 bolt. To reinforce it I used turnbuckles attached to my bumper. last tow finally went well.
I bought and installed this tow plate one year ago on my 2013 Jeep Wrangler. I bought this particular plate due to the jeep having a Barricade off-road bumper. This plate attaches a bit lower than other plates and prevented having to modify the bumper. Installation was easy involving only hand tools. The plate comes with all needed bolts and attachments. I have towed this Jeep several thousand miles behind my RV with absolutely no issues. As an aside, I use a Roadmaster Night Hawk tow bar which is also an excellent product. Both are expensive, but I believe cheaping-out on safety is no a good idea. I highly recommend this product.
2017 f150
Customer service was very helpful. Easy to install. No bumper or grill cutting however, you do loose your front hooks. Nice low profile.
This works perfect with my Roadmaster tow bar. It was a little difficult to install since I had to remove the front end of the Trailblazer, but with the good directions that came with it and some you tube videos made the installation easier.
Pathetic and just talking to Noah he states he will get to my issue later when he has time!! My car is on jacks all torn apart and I think Roadmaster gas misled advertising. This 523228-5 baseplate is NOT MADE FOR 2026 CHEVY TRAX!!!
It mounted up just as the instructions said it would. From previous research I was not surprised when some of the mounting did not align perfectly. Had to use a dremel tool to make it work. The product looks very sturdy from its design. I’m happy with it and look forward to RV traveling.
Awesome instructions! Install was fairly easy. Product is very high quality and solid construction. Thank you E Trailer!
Easy to install needed to replace some fasteners as they broke removing front grill was able to get them from Amazon cheap
This Road Master Direct connect base plate works perfectly for a 2020 ford transit cargo 250! Awesome service from etrailer as usual! The finished product can barely be seen through the front fascia!
Etrailer comes through again! This was a great savings as a used kit, but it was even better than the description online. I have installed (4) baseplates on and etrailer.com has given me great videos to watch and good instructions to follow. Couldn't be more pleased with the quality, service and delivery times.
Had these installed at Lester’s Automotive in Boerne,Texas…First class service all the way. Paul and his crew worked through lunch for over 4 hours to install these on our 2026 Ford Ranger. Also ran the wire and hooked up my auxiliary tow lights. The price for this was very reasonable and would highly recommend them for all r.v. needs even if not real close to the Boerne area. R.V park within reasonable distance if needed.
Great service and comunications
Do you have a question about this Tow Bar Base Plate?
Info for this part was:
At etrailer we provide the best information available about the products we sell. We take the quality of our information seriously so that you can get the right part the first time. Let us know if anything is missing or if you have any questions.





















Thank you! Your comment has been submitted successfully. You should be able to view your question/comment here within a few days.
Error submitting comment. Please try again momentarily.