


To see if this custom-fit item will work for you please tell us what vehicle you'll use it with.


Thank you! Your comment has been submitted successfully. You should be able to view your question/comment here within a few days.
Error submitting comment. Please try again momentarily.


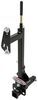
When you’re not towing, this setup blends right in. The streamlined design eliminates the need for a quick-disconnect crossbar and keeps the brackets virtually invisible once the arms are removed. The remaining mounts sit tucked back within the grille where they stay protected from scrapes and scuffs. It keeps your vehicle looking clean and uncluttered when you’re driving around town.
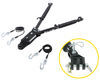
The removable drawbars slide into the brackets and lock into place with a simple twist. When it’s time to disconnect, just pull the built-in ring to release the pin, twist again, and remove each arm. It’s a fast, no-tools routine that makes hooking up or unhooking a one-person job whether you’re at the campsite or your driveway.
Each bracket is computer-cut from all-steel components for exceptional strength. The black powder-coat finish stands up against corrosion and road debris mile after mile. Bolting directly to the frame spreads towing forces evenly through solid mounting points—no welding required—so you get a durable connection you can count on for long hauls.
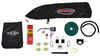
This kit comes ready for installation with instructions and all mounting hardware included. The custom base plates are designed for a precise fit to your vehicle’s frame, keeping alignment correct and reducing guesswork during setup. Once bolted on and aligned, you’re ready to connect to any Roadmaster motor-home-mounted tow bar—such as the Nighthawk, Sterling, Blackhawk, Blackhawk 2, Falcon, or Falcon 2—for a seamless towing experience.

Videos are provided as a guide only. Refer to manufacturer installation instructions and specs for complete information.
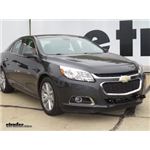
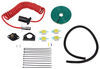
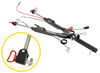
Today on our 2014 Chevrolet Malibu we're going to be taking a look at an installing the Roadmaster EZ5 Base Plate Kit with Removable Arms, part number RM-523178-5. Here's what this base plate is going to look like once it's installed on the vehicle. As you can see it maintains a very nice clean look on the front. All you're really able to see that stands out is these safety chain connections points here and they don't come out very far past the fascia here. Everything is going to stay pretty well hidden when it's not in use. You've got your two mounting rods for your electrical connection here in order to operate the vehicle's lights.
Here tucked back in the fascia is where you'll see the mounting tabs for the removable arms. What's really nice about this base place is that it is so well hidden and so low profile against the front of the vehicle, as opposed to some of the other options available for it. What I like most about this is it features these removable arms so whenever you're ready to use it, you can take these arms, slide them into place until it snaps and locks in and then you're ready to hook your tow bar up and go. Whenever you're ready to remove them in order to maintain that clean look on the front of your vehicle, you pull the ring here in order to pull that pin out, rotate it and pull it right back out. Overall, this base plate is going to do a great job of making it very easy to hook up your tow vehicle behind your motor home and it's going to really cut down on the time needed to get this all set up. Now, let's show you how to install it. To begin our installation, we'll need to begin removing our front fascia and we'll start underneath the hood by removing our torque screws that are here along the edge.
You need a T-20 torque bit to remove these. On the inside of the front fender there's going to be three screws that we need to remove. We use a T-15 torque bit. On the inner fender well there's this little flap that you can use a flat head screw driver to pull out, then directly up from there there's going to be a screw with a 7mm head that we'll need to remove. We'll go to the other side and do that same thing. Underneath we'll start by removing the push pin fasteners that are across the back edge of this panel here.
You can take a flat head screw driver, just get it underneath the open edge of it there and once you got the center of it worked out, the body should pop right out. I'll remove the 7mm screws that we need to in order to loosen the fascia under here. Then we'll go to the other side and remove those same screws. Now, we're ready to begin removing our fascia. It's a good idea to grab an extra set of hands to help you with this. We'll start at our fender and begin pulling outwards so that those tabs can unlock and then we'll pull it towards the front of the vehicle.
If you've got fog lights you will need to disconnect them. You can squeeze down on the tab there and pull that connector right off. Then we've also got the connector for our ambient sensor. We'll lift that tab up and pull that out as well. Once you're free of all electrical connections, you can take your fascia and carefully set it off the side so it won't get scratched. Now, we'll remove our wire loom for our ambient temp sensor from this air dam over here. You can just pull that right out. We'll pull that wiring out of the way for now. Then this deflector has three push pin fasteners that we're going to have to remove in order to remove the deflector itself. If a screw driver doesn't work you can also use a pair of side cutters to get underneath it, if you don't have a trim panel tool. The final one is right on top of the bumper core. Now we'll take that deflector and remove it. Then we'll remove the air deflector on the other side the same way. Now, we'll need to remove our headlight, need a 7mm socket in order to remove the screws. On the passenger side, it'll have five screws but on the driver side it'll have four, it just won't have this screw, but the others will be in the same locations. In order to remove the headlight, you want to begin pulling it forward towards the front of the vehicle to work it loose. Then you'll need to lift up on the back to release that tab and you'll pull it out. Our connector here at the back of the taillight, it's got this red tab, you'll need to pop that red tab up and then you can squeeze down on the tab in order to release that connector. Carefully set your headlight aside and do the same thing on the other side. Now, we'll be removing the tubing for our air intake. There's going to be three push pin fasteners, start with one over here. We'll have to rotate this down and carefully take it and set it aside. Now, in order to give us room to work over here on the driver's side so that we can get to the edge of the frame rail here, we'll need to remove this horn bracket. We'll need a 13mm socket to take that nut off and I'll take this entire bracket, just set it up out of the way. It's a good idea to grab a second set of hands to help get this up into place and support it. Slide this, and these are just on the outside of the frame rails, and you can take jack stands and put them just underneath the edges to hold it in place. Now, with our base plate held up into position with this bottom side flush against the bottom of the frame rail and the plates on the front flush against the front of our bumper core, here on the side we'll drill out a pilot hole through the center. I'll take a longer drill bit in order to drill through to the other side and I'm going to put a block of wood up behind it to make sure that once I get through to the other side I don't hit any components like an AC line or the radiator. Now I'll set up drill bit sizes until I reach the final size necessary to be able to fit the bolt through. Now, I'll take our 4-1/2" long, 1/2" bolt and we're going to put red Locktite on it because we're going to be putting red Locktite on all of the fasteners that we'll be installing to secure our base plate to the vehicle. If you need some of this red Locktite, you can get this on our site, part number LT37420. You don't need a lot, but just enough to get into a few of the threads there. Then we'll take this bolt and insert it from the outside of the frame rail through so that it comes out the inside of the frame rail. Then on the inside of the frame rail, we'll take a flat washer, split lock washer, and a 1/2" nut, install them onto our bolt. Once we've got that bolt started, we'll go to the other side and do the same thing. On the front side of our base plate, drill those out using a pilot bit, going all the way through this bumper core. Again, with these, depending on the length of your drill bit, you will possibly want to put a block of wood back there to make sure that you don't drill into the condenser or radiator. Then just like before, we'll step up drill bit sizes until we've reached the final size. For these front holes we'll take our 3-1/2" long 1/2" bolts, put Locktite on them, and slide them through. With both bolts in place, we'll put on our securing hardware, first the flat washer, then the split lock washer, then the nut. Then we'll do that same thing on the other side. Now, using a 3/4" socket and wrench, we can begin to tighten up all of our hardware. You want to be sure to torque all of the fastening hardware to the specification listed in the instructions. Next we'll reinstall our horns. Next we'll reinstall the tubing for our air intake. Then we'll reinstall our headlights. On the inside of our front fascia, we'll need to remove this foam absorption pad. It's held on with two clips. You can take some needle-nose pliers, press that down and just slide it up over and it'll be the same thing on the other side. Then you'll remove it and it will not be reinstalled. It's a good idea to grab an extra set of hands to reinstall our fascia. Now, we'll trim it so our tow hook connection points can come through. With our fascia better seated we'll be able to cut out so that we can access our tabs where our arms will go. We'll do that on both sides. Also, cut out around our electrical connection posts so there isn't that pressure on the grill. Then we'll finish reinstalling our fascia. Now we'll continue reinstalling all the fasteners for our fascia. That's going to complete our look at and installation of the Roadmaster EZ5 Base Plate Kit with Removable Arms, part number RM-523178-5 on our 2015 Chevrolet Malibu.
Ratings & Reviews

Jeff

2/12/2026
I’ve pulled the Chevy behind our motor home several times over a the last year. It has worked excellent. And when not in tow the tubing is barely noticeable.


Gwendolyn Y.
2/26/2026
Looks great, Mark! Where are you off to next?

Heather A.
4/10/2026
Wow great job Crystal! It looks great! Also, I couldn’t help but notice “Ski Express” on the car, that’s pretty cool. What kind of work do you do?

Mike L.
9/23/2026
Which trim is your 2026 Chevy Trax? Per Roadmaster, the # RM25EQ (523228-5) fits all trims of the 2026 Trax except the ACTIV trim....

David
8/2/2026
It’s been a great year. No problems with the base plate. Works great with my tow bar. Towed my trailblazer from Texas to North Dakota and back, and several short trips.


Gary S.
6/19/2026
No issues at all. This is a solid piece of equipment.
Gwendolyn Y.
4/18/2025
Wow, Bob! Thank you for such the detailed review and feedback about how your install went. I also appreciate all the photos you sent as well. I cant wait to hear about how your first tow goes and where you head off to.
Gwendolyn Y.
6/4/2025
Install for the base plate looks awesome, Joe! Unsure if you have a wiring kit yet but there are a few options so I'll go ahead share them with you here in case you don't yet. The most popular kit would be part # RM-15267. This can be difficult to install but it is the most reliable. I've also linked an install video for this kit. Something that still has an integrated look but easier to install I would go with part # RM-155. You do have to drill some holes into the back of the light housing, so if you're okay with doing that, this may be the better kit. Also included an install video for that kit as well. Hopefully the videos will help you get a good idea of how to run the wiring for your lights. Let me know if you have any questions after watching!
Helpful Links
tv-install-roadmaster-diode-kit-2007-honda-crv-rm-15267.aspx
tv-install-roadmaster-tail-light-wiring-kit-2010-honda-crv-rm-155.aspx
John
9/4/2026
After a year of towing my truck up and down the east coast with my motorcoach, I am very happy with this product. it looks as good as the day it was installed and works perfect


Brooke M.
4/27/2025
It ain't nothin' but a thang, Matthew! I hope you know we will always be here if you ever have any more projects we can help you with :)
Matthew
4/25/2026
Weve been using our Roadmaster set up for over two years and have traveled several thousand miles. All I do is make sure everything is cleaned and lubed. No problems so far.
Do you have a question about this Tow Bar Base Plate?
Info for this part was:
At etrailer we provide the best information available about the products we sell. We take the quality of our information seriously so that you can get the right part the first time. Let us know if anything is missing or if you have any questions.























Gwendolyn Y.
2/12/2025
Install looks great, Jeff! Do you have any plans of where you are going to go this season yet?