
To see if this custom-fit item will work for you please tell us what vehicle you'll use it with.
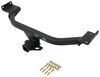
This custom fit kit lets you mount 4 Rhino-Rack 2500 legs to your vehicle with a naked roof. Clamps mount to legs with bolts. Includes 4 clamps and 4 pads.
Features:
Specs:

California residents: click here
Videos are provided as a guide only. Refer to manufacturer installation instructions and specs for complete information.
Speaker 1: Today on our 2015 Kia Sportage we'll be taking a look at and showing you how to install Rhino Rack Roof Rack Kit. This is going to consist of the Rhino Rack Vortex Aero Crossbars, part number RRVA126B-2, the 2500 Series Legs, part number RRRLKVA, and our fit kit for our Sportage, part number DK259. Now keep in mind that our crossbars are also available in silver, part number RRVA126S-2.The Rhino Rack Roof Rack System is a great solution for carrying your vehicle accessories on your roof, whether those are bike racks, ski and snowboard carrier, or cargo baskets. It's going to allow you to free up space inside your vehicle for more gear or more passengers. The aerodynamic shape of our crossbars is going to help to reduce wind noise and drag, and that weather strip on the inside is going to help along with that as well.If we remove our end cap you'll see that our weather strip is easy to remove and we can cut it down and place in channel mounted accessories. Unlike some other roof rack systems our end cap does have the option to lock this in place with our plastic lock core, which will help to prevent theft and tampering of any channel mounted accessories.
We can also replace that plastic lock core with a metal one. The end caps for our leg kit is going to allow us to prevent any theft or tampering of our roof rack system all together. It does lock into place, and it's going to protect our fit kit.Our fit kit is going to consist of our clamp as well as our pad. Any portion that touches our vehicle is going to have a rubber coating to prevent any scratches or abrasions, and it's going to be custom cut to fit our vehicle. This will give us a nice secure fit overall, and we won't have to worry about having to readjust our roof rack system if it moves.
The Rhino Rack Vortex roof rack system has a 165 pound weight capacity, though you do want to double check your vehicle's owner's manual to make sure your roof can withstand that much weight. It's also going to come with a limited lifetime warranty, and be quick and easy to install.We'll show you how to do that now. Now everything that you see on our table is what we will need to install our roof rack system. We already have our front bar in place, we're going to show you our back bar. The only thing we've provided ourselves is a flat tape measure to measure everything out.
We're going to have our included tool to tighten everything down, as well as our end caps for our legs. The key to lock our end cap for our cross bar, and the keys for our end caps for our legs, our end cap for our cross bars, the legs themselves, and then our fit kit which will include our pad as well as our clamp to secure everything to our roof.We'll start by taking our leg, and we're going to remove our bolt here in the center. Once we have that completely removed we can take our clamp and place it over where we just removed our bolt, and we'll tighten our bolt back down. We want to tighten this down just enough so that it holds our clamp into place, so then we can still adjust it around our roof. Then we'll flip our leg kit over and we'll take off the bottom piece.
We want to make sure that the arrow on the foot is facing towards the rear of our vehicle when we place it on. The arrow on the plastic part of our foot is going to face out, away from the inside of our cross bar.So we'll seal that together, making sure that all the holes are completely closed. Then we can place this onto our leg, and we'll place this onto our cross bar. We want to line up our nut on the bottom with our channel, slide that into place. Now I like to tighten it up just a bit so that my leg sits up straight. Now we'll measure out this insert area. We do have inserts that have measurements on them. This will be great if we want to reduce that wind noise and drag, we can place in inserts and cut them down, placing them on the outside and inside channel. But for demonstration purposes we're just going to use our flat tape measure and measure this out to 17.6 centimeters.All the measurements and the placement for each pad, as well as your clamp, will be in your instructions. Once we have that in place we can take our included tool and tighten that bolt down all the way. We'll finish off by placing on our cross bar end cap. Place it on, use our key, and lock it in place.Then we can take our cross bar, making sure that our pad's arrows are facing towards the rear. We want our clamp to sit around our doorjamb. Now we'll measure out our cross bar spread. This is going to be between the middle of the front clamp to the middle of the back. We want to make sure that it reads as the same measurement on each side. Now we'll tighten down our clamps. We're going to take our included tool and tighten down the bolt.I'll start by tightening it down so that my clamp sits just up against our doorjamb, and then we'll do the same thing to the other side. Once they're both even we'll go back and forth between each side, tightening them down evenly until we have a nice, secure fit. Now we'll know we have enough torque behind our bolt when the skinnier portion of our torque tool is completely straight, just like so. Now we can close up our vehicle doors and we'll finish off by placing on our end caps. Make sure we lock our end caps in place, and that's going to help to prevent theft and tampering of our entire roof rack system.Now we're ready to load up our gear and hit the road. That's going to be our completed look at the Rhino Rack roof rack system on our 2015 Kia Sportage.

Do you have a question about this Accessories and Part?
Info for this part was:
At etrailer we provide the best information available about the products we sell. We take the quality of our information seriously so that you can get the right part the first time. Let us know if anything is missing or if you have any questions.


Thank you! Your comment has been submitted successfully. You should be able to view your question/comment here within a few days.
Error submitting comment. Please try again momentarily.