

Installing a Trailer Brake Controller on a 2007 Fleetwood Southwind RV on GM Workhorse Chassis
Updated 06/28/2013 | Published 06/26/2013
Products Featured in This Question
Question:
Need to install a Tekonsha Prodigy controller on 2007 Fleetwood Southwind 35A built on GM Workhorse chassis. Cannot find the 5 pin plug under the dash like a Ford chassis has Is there one? How do I install?
asked by: John
Expert Reply:
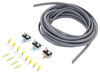
You will need to do a little hardwiring to install a brake controller on your RV since there is no confirmed harness that will fit. It is not actually all that difficult. What you will do is mount the controller as specified in the instructions. For the wiring connections you will need a wiring kit # 5506.
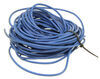
You will most likely need additional wire # 10-1-1, which is sold in 1-foot increments. The first thing you are going to do is use some of the wire, connect one end to the white brake controller wire and route the other end through the firewall and connect it to the negative battery terminal.
The next step is to attach some wire to the black brake controller wire, route it through the firewall, and over near the battery. Mount the circuit breaker from the # 5506 kit to the metal wall in the engine compartment near the battery. Attach the black wire to the post labeled AUX. Then take another length of wire and attach it to the post labeled BAT and attach the other end of that wire to the positive battery terminal.
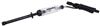
Then you will need to use a circuit tester like # PTW2993 if one is needed to test the wires on the brake switch located above the brake pedal. You need the brake switch wire that only shows power when the brake pedal is pressed. If you find a wire that also shows power with the headlights or turn signals on it is not the correct wire. Once you find the correct wire the brake controller red wire will connect to it.
The last connection is the brake controller blue wire. Use the remaining wire to attach to the blue wire. Then route it through the firewall, under the vehicle avoiding areas that can pinch or burn the wire, back to the 7-Way. At the back of the 7-Way look for the wire that is attached to the pin in the 7:00 position. Cut the wire several inches back from where it is connected to the 7-Way so you can attach the wire you ran to the end coming from the connector. That will complete the installation.

Featured Help Information
Miscellaneous Media

Continue Researching
- Shop: Wiring Kit for 2, 4, 6, and 8 Brake Electric Trailer Brake Controllers
- Video: Review of Lippert Camper Jacks Brake Assembly - LC87VF
- Article: Brake Controller Installation: Starting from Scratch
- Q&A: How to Test Brake Controller without Trailer Connected
- Article: Best Bike Racks for Electric Bikes
- Article: Towing a Trailer? Let's Talk About Brake Controllers
- Article: 2005-Current Volkswagen Touareg, Audi, or Porsche Cayenne
- Article: Brake Controller 7- and 4-Way Installation Kit (ETBC7)
- Q&A: Dexter Brake Assembly Recommendations to Replace Part Number 023-357-00