Brake Controller Installation on 2004 Honda CRV
Updated 01/18/2012 | Published 01/15/2012
Products Featured in This Question


Question:
I just bought a hitch from you and am working on the trailer wiring 7 pin. I have an 04 Honda CRV. My question is about the blue wire from the brake controller. do I need to run a separate wire from it all the way back to the 7-pin connector , or is there a wire already there under the dash and if so where is it and what color? Thanks
asked by: Tom L
Expert Reply:
Honda does not pre-wire the CRV for a brake controller installation, so you will have to run a length of 10-gauge wire from the passenger compartment, through the firewall and engine compartment and under the vehicle to connect to the 7-pole connector at the rear. The brake controller output wire would connect to the # 2 pin on the trailer connector, which is sometimes labeled BLUE.
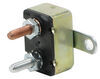
I took a look at your order and saw that you did not order a taillight converter, part # 118336 for your CRV, which is necessary. Instead of the HM48480 7-way you purchased, you would be better off using a 4-pole to 7-way adapter like part # 37185. Once the taillight converter is installed, the 4-pole coming off of the converter would plug directly into the adapter, at which point, the lighting connections are complete. The remaining 4 wires would then need to be connected. The white wire grounds to the vehicle frame, and the blue wire would connect to the wire ran from the brake controller. The black wire is typically used to provide 12-volts to the trailer for any accessories that require power and would connect to the positive battery terminal via a 40-amp circuit breaker, part # 9510. The purple wire it usually used for trailer reverse lights. It can be tapped into the reverse light circuit of the CRV if needed. Using the 37185 adapter would be much easier than the connector you have already purchased.
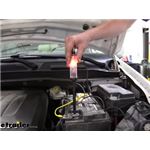
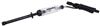
The controller would mount under the dash, within easy reach of the driver. The 4 wires exiting the controller would install as follows. The black wire runs to the positive battery terminal via a 20- or 30-amp circuit breaker (#9506P or 38630), depending on which the controller instructions call for. The white wire connects to the negative battery terminal, the blue wire runs back to the trailer connector as discussed earlier and the red wire connects to the brake stoplight switch. The switch is located at the top of the brake pedal, and a circuit tester like part # PTW2993 should be used to locate which of the wires on the switch shows current only when the brake pedal is pressed. Once the correct circuit is located, use a wiretap like part # 804C to tap the red wire into it.
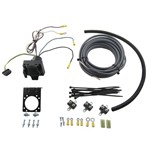
If you were to go with our brake controller install kit part # ETBC7, it would include everything needed to install the controller like the 37185-adapter mentioned above, the circuit breakers and all wire and fasteners. The only other thing you would need would be the controller itself and the taillight converter.
I will link you to the parts I mentioned above, as well as some FAQ articles and install videos that you might find helpful.


Featured Help Information
Miscellaneous Media