
To see if this custom-fit item will work for you please tell us what vehicle you'll use it with.
Thank you! Your comment has been submitted successfully. You should be able to view your question/comment here within a few days.
Error submitting comment. Please try again momentarily.
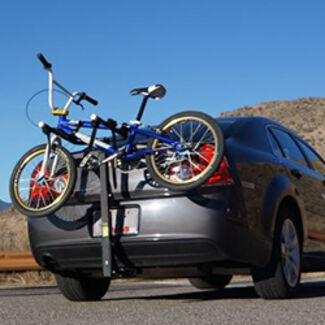
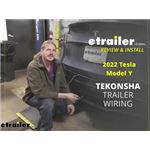
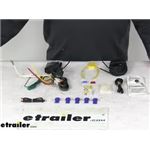
This converter kit includes a 4-way trailer connector, power wire, and hardware to convert your Toyota Highlander's lighting system to match that of your trailer's. Pulls power from your Toyota Highlander's battery. Works with LED or incandescent bulbs.
Features:
Specs:
Some vehicles operate on a 3-wire system, wherein the brake signal and the turn signals run on separate wires to illuminate different lights. (Typically, these vehicles have amber turn signals.) But most trailers run on a 2-wire system, which means the brake and turn signals travel along a single wire. You'll notice that, on your trailer, the brake light will flash for the turn signals.
If your vehicle operates on a 3-wire system, it will need to be converted so it will be compatible with the wiring system of your trailer. This is where a tail light converter comes into play. This converter lets you combine the brake and turn signal functions of your vehicle so they run on a single wire to properly activate your trailer's tail lights.
This particular converter also works with newer types of vehicle wiring, like PWM and multiplex. Pulse Width Modulation (PWM) is standard on European vehicles, and multiplex systems are common on newer vehicles. To determine if your vehicle uses PWM or multiplex systems, please consult your vehicle's owner's manual.
LEDs require less power than standard incandescent bulbs, which means that a vehicle that has LED tail lights might not provide enough voltage on its own to activate your trailer's tail lights. This converter, though, pulls power straight from your battery to ensure that your trailer lights will activate no matter what type of bulbs your vehicle has - or your trailer for that matter.
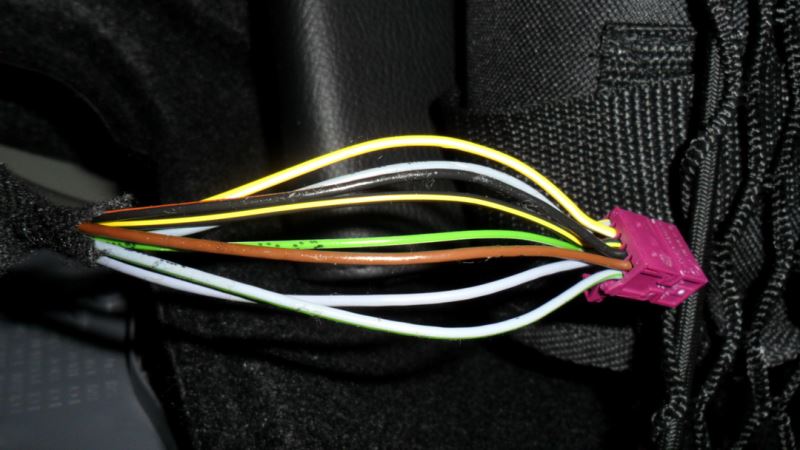
| Wire Color | Wire Function |
|---|---|
| Green | Right turn |
| Brown | Tail lights |
| Black | Battery power |
| Red | Brake |
| White | Ground |
| Yellow | Left turn |
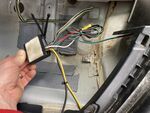
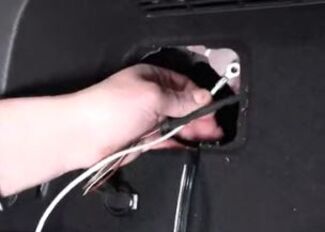
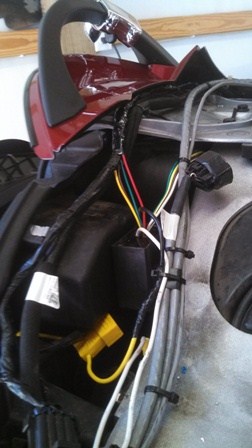
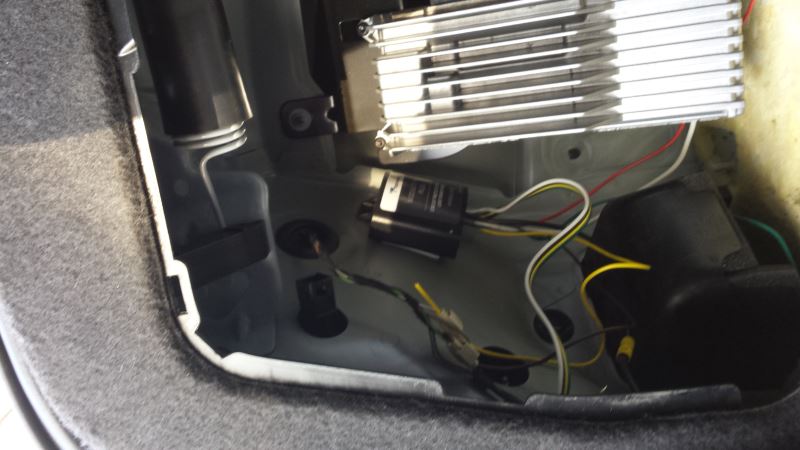
Because the color/function of the wires on this connector may not match the color/function of those on your vehicle, be sure to use the included circuit tester to double check the function of each wire on your vehicle's tail light wiring harness before installing this connector. Once you've figured out the functions of your vehicle's wiring, use the included quick-splice connectors to connect the corresponding wires on the trailer connector. Quick-spices, or "wire taps" are a quick way to make connections without stripping and twisting wires - just place the wires in it and snap the cover down.
Any wires you don't use will be secured to ground with the included ring terminal. The number 1 reason trailer wiring comes up faulty is a bad ground, so make sure your grounding wire has a solid and clean connection to metal.
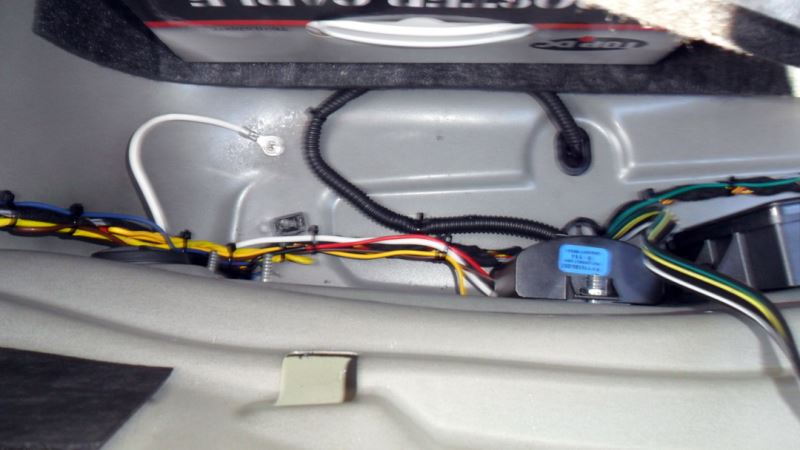
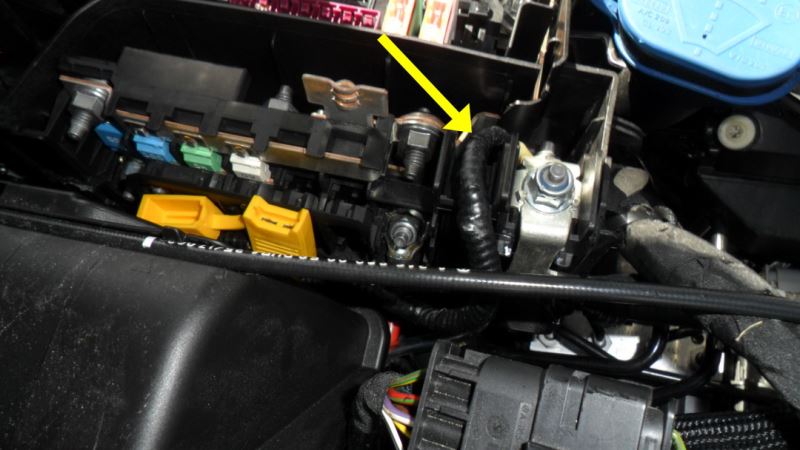
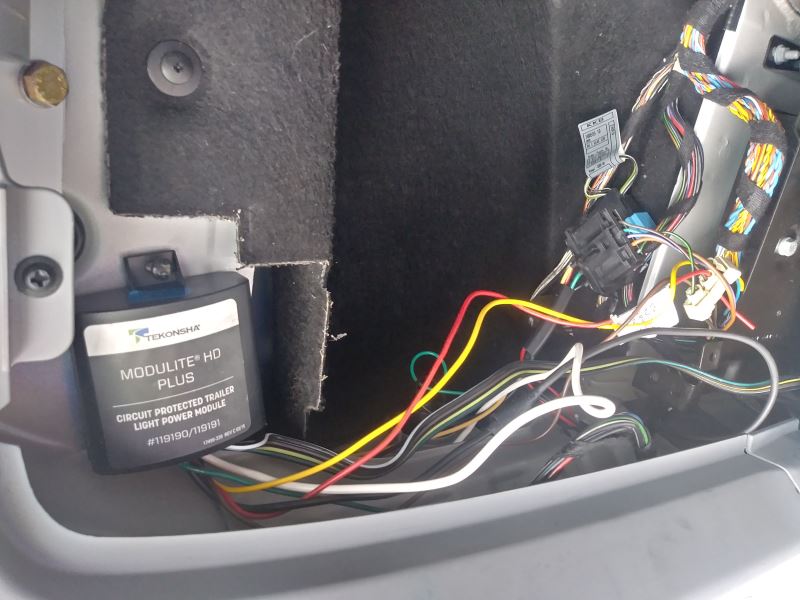
The ModuLite converter kit comes with a power cable so you can connect it to your battery to get the power necessary to operate. This keeps the converter from overloading your vehicle's electrical system. The power wire will need to be run back from the coverter, which will mount near your tail lights, up to your battery. Be sure to remove the fuse during the installation process so you don't blow it! You can put it back in once everything has been installed.
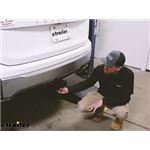
Using the included double-sided tape, stick the converter box to a flat surface inside your vehicle near the tail lights. It's helpful to clean the surface for the tape to adhere fully.
Find a raw, unpainted metal surface to use as a grounding point and secure the white ground wire using the provided ring terminal and self-tapping screw. Cleaning the surface prior to securing the white wire will ensure your converter is fully grounded. Finally, secure the converter wires to your vehicle using included cable ties.
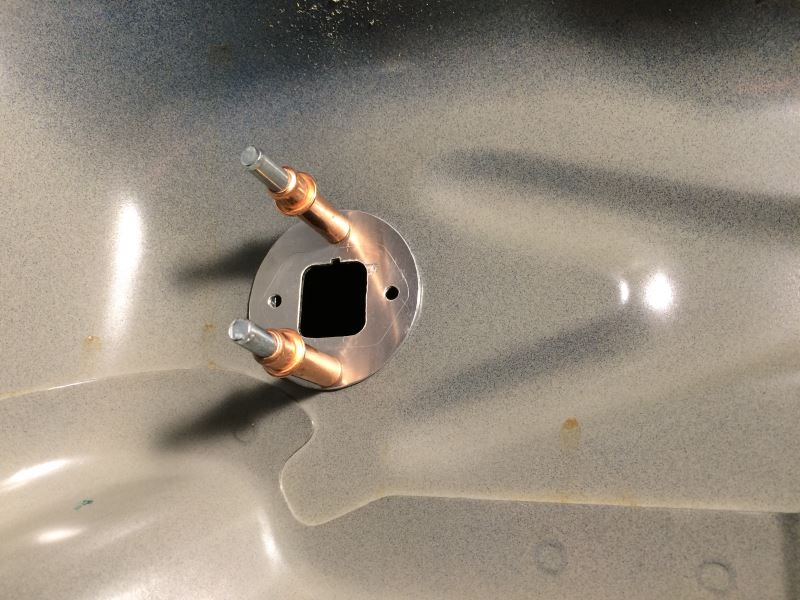
Use a small amount of dielectric grease on the 4-pole connector to help prevent corrosion.
Quick Tip:

Average Customer Rating: 4.6 out of 5 stars (443 Customer Reviews)
This converter kit includes a 4-way trailer connector, power wire, and hardware to convert your vehicle's lighting system to match that of your trailer's. Pulls power from your vehicle's battery. Works with LED or incandescent bulbs.
The wiring harness and trailer hitch from ETrailer work great. No issues whatsoever. It works as it should. FTIW, I have self-installed hitches in the past on other cars and consider myself a savvy shade-tree mechanic. Although the installation of both products didn't look that difficult, and there are a wealth of vids by etrailer, my problem was the jacking and safe under-body access on the Tesla. I just don't have the facilities, and was wary by the weight of the car plus warranty issues. So I opted for a pro intsall job. Given the nature of the beast, and this is no reflection on etrailer, if I were doing it again I'd prob just spring for the pricey Tesla install. Since I live in the sticks, I had to drive pretty far anyhow to find an installer, let alone a good one. The bumper removal etc. for the hitch install isn't difficult, just that pesky wiring and a safe work condition.
Install on 2018 Mercedes Benz CLA250 w/LED tail lights:
There were no guides I could find so I'm posting this for other etrailer customers.
These are my installation notes and the kit operates correctly. There are other ways to do this, I'm sure.
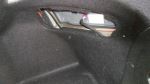
It isn't necessary to remove the tail lights, there is a removable piece in the trunk carpet. I removed that and the plastic trim panel in the middle.
The tail lights have 10-pin connectors. On the left there are 8 wires on the right there are 7. My thought is maybe this has something to do with the european style parking lights. After probing I found this:
Left Side:
Turn/Brake - Yellow with White stripe
Running/headlights - Black with Orange stripe
There is constant power to the Green with White stripe
Right Side:
Turn/Brake - Light Blue with Red
There is constant power to the Green with White stripe
I had to splice additional wire to mount the module where I wanted it. The final connections were:
Module Brown to Left Black/Orange
Module Yellow to Left Yellow/White
Module Green to Right Light Blue/Red
Module White to Ground
Module Black to Battery
Module Red Terminated (unused)
The positive electrical connection I made was under the hood, off the fuse box. Terminated to one of the lugs, covered with wire loom, and run into one of the cars wire bunches.
The 4-wire hitch output is terminated with a CURT tester (If you put one there, you'll always know where it is when you need to troubleshoot something)
This vehicle is completely covered on the bottom and running the wire can be very time consuming if you want it to look tidy.
It took some time and trouble to figure out how this correlates to the installation video (for the Curt model, which has fewer wires). Once the right wires were identified, it was very simple and straightforward. The system works like a charm, and I've already towed a U-Haul trailer. Depending on the vehicle, I would recommend getting some 3/8" wire loom ($1.99 @ Home Depot) to protect the power wire from abrasion/cuts if you route it along your car's underbody. The included instructions (online & paper) are too generic to be useful, and the vehicle wiring codes (types of wire systems: 2-wire, 3-wire pulse, etc.) don't have a reference on the TowReady website. Moderate gripes, but some streamlining would've saved me unnecessary troubleshooting. All the parts you need are included, with extras just in case.
The product works great. The worst thing about it was that there were no instructions with it at all. I had to email etrailer and they in turn emailed me the instructions. Other that that no problems. Fast shipping and product is as advertised.
I used this product on my Victory Vision so that I could pull my trailer. Below is a picture of where I placed it. It worked out best in my opinion to velcro it to the back of the saddle bag. It actually mounted right under the wiring harness of the bike that I had to tie into.

Damon C.

12/18/2014
Still works great. No problems at all.
I installed my unit on a 2013 Audi a4 quattro sedan. using the provided tester I determined it is a two wire system. i installed unit in driver side outside of trunk. I easily snaked the green wire through trunk to passenger side chamber. The battery is in the trunk, so it was easy to connect supplied fuse connector directly to battery. Wiring:
Unit green wire to gray/blue wire on passenger side
Unit Yellow wire to gray/white wire on drivers side
Unit Brown to Green wire on drivers side. No drilling needed
Ran trailer wire into trunk and out through cut out on trim where hitch is
Works perfectly.
Reason for not a 5: No directions and missing 1 crimp connector.
Laura E.
3/15/2017
Thanks for your business and your detailed review regarding the wiring, Frank. Depending upon the factory product run, the vehicle wiring colors may change. We always recommend testing for function before connecting the wires.
A module such as this is absolutely essential when trying to add a trailer lighting circuit to a modern CANbus equipped vehicle. The module itself works beautifully but I deviated from the eTrailer install video for my '13 Jetta Wagon.
First, I used the 'poke-n-wrap' method with solder to attach the module's signaling wires to the vehicle wiring harness. I have a personal aversion to Scotchlok or vamp connections because they often fail with time and vibration. This method keeps the harness relatively compact and clean looking, especially if you resecure everything with cloth wiring harness tape.
Second, no self drilling screws. I attached the module to the chassis with proper self adhesive tape like 3M VHB. The white ground wire is easily attached to the existing grounding lug on the left rear wheel well, so no self drilling screw there either. Don't poke holes in your chassis with self drilling screws if you can avoid it.
I avoided drilling a hole in the spare tire well by running the power wire through the existing body plug in the area aft of the right rear wheel well. It's easy to remove the plug, drill a hole in it, and thread the wire through. Add a dab of black RTV to make sure it's watertight.
When powering the module, the suggested method is to split the 1/4" ring terminal and stuff it under the nut that holds the positive battery terminal in place. Instead, I obtained an M6x1.25 nut and secured the fuse holder to a unused, unfused stud on the terminal block inside the underhood fuse block. When it's time to change the car's battery, the split ring will inevitably get deformed and may cause problems. This way, the positive terminal clamp only has to do one thing: hold onto the positive terminal.
To bring the wiring harness outside the wagon I went a little off the deep end with a little sheet metal work and Molex MX150 connectors to make the passthrough watertight. I added etrailer 18140 and 18144 to mount the 4-way connector to the hitch so I wouldn't have to fish the wire out of the left-side trunk compartment and shut the tailgate on it every time I wanted to tow.
Straightforward install like any generic trailer wiring harness. The only problem is that modern auto wiring for LED lights is such a small gauge that the T-taps don’t work. I wound up having to cut the wires and install this with butt splices.
thanks for being so helpful in switching us into this heavy duty wiring harness. The service was better than all face to face places in this type of business. My installer swapped out the modules and everything worked perfectly. I can't say enough about both customer service and the tech support that we received. There should really be a sixth star (for above and beyond)!
Doug L.
1/16/2018
Works great... thanks.
Perfect ! First time I install a hitch and this kind of electric Harness. I was a little confuse on what to do first but well explain and it went very well.
Tips : On my Tesla model 3 2020 there was a 12v plug already coming directly from the 12v battery in front, so it was a lot easier then passing this cable my self. The cable is in the bumper, you should see it if you install the hitch :-)
I own a company and I work with computer, so nothing to do with mechanics and electronics. Just study the plan, watch videos online. Once you understand exactly how it works, it's pretty easy to install.
There is no where at attach the wire harness it just dangles

Mike L.
9/15/2022
The protective cover on the trailer connector can be attached to the safety loop as shown in the thumbnail photos above. This will keep the connector secure until its needed.
This kit was great and functions exactly as intended. With the help of the online video it was easy to install, even for people without any electrical knowledge.
My only advice is:
1) watch the video and the hitch installation video at the same time. This will help you plan ahead and not re-install parts during the hitch installation, that will need to be removed for the harness installation
2) be VERY careful about selecting the right wires, by using the testing tool eTrailer provides. In the install video for my BMW X5, the technician referenced a yellow and black wire when making the initial connection. He later goes on to make a separate connection for a black and yellow wire. To the novice they look nearly identical. I confused the two wires and had to re-do this, but would not have been an issue if I had understood the distinction and used the testing tool, as recommended in the instructions
3) be careful about placing all connectors so that they face in the same direction. Does not impact function, but makes for a neater install when complete.
I could not be happier about how this project turned out, and credit etrailer with all of the success. It has a very OEM look, and etrailer made the entire project doable for me through their great suite of videos and excellent Customer service. I wish every retailer could be this good!
Based on the etrailer video on [online] showing my model car, I was expecting the module wires to be plug and play, with connectors for my car’s harness. Instead, the module I received requires crimp connectors to splice into my car’s harness.

Jenny N.
3/27/2023
The harnesses that are available for a 2019 Volkswagen Golf Alltracks are hardwire harnesses that are spliced into the vehicle wiring. If you have any concerns you are welcome to contact us.
The harness works perfectly with my 2015 Honda Fit and installation was pretty solid, especially now since Honda makes interior clips easy to remove.
I had trouble with the wiring at first due to having the 3 wire system, but after giving etrailer a call during the install I was walked through which colors go where (I was watching the 2014 VW Passat video where they say to make the red wire the extra ground, don't do it with the Fit! It's the brake light FYI).
No instructions included, just check out the sample videos on this page for the install on other similar vehicles.
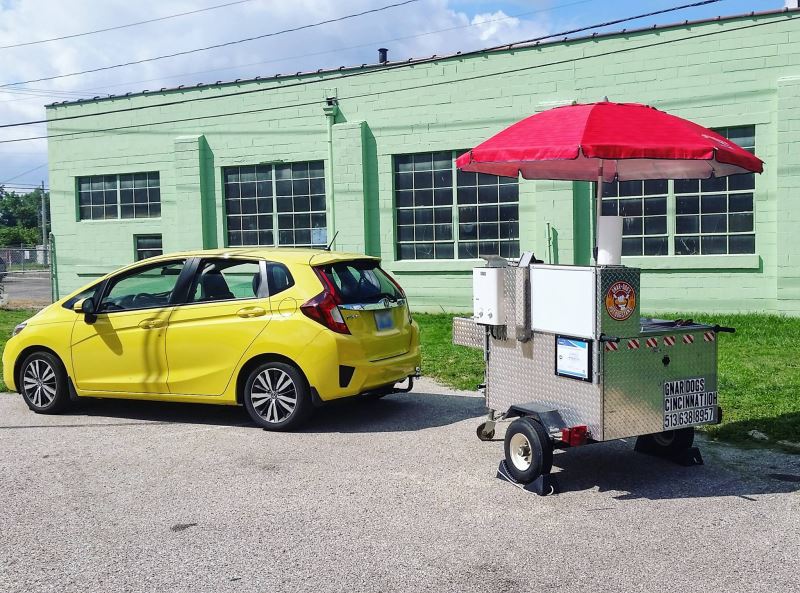
We purchased the custom Drawtite hitch and wiring harness to help pull along our hot dog stand (Gnar Dog's Hot Dog Stand) in the greater Cincinnati Area. Couldn't be in business without etrailer; thanks guys!
I am a DIY guy who does not have any experience on electrical. Got it today, and installed in with not much issue. I went online/youtube to get more information etc. Took me a while to figure out the circuit tester that came with you kit was not working at all. I ended up buying a tester from [online], which basically confirmed that the tester came with the kit was defective.
Jenny N.
2/20/2022
I will have our customer service team reach out to you.

Matd
2/16/2023
Well, after a year.....so far so good, and it has not been giving me any issues.
Installation was VERY SIMPLE and straightfoward, especially sinse the installation video etrailer provided was on a 2002 e53 x5 and thats what I imstalled my harness on. Everything works great and I will most definitely be buying through etrailer again. Shipping was fast also!
The wiring harness worked great. The fuse tap was a bust. All the pig tails were too small. Had to go to Auto Zone to get the right one. Would highly recommend the wiring harness kit.
installing was generally easy, the only problem I seen was the receiver is low and no recommendation to purchase or use a high lift style ball assembly, had to modify the ball assembly to help with the problem.
Easy to install. Because the wires aren’t actually touching, the lights don’t always remain on. I’ll watch in my rear view mirror, sometimes the lights are on, sometimes they aren’t.
Quality product and service, straightforward insulation with no alignment issues.
Takes a few hours without help and with a vehicle that’s needs to be wired.
I installed this 119190KIT into my 2015 Toyota Prius Plug-In Hybrid.
I could find no review that addressed installing into a Plug-in Prius Hybrid. There were several reviews of various years of standard (non-Plug-In) Praises, but no reviews for a Plug-In.
The eTrailer webpage video for 119190KIT (https://www.etrailer.com/Custom-Fit-Vehicle-Wiring/Tow-Ready/119190KIT.html) has links to 4 other videos, none of which is for a Plug-In Prius (PIP), but one or more of them shows how to test and splice wires just like in the 119190kit.
The video for the 2013 BMW X3 shows how to use the tester at the 2:48 mark. This tester was essential. I used it to determine which lights were connected to which wires. Do NOT rely on any videos to determine which color wire connects to which light (tail, brake, left turn, right turn). Instead, follow EXACTLY what the instructions sheet tells you. The first step was to determine which color wires in my PIP connected to which lights in the PIP’s rear tail area. When you use the tester, you MUST push the metal pointed tip directly and forcefully into the center of the plastic sheet encasing the wire. If you do not penetrate fully, you won’t get the tester’s light to come on when you press the car’s brake pedal or light switch or turn signal lever.
A video that shows the internal compartments for a Prius is at this link:
https://www.etrailer.com/tv-install-trailer-wiring-2010-toyota-prius-118505.aspx
It's not a Plug-In model, but it shows a lot of spots that are identical nonetheless.
I found that there was not a lot of slack in the wires in the PIP’s taillight assembly, but there was enough.
The video below shows a 2010 Prius and how to remove the rubber seal - at about time stamp 0:30+.
A good spot to screw the ground into the "doubled sheet metal" is at 2:03+.
A good segment to show putting the wires under the back side of the hatch starts at about 3:00 and runs until about 3:22+ and also at 3:30 it shows how/where the banded 4-pole wire will go into a lower compartment, to be stored until need to attach to a trailer.
3:53 - 4:41 shows running wire over to the other taillight.
From 5:10 to 6:20, it shows hooking up to the battery.
https://www.etrailer.com/tv-install-trailer-wiring-2010-toyota-prius-c56147.aspx
This video shows a 2014 Prius V....
https://www.etrailer.com/tv-install-trailer-wiring-2014-toyota-prius-v-118610.aspx
It shows the actual part that I have to connect - 118151 which includes the yellow "circle" wire. Go to time 5:00. It shows the yellow loop (aka, fuseholder) in the kit and how to install it at around time 5:42+ thru 6:23 and beyond shows attaching the yellow to the positve battery pole at around 6:40 to 7:00. Shows adding fuse to fuseholder at 7:13+.
At 7:30, starts to show attaching the ground wire to the "factory ground. Through and past 9:20 shows zip-tying all wires.
Here's another video that shows splicing…..with the kit’s “no-splice” connector.
https://www.etrailer.com/tv-install-trailer-wiring-2013-toyota-prius-119147kit.aspx
....at 3:30 to about 5:13.
WARNING - you must use pliers as shown to connect two wires that the directions say to connect. You have to squeeze the pliers pretty hard to get the metal piece in the plastic quick-splice connector to go all the way through the plastic sheathing and then make contact with. The video does not emphasize that you have to squeeze the metal piece pretty hard. In fact, when I first used four quick-splicers for connecting and then tested to see if a connection was made, only one of the 4 quick-splice connectors resulted in an electrical connection. So, I had to open up the 3 connectors and press the metal piece inside the quick-splice connector real hard. So, be careful!! I have a moderate degree of experience with home electrical wiring, but none with car wiring. I just took my time and it all worked great!!!

Fred Y.
7/20/2017
This wiring is still working perfectly after one year! Very satisfied.
I bought the 119190KIT, TK90160, and ETBC7 based on etrailer's recommendations for my 2010 VW Golf. I came into DIY trailer electronics without a clear understanding of what I needed, so I asked etrailer what would work for my car, and they put together this well-priced and high quality bundle for me.
The parts arrived quickly and in good order, and using the included instructions and some videos from this site, the installation process was fairly painless. The biggest hitch for me was that the VW MKVI runs multiple modulated signals along one wire to the tail lights, so wiring for the turn signals had to be run up to the headlights instead. The kits didn't include this information, nor enough wiring to do that extra work, but it didn't set me back very much more.
Great service, great products, and lots of excellent information on this site. I'll definitely be an etrailer customer for any more trailer stuff!
Michael B.
8/23/2018
Still going strong, its a great wiring kit.
Downsizing so I needed a hitch setup for my 2015 Honda Fit. I have utilized etrailer previously on my daughter's Outback and received the same prompt FREE delivery. Solo install and only a little regret not having a mate to support the hitch when doing the bolt up. No surprises and that is a good thing. Note: Bend the one muffler hanger down about a quarter inch to remove any chance of muffler against bolt head tap. Thanks etrailer.
I have not yet towed a trailer but I have installed and tested the wiring kit with a 4-flat tester. I did discover a discrepancy between the installation video and the kit instructions.
I have a 2015 BMW X3 and I followed the install video (for the same vehicle) exactly. However the brake lights did not work. After reviewing the kit instructions PDF I discovered that the install video incorrectly stated that the X3 has multiplexed brake/taillight and not to use the brown wire. I rewired the brown and red wires per the kit instructions (for a 3 wire system) and it not tests correctly.

Brad H.
6/4/2019
Pulled a tear[] trailer for about a week and it worked great.
The kit came complete with all that was needed for installation and really fast shipping. The video offered on the etrailer.com website for the BMW E70 X5 was outstanding and provided all the detailed instructions needed. I had absolutely no problems and the job took about 1 hour. The system worked flawlessly when connected to my Road King trailer. Coupled with the Curt Class III hitch this combination made for a much less intrusive trailer hitch option for significantly less than the OEM option. I would highly recommend this trailer hitch kit.

Pat M.
4/30/2015
Outstanding. No problems at all. It was a cinch to install. Have towed utility trailers and boat trailers without issue. Much less expensive and a lot cleaner installation that factory.
The wiring kit was fairly easy to install. It had less to do with the kit and more so with the tight space in the rear corner of the car and the TINY wires the car came equipped with.
There are no instructions but eTrailer has an installation video for my car linked to their product page. The instructions were clear and easy to follow.
What I learned was once i crimped the wire connector on, two of them didn't slice the insulation and make connection so I crimped down harder until I had a good electrical connection. Bottom line is check each connection with your DVM or the supplied lamp tester before proceeding or taping everything up.

Wes
3/19/2015
I installed the light kit a year ago and have had no problems at all.
Do you have a question about this Trailer Wiring?
Info for this part was:
At etrailer.com we provide the best information available about the products we sell. We take the quality of our information seriously so that you can get the right part the first time. Let us know if anything is missing or if you have any questions.


Richard
6/2/2014
Hey Jameel, not sure if things were different back in 2012 but for folks ready your review today, I suggestion 1/4 wire loom instead. The 3/8 diameter is larger than needed and leaves more play.