


To see if this custom-fit item will work for you please tell us what vehicle you'll use it with.


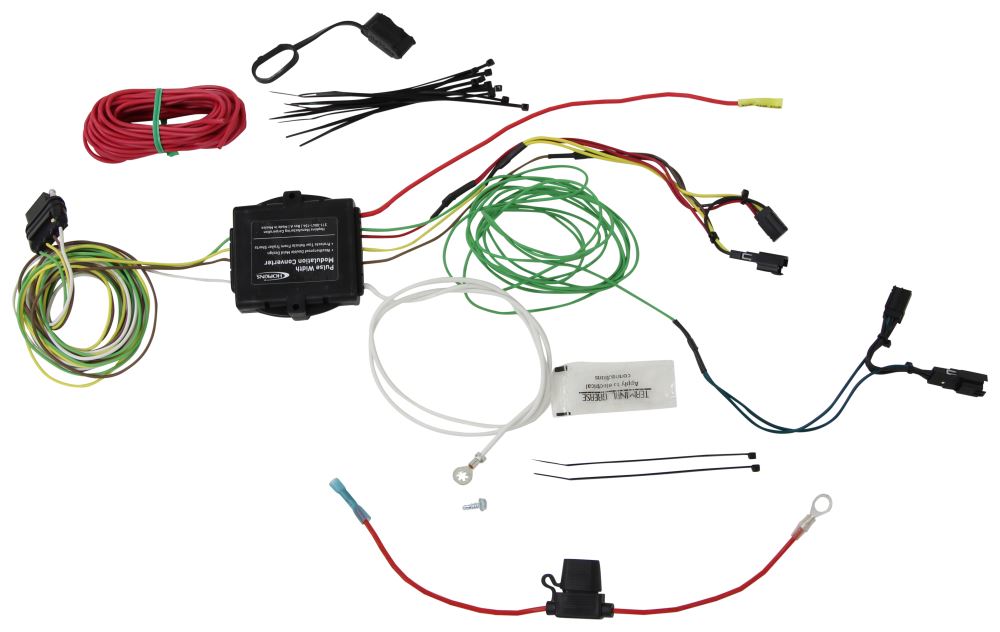


When wiring a trailer, no one wants to splice into factory wires or chase down bad connections. The Hopkins Plug-In Simple Vehicle Wiring Harness makes it easy with connectors that plug straight into your vehicle’s existing wiring. It gives you a solid 4-flat trailer connector without cutting or splicing, keeping the install clean and straightforward.
This harness provides the standard 4-pole flat connector that covers running lights, turn signals, and brake lights. It’s exactly what most small trailers need, giving you dependable lighting every time you hook up.
Some vehicles need extra power management to handle trailer lighting correctly. The built-in powered converter draws power directly from the battery instead of the tail light circuit, so it protects sensitive vehicle wiring and keeps signals bright and steady.
If your vehicle didn’t come with trailer wiring, this kit has everything you need to add it. The plug-and-lead design connects at the vehicle end and extends to your hitch, giving you a ready-to-use trailer light connection even when there’s no tow package from the factory.
This will not affect how the tail lights on your vehicle operate.

Videos are provided as a guide only. Refer to manufacturer installation instructions and specs for complete information.
Today we're going to review part number HM11141625. This is the Hopkins Plug-In Simple Vehicle Wiring Harness with the 4-way Flat Trailer Connector. This is a custom fit part. It is designed to fit the Chevrolet Malibu starting in 2013. What I would always recommend on a custom fit part is to go to our website, use our fit guide, put in your year and model vehicle and it will show you if this will work for your application. This part does provide a 4-way flat trailer connector at the back of your vehicle to power your trailer signal lights. It does connect very quickly and easily.
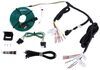
Basically, you just locate your connection points, which are usually behind the tail lights in the rear of the vehicle, plug in these T connectors to that, run your power lead to your battery, connect your ground, and you'd be ready to go. You're going to go through this in a minute, how it all connects. It does include this tail light converter here, to ensure that your vehicle's wiring will match that of your trailer. It is a powered converter, which means it will connect directly to the battery and this is to avoid overloading your vehicle's electrical system. The terminals are protective connection terminals which will help resist corrosion. It does come with this dust cap right here for the 4-way.
Basically what you end up doing is, when you're not plugged into the trailer, go ahead and put your 4-way over that and that will protect those terminals from any damage from the elements. A few specs on this harness. The maximum amperage for the stop and turn light circuit is three amps per circuit, for the tail light circuit is 6 amps. Now, just to show you briefly how this installs. This comes with everything shown here on the table. I'm going to show you where all these parts connect. Basically we go to the rear of your vehicle and gain access to behind the tail lights.
Start on the driver's side and take the shorter T connector that has the red wire in it. Go behind the tail lights, unplug the connection of the harness to the tail lights, and plug this in between the harness and the tail lights. Then take the one with the green wire, it has a longer length wire, run this over to the passenger side, and do the same thing. Connect this T connector behind the tail lights. Then attach this converter to a nice location, preferably a flat surface if possible.
You can use a cable tie to attach this and hold it into place, you just don't want this moving around. Then take the white wire, you'll see this length of white wire with the eyelet on the end, this will need to connect to a good, clean ground. What they recommend is to drill a hole for this grounding screw and make a good, clean ground with that. Your last wire is the red wire. It has a butt connector on it. This is the powered wire. It will need to run to the battery of your vehicle and they give you this length of wire to do that. So take the butt connector, connect it to one end of this length of wire, run this wire all the way up to the front, and use these included cable ties to take up any slack in the wiring to keep it from hanging down. Once you get up by the battery you don't want to connect this wire to the battery directly. You're going to run it through this in-line fuse holder. What you'll see here is that one end has a butt connector you'll connect to this in-line fuse holder. And the other end will have an eyelet on it. This is what will connect to the positive post of the battery. Then open up your fuse holder, take your included 15 amp fuse, install it into the fuse holder, put the cap back on it, and you'll be ready to go. They also include some dielectric grease, or terminal grease, and any time you make electrical connections you'll want to put some grease on it to help with as far as the corrosion. That should do it. You'll have your length of wire with the 4-way on it that will run out the back when you need to plug it in. When you're not using the trailer you can just coil it back up and put it in the rear of the vehicle. That should do it for the review on part number HM11141625. This is the Hopkins Plug-In Simple Vehicle Wiring Harness with the 4-way Flat Trailer Connector.
Ratings & Reviews

Info for this part was:
At etrailer we provide the best information available about the products we sell. We take the quality of our information seriously so that you can get the right part the first time. Let us know if anything is missing or if you have any questions.














Thank you! Your comment has been submitted successfully. You should be able to view your question/comment here within a few days.
Error submitting comment. Please try again momentarily.