


 Arrives before Christmas


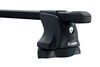
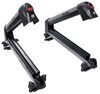
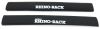
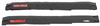
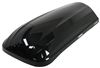
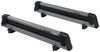
Replace a damaged crossbar or add another bar to your existing roof rack to help distribute a load on your roof with this half kit. It includes 2 legs and 1 silver, lightweight aluminum AeroBlade Edge roof rack crossbar.
Features:
Specs:
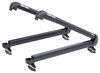
This single Thule AeroBlade Edge crossbar lets you replace a damaged crossbar or add another crossbar to your existing roof rack to help distribute the weight of a load on your roof. The crossbar mounts to your vehicle's factory fixed mounting points or flush side rails to create a roof rack that is quieter, stronger, and more aerodynamic than almost anything on the road. The low-profile, arced shape of the crossbar couples with the unique WindDiffuser stripping to produce a bar that is so quiet you'll forget you even have it on your car. Many factory and aftermarket bars produce an annoying whistle that can only be quelled by adding a fairing to the system. Not only is a fairing unnecessary with the AeroBlade Edge, but adding one would actually make it louder and less aerodynamic.
A built-in T-track sits along the top of the bar, near the front. When no accessories are mounted, the included WindDiffuser rubber stripping covers the T-slot. (You can also cut the stripping so that it can be placed in the slot around any carriers or accessories that are mounted.) The rubber stripping serves to keep dirt and grime out of the T-slot and provides a little scratch-resistant cushion for any mounted items.
The unique aspect of the WindDiffuser, which comes standard with the AeroBlade Edge, is the raised, angled vectors (or ribbing). This textured surface disrupts and redirects the air flowing over the bar, tripping it to create turbulence and clean air release. The result is less wind noise and drag, little to no annoying whistle, and a more aerodynamic crossbar. In fact, the AeroBlade Edge crossbar has been shown to produce 90 percent less sound energy than an elliptical Thule Aero bar, making it the quietest style of load bar in the industry.
Thule took a note from the manufacturers of high-performance cars, such as Ferrari and Maserati, and designed the AeroBlade Edge with a Kammback (or Kamm-tail) style. This crossbar does not have a full-length teardrop-type tail; rather, it is cut off, leaving a square end at the rear of the bar. The aerodynamic effect is essentially the same as it would be if the bar continued into a full teardrop shape. Air continues to move over it in a streamlined fashion, flowing along the bar as it would if the tail were complete. Because there is no tail, though, the bar is smaller and weighs less.
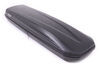
The Thule AeroBlade Edge load bar is constructed of extruded aluminum to ensure an extra-sturdy roof rack system. During the extrusion process, metal is shaped to form a complex BoxBeam design on the interior of each bar, as seen in the cross section of the AeroBlade Edge. Each fold adds to the overall strength and rigidity of the bar. This process creates a crossbar that is primarily hollow but still reinforced for added strength. The result is a bar that can withstand more than 800 lbs of force, yet weighs so little that it takes up only a slight portion of your load capacity.
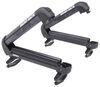
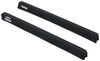
The AeroBlade Edge mounts to your vehicle's roof with a Thule Podium foot pack (sold separately). Once you've installed the foot pack onto the crossbar legs, you must position the bar correctly on your roof. To center the bar, remove the covers from the legs and slide the crossbar in and out of the legs as needed until the bar is centerd on your roof. You will be able to determine if the bar is centered by matching up the numbers displayed on the integrated ruler at the top of each leg. When the numbers match - indicating correct positioning - simply tighten the adjustment screw inside each leg with the included tool and replace the leg covers.
Mounting roof rack accessories is quick and easy with the AeroBlade Edge. Simply remove the crossbar cover, slide in your accessory, and replace the cover. Some accessories may require Xadapt hardware (sold separately), and trimming of the WindDiffuser strip may be required to accommodate accessory mounting hardware. To deter theft of your carriers - and the crossbar - add Thule One-Key System lock cylinders (sold separately) to the covers.
 Alternate Instructions
California residents: click here
Videos are provided as a guide only. Refer to manufacturer installation instructions and specs for complete information.
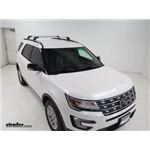
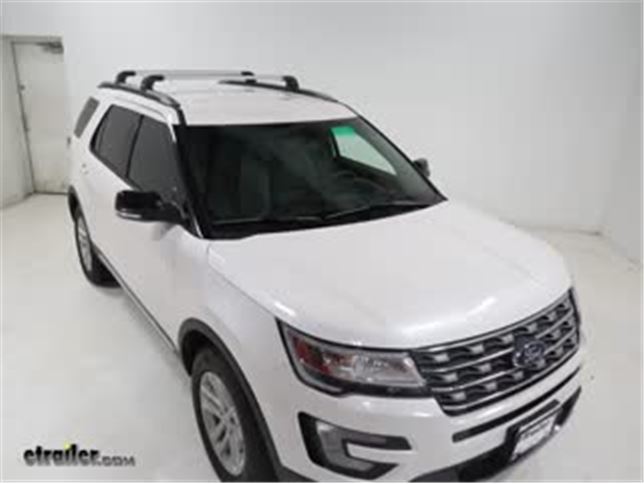
Today on our 2016 Ford Explorer, we'll be doing a test fit on the Thule Aeroblade Edge roof rack system, using part numbers T-H-7-6-0-3 for the rear crossbar and T-H-7-6-0-4 for the front crossbar and part number K-H-T-I-3-3-1-5-1 for the fit kid. These low profile, aerodynamic, ultra quiet crossbars allow you to carry accessories on the roof or your vehicle. You do have the option to change these plastic locks out with the Thule locking cores. You can pick four up with part number T-H-5-4-4. Their arch design is going to compliment the curves and lines of your roof. They're made out of a light weight anodized aluminum so they're going to be durable and rust-resistant. Let's go ahead and who you how to get them installed.
We've already got the front cross bar installed on our Explorer's flush-mounted rails. We've got it lined up with our factory mounts. Let's go ahead and do the rear one together. For our rear crossbar, we've already got one fit kid installed on the side. The other side installs the exact same way.
Let's go ahead and do that now. The first thing we can start out with, we'll grab our metal plate here and our pad. This is going to be part of our kit. We're going to slide it in to where it lines up with the two holes here. It's going to look like this. Then we're going to take our two Alan bolts, go ahead and put them through the holes.
Then we can move over to our Aeroblade crossbar and we need to make sure that the two holes are lined up here. If they're not, if they just have one hole, you need to make sure that they have two so you can simply come to the side here and then turn it until they show up. Then we'll take our fit kit that we put together and then get those started. Got it lined up. We can just grab our included tool.
Once we've got it started, we can kind of slide up and get our other one started. Then we can just tighten it down all the way. We want to be sure not to over-tighten because then you will damage the rubber portion here. Once we've got these secured down, we can set the whole thing aside for now. Then we'll grab our other included tool and head up to the roof for our Explorer. We'll need to remove the plastic fasteners on our flush-mounted rails on both sides. We'll take our included tool. It doesn't take much to get them loose. Give it a good turn and then you can just finish it out with your hands. Now we're ready to grab our crossbar and head up to the roof our Explorer. You'll need to be sure that it's loosened up. You can do that by loosening up this bolt right here with your tool. We'll gently set the other side in place right around the general area and do the same thing for this side. Then we'll grab our other included bolts, the ones with the larger head, and then we're going to get them started right here. If you have any trouble installing them, it can help if you put pressure on the top of the crossbar just so the holes line up better. Once we've got them hand-tightened, we'll take our included tool and tighten them the rest of the way down. Then we can just repeat the same process for the other side. With our rear crossbar in place and tightened down, our next step is we need to make sure we have an even amount of space on our crossbar here on both sides. There's actually a little scale here you can follow so you can just look at one side and go over to the other side and make sure it's the same. That looks pretty good. Then we can take our Alan tool and tighten up the top here. Now let's put on our covers. When we put our covers on, we need to make sure that the locking mechanism is going to line up with this open space right here. If you have it reversed, it won't fit properly. You want to make sure to slide it into the channel on each side on top here. Slide it forward until it goes into place. If it doesn't go into place right away, it's okay. Just try it again. Needs to look something like that and then we can just take a flat-head screwdriver and then it turn it to lock it. All right. With our roof rack system installed, we're ready to load up our favorite Thule roof accessory and hit the road. That's going to complete our test fit on the Thule Aeroblade Edge roof rack system on our 2016 Ford Explorer.

Good product promptly delivered. Thank you.
Easy to install (15-20 minutes), works as advertised.

Always a great product. Easy to install and great support and quick turnaround from etrailer!
Great product, fits perfect! Great customer service as well!
Prompt shipping, great communication and unbeatable prices. Why shop anywhere else. Thule - need I say more - these products are top quality.
Etrailer provided a quick delivery. They arrived earlier than expected considering the challenges during these times. USPS was hard on the packaging with one end open but everything was still in the box.
Theses Products are the best. I needed this for a trip and it has work without fail. Not only that but when I ordered this I needed some more parts and were almost out of time called Etrailer and they rushed them to me saved my trip. I have not taken them off and gone on many trips since. They look and preform like the day I bought them.
You wont be dissapointed :)
Needed cross pieces for my new car as I wanted to used my exisitng Thule Motion XT XL ski-box. Size was correct for my car and they were very easy to install.
Crossbars were easy to install and fit great on my 2017 Mini Countryman. Ask to have them shipped separate from any cargo carrier to prevent possible damage during shipping.
Great product. Fairly easy install with great video instruction from etrailer.com.
Delivery was fast and efficient. The tracking updates were really helpful. The etrailer instalment and review videos and were amazing and helped with the purchase and attachment.
I dislike writing reviews......BUT.......the Thule racks came next day as promised n assembled nicely with great help from etrailer video so I’m a VERY satisfied customer so THANK YOU etrailer !!!!!
The best ever , I love !!
Package arrived on time.
All the pieces were included - excellent service and product.
Info for this part was:
At etrailer.com we provide the best information available about the products we sell. We take the quality of our information seriously so that you can get the right part the first time. Let us know if anything is missing or if you have any questions.


Thank you! Your comment has been submitted successfully. You should be able to view your question/comment here within a few days.
Error submitting comment. Please try again momentarily.