


Thank you! Your comment has been submitted successfully. You should be able to view your question/comment here within a few days.
Error submitting comment. Please try again momentarily.

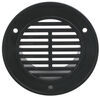
This vent lets you control where the air goes so you can stay comfortable no matter where you’re sitting. The louvered grille rotates a full 360 degrees, so you can point the airflow exactly where you want it. It’s great for fine-tuning air movement without needing extra parts or tools.
Designed for 4" duct openings, this vent installs easily on either a wall or ceiling. The included mounting hardware makes setup simple, and the 2-1/8" depth gives a snug fit that won’t stick out. Once the bezel is in place, the grille snaps right over for a clean finish.
No exposed screws or bulky trim. The two-piece design hides the mounting holes behind a snap-on grille, giving the vent a neat, finished look. It’s an easy way to keep your interior tidy without sacrificing function.
Made from strong beige plastic, this vent holds up to regular use and keeps its color over time. The smooth finish blends in with most interiors, so it looks good while doing the job of moving air where you need it.
With overall dimensions of 5-1/2" diameter by 2-1/8" deep, it fits well in small or tight spots where you still need airflow. The 4-7/8" grille diameter and 4-1/2" center-to-center mounting holes make it straightforward to line up and secure.


Videos are provided as a guide only. Refer to manufacturer installation instructions and specs for complete information.
Randy: Hey guys, Randy here at etrailer.com. Today we're going to be taking a look at a replacement vent from Valterra. It's a four- inch design, so it's designed for use from four-inch vent tubes. It's going to work out great for your heating and air conditioning. Allows you to distribute the air where you want it. You can see as we rotate that, those angled vents are just going to promote air flow in the direction that we want..
Now, It's not a dampered vent. Oftentimes you'll see dampered vents, so we can cut off the airflow generally by rotating it, so it won't come out here and we can get that into other areas. I like the dampered option over the non-dampered option, basically because I feel like your heating and your air conditioning, you can make it a little bit more efficient.That's maybe not as important if you're plugged up to shore power, but if you're boon-docking or dry camping, that can certainly help out. If we can close all the air flow up here, where we don't need it when we're sleeping, or maybe we don't necessarily need the airflow in the bedroom area, and when we're not using it, we want more up here, you can fine-tune it. Outside of that, I think it's going to do a great job.
It's really easy to install. It's a quick and simple process, and it's available in four different colors. We've got the polar white here. There's also going to be a tan. There's going to be a black, of course, and then there's going to be a walnut, which is kind of a light brown color, so regardless of the interior of your RV, you should be able to pick one that's going to match out really well or match up with it really well, and give you a nice look.Generally,, this is going to be a replacement for an already existing vent, or if it's been damaged or something, or if you older ones are just outdated, you can freshen up the look and get new vents to cover all your vent holes there, and just refresh and renew the look of the inside of your RV.
For the replacement process, of course, we need to get our old vent removed, and you see this is the type that spins all the way around the outside there. It has a center push-pin. Now, they can be varying in type, but most of the time you're just going to have a cover on the outside that protects and covers those screws. Makes it look nice. In this one we want to pull out on both sides here.
I'm just going to gently wiggle it side to side.You can see that center section is going to come out, and there we've got our four screws. A lot of times these are going to have a square bit. You can see there's a square in the inside, but a Phillips will also work for it. Let's just get this one taken out. Just going to be wood screws there. Not that much to it. Going pull that out. This is our ducting material. Just like a dryer hose really. I'm just going to pull that out. Now, for the installation process, you can see are two mounting holes, here and here. I need to get this outer cover off. Let me see. I'm just separate it and pull outward. At the same time you do that, push on that little center point. Okay. That inaudible 00:03:04coming out. Once it's out, I just want to slide it around that tube. I'm going to slide the vent tube around it.Pull up as much as you can there, and rotate that to align your original holes. Now this one only has two. Most of them have three or four, so just be using one original and probably making our own down lower. Then, we'll just pop that on. Push it in the center. At that point, the vent's ready to use. You can see how we can rotate that to direct the air to the direction we want. So as you guys can see, nice, easy, simple, straightforward installation. There's not a whole lot to it. If you don't mind not having it, that dampening ability or the ability to shut it off, I think it's going to work out really well for you.
Ratings & Reviews


Info for this part was:
At etrailer we provide the best information available about the products we sell. We take the quality of our information seriously so that you can get the right part the first time. Let us know if anything is missing or if you have any questions.



















Peter
4/20/2022
The vent is working very well after a year of use.I would not change a thing.