
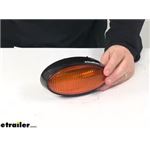
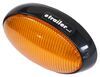
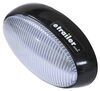
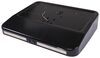
6-1/4" x 3-7/16" Oval. Incandescent light provides bright light for illuminating the area outside your RV. Durable plastic housing with snap-on lens. Surface mount - hardware not included. 2-Wire design. (1) 1141 bulb.
Features:
Specs:
California residents: click here
Videos are provided as a guide only. Refer to manufacturer installation instructions and specs for complete information.
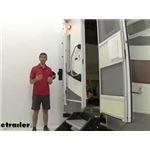
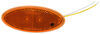
Hey, everybody. Zach here at etrailer.com. Today we're going to be taking a look at a light from Optronics. This is going to be an RV porch light for campers or RVs, but you can also put this on enclosed trailers to act as a utility light. It's going to be a really good option if you're looking for an amber incandescent light. It also works out well for a lot of replacements with RVs and campers.
Now this one doesn't have a switch built into the outside on the housing. We have ours tied into a light switch on the inside. So, that's one thing to keep in mind. But with this light, it's going to do a really good job. It's got a nice clean look to it, kind of a modern look with that oval design.
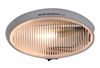
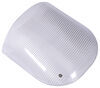
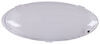
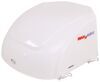
So it's going to make well, if you're looking to replace a light that maybe is damaged, or if you're just looking to kind of add a more modern look to your trailer. There is an identical light just with the white housing that's available.Now, when it comes to incandescent and LED, this one's going to be warm to touch. So I've had this on for a couple of minutes and it's already a little too hot to touch it. But, what I like about incandescent lights is if the bulb burns out, I can replace it pretty easily. I just take the cover off, put a new bulb in.
Now, one thing to keep in mind is, these will burn out much faster than LEDs. The LEDs are going to burn cleaner and they're going to last longer. It's not going to require as much power from your batteries or wherever you're drawing your power from. But to that, they're a little bit more expensive, and when you have to replace it, you have to replace the whole thing for the most part. With this one, if you have a spare bulb somewhere in the camper, you can easily just put that in place.
So that's one benefit to that style.Most lights that come on campers are going to be in this similar size that we have here today. So the measurements on that are six and a quarter, by three and seven sixteenths, by an inch and seven eights in depth. Now I turned the lights off here in the shop to kind of give you a better idea as to how bright this is. I have a little bit of light coming in from next door, but you can see it does a pretty good job of lighting up the area outside of the entrance to our camper. I like the subtle look of the amber. Some people don't really like it as much. They prefer that white light. That option is also available, if you're looking for something to be even more brighter. But for me, I don't need it to be overly aggressive with how bright it is, especially if I'm just hanging out outside on the patio, or if I just want something to kind of light up my steps like we have here today.So the incandescent light, a little bit more dull compared to the LED, but I think that this is a really good option, especially if you're looking to replace or just kind of add something new compared to an older style. The installation is pretty straightforward. So let's just walk you through how we put this one in place.Before we get started, I went ahead and I took off my old light and I have a couple of my wires here exposed. I've already tested those out. I know that my black wire is power and my white wire is ground. So, that works out great. I'm just going to match it up with the back of these. And then we're going to connect these with just standard butt connectors, since it's going to be in our wall there, but you can also use heat shrink butt connectors as well. We have both those available. Get that slid all the way on. Get that crimped down. There we go. We've got a good connection there. Now I can start feeding these back through. We're going to get this lined up to get our holes put in place. You can see, we've tested out some other lights on this camper here before. We might actually have some luck where we don't have to drill those out all the way. I've got a decent amount of extra wire here, so we'll get that all tucked back in.And then, what I'm going to do, I'm going to take this outer housing and get that lined up. Now, hardware is not included with this. So if your old hardware off your old light is still in good condition, I would just reuse that like we're using here today. And then we can just get those put in place. Then we can get our lens cap put in place. Now that I had power hooked back up, we can flip our switch there, and you can see we have a functioning light. Overall, this isn't too bad of an installation. I still have a little bit to clean up here from our old light, put a little bit of sealant around that. But overall, not too bad of an installation. We've got a nice new working light here. But that's going to do it for our look at the Optronics RV porch light and utility light..
Ratings & Reviews

Everything was spot on!!!
Etrailer Rocks!!!
Info for this part was:
At etrailer we provide the best information available about the products we sell. We take the quality of our information seriously so that you can get the right part the first time. Let us know if anything is missing or if you have any questions.


Thank you! Your comment has been submitted successfully. You should be able to view your question/comment here within a few days.
Error submitting comment. Please try again momentarily.