


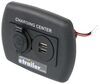
Need a clean, modern way to power your setup? This dual outlet gives you two plug-in options in one compact design, making it easy to run devices and appliances. It installs quickly and fits right into standard spaces for a seamless look.
Videos are provided as a guide only. Refer to manufacturer installation instructions and specs for complete information.
Hi, everyone. I'm Evangeline right here at etrailer. Today, we're taking a look at the RV Designer Speedwire Dual Outlet. This is going to be a 120-volt outlet that you can either add to your RV or use to replace an old one. With this being a speedwire outlet, it has a slightly different method of connecting the wires to the outlet that creates a little bit more of a firmer grip on the wire. So if you stick around to the end of this video, I'll also show you how to get that set up.
RV outlets will look a little different compared to your residential outlets if you've ever had to install those. On the outside, they look the same. So you can see a couple different options and different colors available here at etrailer. On the inside, they're a little different. These are designed to be self-contained boxes that can handle the extra vibration of being on a rope.
So compared to a house where it's not going to be jumping around and vibrating around, therefore you can get away with using a separate box and then installing an outlet in there, this one has everything contained. Having that functionality of being self-contained so that your wires will not make any contact with any metal outside of the outlet, plus being able to have that extra grip on the wire so that vibration won't move the wires out of placement, is almost worth the extra hassle that goes into replacing these outlets. Now, the speedwire version is available only in white here at etrailer, but if you want a dual outlet, but maybe in a different color, we have RV Designer dual outlet options, very similar in design, slightly different in how you push the wires in. So I think it's totally okay to go that route if you want, let's say, a brown or a black version instead. If you are replacing, then that process is going to be super simple because this will fit into pretty much any regular dual outlet spot.
If you are upgrading from maybe a smaller outlet or adding an outlet spot where there was not one before, well, check out the dimensions here on our site. That will help you out with that cut-out process. As for the wiring process, we're not going to go into that into this video. Something I recommend doing is checking out one of our local installers to you since that will be a little bit of a more involved process. But if you're just curious about the replacement process, well, stick around.
All you're going to need is a flathead screwdriver for prying off the faceplate, a Phillips head screwdriver for tightening down the toggle that is already included with your outlets, and make sure to turn off your RV and trailer. That involves unplugging from shore power, turning off your inverter, flipping at your breakers, everything to make sure there's no power going through as you replace your outlet. To start installing or replacing your new outlet, if you have an old outlet, you're first going to have to remove it. That process will be different for different people. What this outlet here needed was I needed a flathead screwdriver. I just pop off that plate and that actually removes from the outlet. And then from there I was able to loosen the top corner bolts, and then that has a toggle in the back and I was able to remove it. Now, here, taking a look at this old outlet, the older toggle is actually off and I already took off the backplate. We can see our wires over here, and something a lot of people like to do is also just double-check and verify the orientation of the plate so that if they replace it's the same as before. I personally am a ground hole facing up person, but if you want to match the old socket, this is a way to make sure you do. Now, here, I'm just gonna lift the wires away. They are pretty jammed in there, so I am going to just grab a screwdriver just to help pry them up and out. See how that's working well. Again, this is only possible because all the power is off. Now, we have our new outlet, and just to double-check, again, checking the orientation and also on the outlet it says white wire, black wire, and then in the center it'll say green wire. So matching that up with our wiring here, this one's pretty straightforward since it matches exactly what the other one did too. And I'm going to start getting these in position to jam down. This is probably the hardest part of the whole process. It requires a lot of muscle to get this into place. Yes, it's technically called speedwire, but you're still going to have to put some work into it. Now, I've seen different people use different things to really help with that pushing down process. Something that's helped for me is having a block of wood to support the flat part of the outlet as I push down, there we go, with the screwdriver. Some people use the back of the outlet as a tool to help push down on those wires. I'm not the biggest fan of that move, simply because the latch for the speedwire setup is a little bit on the shallow side. But if they use that with a clamp, that does help make that connection. Now, make sure that you are fitting this onto your outlet with the long side facing away from the wires, and then there's going to be a short end, and that's going to be where your wires are. Put this into place just like that. And if you haven't already, then go ahead and remove your faceplate. Those just pop out of the outlet, and now you can fit the outlet into the hole. Now, our wire requires almost a 90-degree bending to get up and into place. That's all right. Most important thing is that we can push this back to where the outlet is flush, but also have space for our toggles to turn once they're inside. See that toggle We're going to keep that in a down position now for now. (outlet rattling) Now, you won't quite be able to see behind the outlet since there's a very near narrow peephole, but here's the trick that I do. If I have any access whatsoever behind the outlet, like what I have in this trailer, I'm able to take a look at the back and loosen the toggle just enough to where I can then flip it over to where it goes to the wall, and from there I can then tighten down. This can be very tricky because if you loosen it too far, the toggle will just fall off, and if you don't have access back there, then it's gone forever. So loosen and then check to see if it's clear and then go ahead and tighten down. With that all done, your final step is just to put that faceplate onto your outlet, and good job. You just replaced or added a dual outlet to your RV.
Customer Satisfaction Score:
98% were satisfied with this product
2% of customers were not satisfied
Ratings & Reviews

Do you have a question about this RV Electrical Outlet?
Info for this part was:
At etrailer we provide the best information available about the products we sell. We take the quality of our information seriously so that you can get the right part the first time. Let us know if anything is missing or if you have any questions.

















Thank you! Your comment has been submitted successfully. You should be able to view your question/comment here within a few days.
Error submitting comment. Please try again momentarily.