


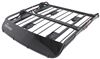
When the road disappears after dark, this Kuat light bar with 5 Diode Dynamics C2 Pro pods helps you take it back. It bolts to your 47-inch Kuat DEK platform with no drilling, keeps light off your hood, and includes wiring for a clean finish.
This driving beam throws a light down your lane and out toward the shoulders, with a reach rated up to 1,280 feet (about four football fields). It's brightest up close and gradually fades with distance, so you get strong light where you're driving and helpful visibility farther out. And because the beam is shaped to stay forward, you get that reach without lighting up your hood and washing out your view.
You want more light up top, not a weekend of measuring, drilling, and hoping you got it right. This light bar is made for a 47" wide Kuat DEK roof platform and bolts on without putting holes in your gear. Wiring is included, so you can run power cleanly and keep your platform looking like it came that way from day one.
 Alternate Instructions
Videos are provided as a guide only. Refer to manufacturer installation instructions and specs for complete information.
Hi everyone. I'm Evangeline here at etrailer. Today, we have the Kuat Dek Light Bar. This is a bar that integrates into your Kuat Dek platform. It's a collaboration of Kuat, and the biodynamics where you have this really cool-looking light bar. Just a really cool addition to your platform, but it also adds functionality.
So if you're driving at night, and you just want a little bit of visibility of your vehicle, you can set it onto the Amber Mode or if you want full visibility of the road, go turn those bright lights on, and now you'll be able to overland with ease. Let's go check it out. Just like the platform, this is available in two width sizes, so 47 inches, which is what we have here, or 54 inches wide. Now you can get this here etrailer along with your platform, or you can get it as an upgrade later on if you decide after having the platform that you want a little extra light added. Now, other than your light pods, this is also all metal with a combination of aluminum and steel.
You have a heavy duty construction there where you have an IP67, which means highest level of solid protection, dust proof, dirt proof, but then also for water. If a quick rainstorm kicks up where you're driving through some snow and some sleet, you're covered. But the main point of a light bar beyond looking really cool on top of your car is to illuminate your surroundings at night. We have 15,000 raw lumens of light beaming out around the front of your vehicle, helping out with that visibility. So if there's stumps in the road, potholes or a quick drop off, you can see it.
Now when you don't quite need all that light, you also have the option of the amber back light. So not as bright on the road, but helpful for when your car needs to be a bit more visible. Now if you're concerned that these lights might be a little too bright, especially since certain areas are pretty strict with even having off-road lights while you're just highway driving, you do have the option of purchasing some light covers. These are designed specifically for your light bar, and that way even when you have it switched to on, it completely covers all of that light. Now speaking of switch, this comes with everything that you may need to get your light bar installed.
The Y harness is included even in extra pigtail if you wanted a more custom OEM switch installation. Very simple installation compared to some other wiring setups that I've seen, and that's because this is designed specifically for your deck platform. Everything works together so it's super simple to get a really cool setup onto your vehicle. So if you're curious about the Dek Platform because maybe you don't have one yet, please use our fit guide here at etrailer where we have the different platforms, the different shapes and different sizes for your vehicle, and that we can get the right fit for you. And then once you've found that, you can then light it up. So if you're curious about how I switched out the front of our platform for this light bar, stick around and I'll show you that process. First unleash light bar, it involves removing four bolts, so two on each side, and if you don't have the Allen key from putting together your platform, you can use the one included with the light bar. With four bolts removed, you can then just gently take this out. Now, I personally recommend doing this disassembly and reassembly when the platform is on the ground, but it's possible on the roof. Then with a new light bar, you're gonna get these square nuts, and you're gonna drop those into the side panels similar to how the old piece looked like, and this will slid in into the platform Now to connect the wiring harness. So I have a quick little mockup here of how to connect that harness. Note that this process is gonna be different depending on your vehicle, depending on your platform, and where it sits, as well as if you want to use the included switch or your own switch. So let's get started. You'll start your mockup process with plugging into the platform. So where our plug is is on the passenger side, so this wiring harness just goes right in. Snaps into place. You'll then run down to where your battery is. So since this is just a mockup, we have our wire hanging here. We're gonna go down this side, and then we also have our wire cover included with our kit. Your wire fits into that rubber cover, and then there's an adhesive at the bottom. That way, once you have exactly where you want to go, this cover sits flush up against your windshield, and it's long enough where it'll fit most applications. You just cut two sides. Running the rest of our wire towards our battery. Here's some key things to look for. So we have a three-way relay, so this is gonna be because we are using a 12 volt connection or 12 volt battery. Now this plugs into the relay, and it has its own mounting bracket. This is included with our setup, and then we run the rest of the wire towards our battery. So the red part, that secure the black wire, that's our ground wire. Make sure you are properly grounded. And then finally we have our switch. So you have two options here. You can use the included switch, and this will keep things powered and connected, and has your two functions. Or if you wanna use your own OEM style switch, you can go ahead and do that. This just has a little pigtail connection, it comes with a pigtail that can then wire into your own style of a switch. In our case today, since we will not be running this switch in through the firewall, I'm just gonna bring this back around over our hood area, and toss this in through the window. When you do route your switch on through your firewall, which is a spot between your hood, and where you sit, then you want to find a good spot for it. If you're familiar with installing brake controllers, then you know that you usually have to install like a dial or a knob somewhere you can easily access. Same thing goes for this switch. I like to put it in blank spots like this near maybe other light functions, and that way everything is in the same place. You can see that with this small diameter, this will fit in most locations, but you may need to either remove a cover, drill a hole to find the best spot for you. Once you're happy with where you have it, and it took me two mockups to make sure that I was happy with where it sat, that it wasn't in the way of anything else. Then you can go ahead and make things pretty. If you are running things through the panel, I use a T20 Torx wrench to undo the bolts here to take off the panel, and then I can run the wire on through. Just make sure you have cable ties or other things to make it neat, and then secure all that in place before you continue on. And for those that are using an OEM style switch, then you can use the included pigtail that's gonna have a blue, and a yellow wire, as well as butt connectors at the end to go into your switch. Butt connectors are included, and just make sure that the blue wire is for the backlight LED power. And then the yellow wire is for the main LED power. And that's gonna be it for our look at the installation, and features of our LED Light bar for your Kuat Dek Platform. It's really straightforward once you know what you're looking at, but if at any point in this video you realize that maybe you want a professional installation because maybe your vehicle just has a lot more going on compared to what we had here, please reach out to us here at etrailer. We also have a dealer locator network where you can find people that can help you out with this installation to make sure that everything is set up correctly. If you have any questions, feel free to reach out. My name is Evangeline here at etrailer, and this is a look at the Kuat Didode Dynamics Light Bar for the Kuat Dek Platform at etrailer.com.
Info for this part was:
At etrailer we provide the best information available about the products we sell. We take the quality of our information seriously so that you can get the right part the first time. Let us know if anything is missing or if you have any questions.


















Thank you! Your comment has been submitted successfully. You should be able to view your question/comment here within a few days.
Error submitting comment. Please try again momentarily.