


Durable nylon legs let you mount Sportz crossbars to your vehicle's factory flush side rails. Custom-fit leg clamps tighten with included tool for easy installation on your rails. Pair with 2 crossbars to create a complete roof rack.
Features:
Specs:

California residents: click here
Videos are provided as a guide only. Refer to manufacturer installation instructions and specs for complete information.
Hi, Matt with etrailer. And today we're gonna be talking about our Rhino-Rack roof rack system with the SX series towers and our Vortex bars. Now let's take a closer look at it. Our roof rack system is gonna be a great option for you if you're really looking at getting more space out of your vehicle. If you're kind of running out of room in the back, maybe you have a lot of people in the back, whether they be kids, other friends or anything like that, or it's already full of other things. So it's gonna be a great option for any luggage or camping supplies.
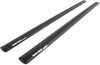
On top, we're gonna have our 54 inch Vortex Aero crossbars, and beneath that we're gonna have our series SX towers. Now let's take a closer look at each one of those. Our Vortex Aero crossbars are really nice, especially with that shape. It's gonna make it more aerodynamic and we're gonna have this built-in weather strip that's also gonna contribute to that and help it be more wind resistant. What I also do like about that weather strip too is protecting that T channel so you don't have any debris getting in there and it's gonna help reduce that wind noise.
And what's nice about this end cap too is we're gonna have this built-in mechanism and we're gonna have an included key so we can take that off. So, and that's just kind of deter any theft if anyone were to come by and try to take any T track accessories off your vehicle. And your towers are gonna come specifically made for our vehicle today. And what's really nice is the way they install is just gonna be right underneath your crossbars and then they're gonna have this built in clamp that will attach to your flush rails. And it's really easy to install as you'll see later.
We just have a knob at the very end to tighten everything up. And it has a built-in lock core just for that added security. Now the way they're gonna sit up here, if we measure from the top of our roof to the bottom of our crossbar, we're gonna have about three inches in between there. So that's just something to kind of note. If you have any clamp on accessories, if you don't plan on using the T channel on top, just making sure you know what you can put on here.
And now if we measure from the top of our roof to the top of the crossbars, that's gonna be four and a half inches. That's important to note, know what areas you have clearance under. So what I recommend doing is taking the total height of your vehicle and then taking the total height of the crossbars too, adding those together to make sure you know. And then for a hangover, because we do have a little bit of hangover, if I'm going from our flush rails to the end of the crossbar, that's gonna be at five and a half inches, which isn't gonna stick out very far at all. It's still gonna stay within your vehicle, but you might be able to put on maybe one clamp on accessory if it has a cylinder clamp. And we're also gonna have a weight capacity of 165 pounds. Just always make sure you check what your roof can handle, just checking your owner's manual. But overall, this is a roof rack system that I really like. It's really straightforward and easy to install, but if you do need a hand with that, just stay tuned, we'll show you how to do that. Alright, to start off our install, we're gonna want to lay everything out. So I'm gonna have my SX Rhino-Rack towers and we're gonna have the keys that go along with them. And then I'd also recommend getting out your pads that go on top those clamps, I just kind of organize 'em so you don't lose them. And I'd also recommend getting a tape measure. You're also gonna have this included tool and this is gonna be your Rhino-Rack key to kind of help you get these end caps off your crossbar. Now let's take a closer look at how to install this. Now what I recommend is starting off with putting these pads on the end clamp here, just kind of matching up that shape and sliding it right on. You can also loosen this up so it fits onto your crossbars a little bit better. Ours are already loosened up. What we have to do to loosen it is just turn this counterclockwise and get this clamp nice and loose. Next up, I'd like to just flip over my crossbar so the bottom side is facing up and we can remove these end caps using our included tool. Just turning that until it unlocks. Sometimes you might have to turn it a little bit more. There we go. And now all we have to do is line up this block here with that channel. Now if you didn't loosen this up enough, or this might just be at a certain point where it doesn't wanna loosen up any, you might have to adjust it some. And after adjusting it somewhere, it'll kind of slide on in there. You can also push this clamp in 'cause that can kind of help too. And it'll just slide through that channel and kind of place it roughly where you think you're gonna need it. After when you've completed this process. Just do that same thing on the other side. Now we wanna get our crossbar spread. Now Rhino-Rack does have a recommendation of how far you should have your crossbar spread. It's gonna be in between a little bit less than 28 inches and all the way up to 31 and a half inches. So just kind of come over here. Can I get a rough estimate of what you need to accommodate whatever accessories you have and kind of mark it off with something. I just use some painters tape. Now if you do have something that is a little bit wider or shorter than that, then I would accommodate that instead, even if it is just slightly off, You're just gonna roughly place it up there, kind of where you left your marker at, just lining up those clamps to your flush bars and then you can go to the other side and make your final adjustments. So making sure that these clamps are around those rails. And when everything is lined up, you can now take out this little tightening knob on the end and tighten these clamps down. You don't wanna tighten it down all the way though, you just wanna get it to where it's getting a little bit of resistance. And then you can go on the other side and tighten that one down as well. Just going back and forth until it's tightened all the way down. Now we can just lock up our end caps on top of our crossbars and lock up the system itself using your included key. After that, I'd like to just double check it, make sure everything's feeling nice and tight. And when it is, then you can take it for a ride. But if you liked everything you saw today, that was just a look at the Rhino-Rack roof rack system on our 2022 Volkswagen Atlas Cross Sport.

Info for this part was:
At etrailer we provide the best information available about the products we sell. We take the quality of our information seriously so that you can get the right part the first time. Let us know if anything is missing or if you have any questions.


Thank you! Your comment has been submitted successfully. You should be able to view your question/comment here within a few days.
Error submitting comment. Please try again momentarily.