


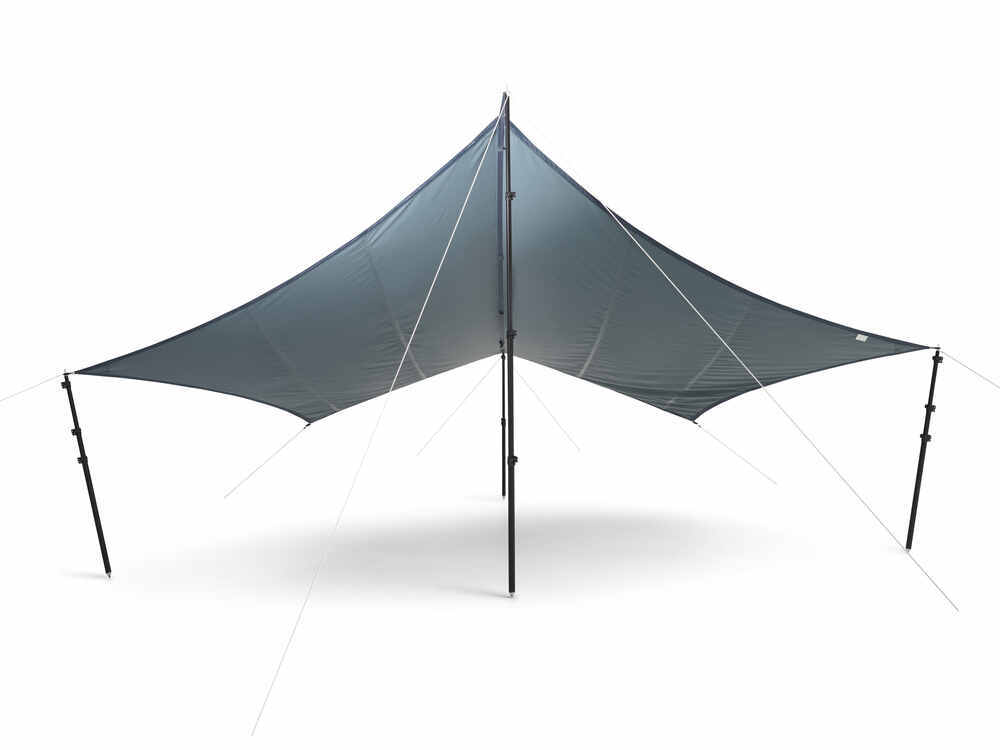
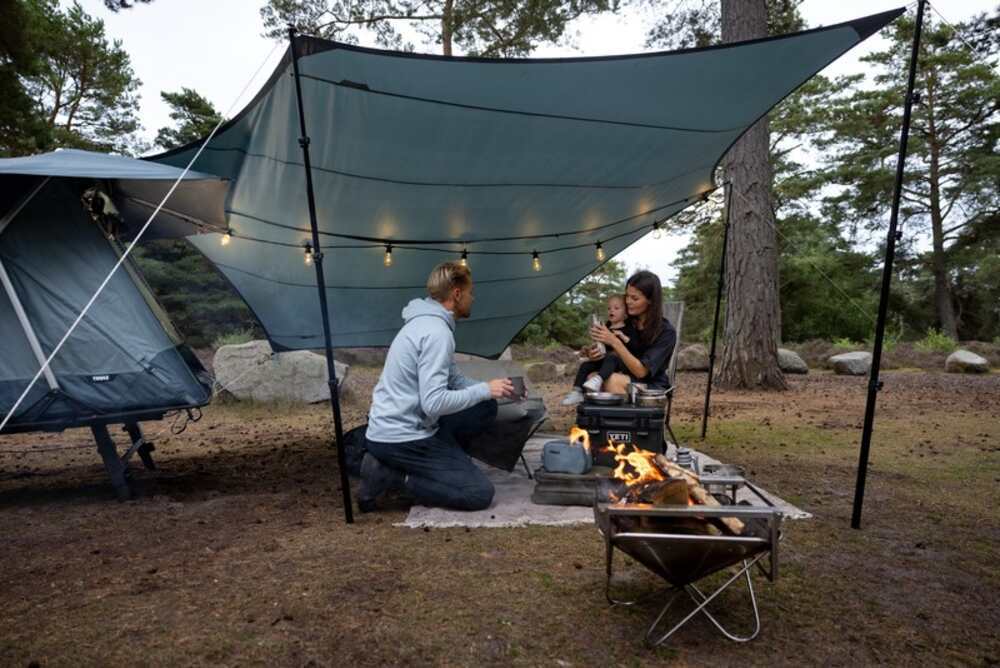


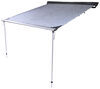
Canopies are bulky. Awnings only work if you park just right. This tarp gives tent campers a better way to stay out of the sun and rain. It packs small and sets up fast, giving you shelter where you sleep, eat, or just hang out.
If you're the kind of camper who pulls in, sets up, and stays put, the Thule StarSet tarp just makes sense. It's smaller than a canopy and not stuck to your car like an awning. You're not trying to build a backyard patio, you just want something that keeps you covered without taking over your gear space or limiting how you set up camp.
It's made for tent campers who want to stay outside. You didn't come all this way to sit in the car or hide in the tent every time the weather turns. You can throw it over your table, set it up above a few chairs, or pitch it over your tent for extra coverage. You stay dry and cool without having to leave where the trip's actually happening.
This thing packs down small and fits easily with the rest of your gear. You don't need to make room for a big frame or oversized bag, and you won't have to leave anything behind just to bring shelter with you.
Setup is quick and doesn't depend on the perfect layout. You don't have to park a certain way just to make things work. Grab the tarp, choose your spot, and put it up. It fits wherever you make camp.
When the sun goes down, the tarp still works. Hang a lantern or string up lights from the anchor points and you've got camp lighting without having to clip a headlamp to a chair or balance a flashlight on the table. You can see what you're doing and stay outside longer.
The kit includes four support poles, two adjustable-height poles for flexibility, eight ground stakes, and four guy lines to keep everything stable. It even includes a convenient storage bag to keep everything organized so you don't lose parts between adventures.
Videos are provided as a guide only. Refer to manufacturer installation instructions and specs for complete information.
Evangeline right here at etrailer. Today, I have our campsite set up with the Thule Starset tarp. This is a very unique offering from Thule. Compared to your regular tents or even your vehicle mounted awnings, this is gonna be a freestanding tarp that provides a lot of shape. Now, I like to go camping because I like to climb in random places that are way off the beaten path. So putting this whole setup together was really interesting for me.
So stick around for this video and we'll talk about some of the features that really stuck out, and I'll also give some of my tips and tricks to really make this tarp work for you. When I first heard that Thule has a tarp, I was really confused because for me, a tarp is what I use for very primitive bare-bone camping where you just tie different ends up of the tarp to trees and suddenly you now have some rain cover. But once I start putting things together, I understand the whole point now. So the main benefits you get from the Thule tarp is definitely gonna be that you get a lot more shade with this, a lot of customization with a different star points, and somehow it all packs up to be a lot smaller and more compact compared to many different tents and awnings. This is really easy to just toss into your car along with all the rest of your campsite gear, so now you're ready for adventure.
It's currently midday here at etrailer, so the sun is beating down. And look at all this space we have that is in the shade. So for reference, I have the etrailer outdoor rug or RV mat that's eight feet wide by 20 feet long. Now, this is my preferred footprint for when I go camping because water can go through, has a lot of shade, has a lot of coverage. But it matches very nicely with our Starset tarp because that also has a lot of shade that it provides.
Now, the shade and the sun, that's gonna move throughout the day. So having more coverage or as much coverage as possible is always the way to go. So no matter what time of day it is, you're covered. But if you do want to adjust your campsite because of where the sun is in the sky, that's really easy to do. Compared to the vehicle mounted awning where you kind of have to move the whole vehicle at that point, here you have some options with your two extra poles.
So the poles are there to give support, but you can adjust the height of the poles up and down for different amounts of shade. You can completely remove two of the poles if you want more of a sidewall situation, or you can move the poles around if you want to adjust where the entrances are. So it really does depend throughout the day on what your camping needs are. This can adjust with you. The material this is made of is 200D polyester. For those that shop tents and awnings, very important number because that is within the very lightweight and malleable range while still being durable. Now, to add to that durability, it is coated with polyurethane. So that way as water comes down, you can just see it bead up and then slide it right down versus seeping through the fabric. Along the sides, this is reinforced with very nicely stitched reinforcements as well as a more canvas material for your stress points, which is where you're tying down. So big question there is, will this work in a rainstorm Well, I have some tips and tricks there. If it's some extreme weather coming up like a tornado or something, definitely seek better shelter. But if it's just a quick little storm in the night, then I start doing things like lowering the poles a little bit so there's less to catch. I would really tighten down all of the guy lines, making sure there's a lot more tension than what we have here. I might even remove the two extra poles so that I have more side coverage. And then, I just center my tent underneath the shelter. In fact, I sometimes prefer using the Starset shelter compared to my own rain fly because a rain fly sticks so close to the tent, it gets really stuffy. But there's just nothing like the experience of being in your tent, knowing that you're sheltered by a larger tarp and hearing the sound of rain without feeling the rain while you're all snuggled up and cozy inside your tent. So I actually do recommend this for some rain situations, but again, double check the forecast, use your best judgment and buckle down. Now it's time to set up your tarp. While there's not that many pieces to it, sometimes it can get a little confusing on which side is which, where do I put what, so I'm gonna guide you through that process. You're gonna have four poles. You're gonna have your main tarp and you're also going to have a carrying bag with some stakes and guy ropes. So we'll start with the poles. You can see at full extension, they extend pretty high up. You're gonna set up two of the poles along the tent fabric and we're gonna go for the long angle here. Then you start by seeing how much space you need. So you're gonna have your tarp and you want to have it folded in half along the long angle. So coming into where we put our first pole, that will be the sides with the buckles and the more canvassy strap. So we're just gonna lay the pole here, just sitting out like this, and you can see where I have the other pole set up just like this. And then we're not gonna lift the poles up yet, but this is gonna be a great way to stake out our stakes. You're gonna hammer down two stakes on each end of the pole. So following the pole, you make a 90-degree turn and then that's the direction you're gonna put each stake. Now, you can just use any old rock that's lying around your campsite. I highly recommend taking a look at some of our tent camping mallets that have hooks on the end 'cause that'll be much easier than whatever I'm doing. You're gonna have two different guy lines. So go ahead and grab the larger guy lines. These are gonna have two tensioners at the end. And with these guy lines, you'll also have a center loop already knocked it in there. So what you're gonna do is you're gonna get the first end and then that will go through the first stake, and then you're gonna bring the middle loop over to your tarp. And then this will go into the pole and then you're going to take the other end and that will go into the third stake. Now it's time to lift that pole up. Here's how I like to do it. I stake it into the ground. I bring this back up there so that it is truly secure, and then I adjust the tension of the rope, which will help keep that pole up. Hold onto the tensioner and then tilt it like this in order to pull. And then when you need to lock it, make sure that rope sits along the tensioner. So pull and then lock. Do that on both sides. If your tent is falling as you're doing this, don't worry about it. Do the same thing on the other end and then that will help create just some extra force to pull against each other. Rather than having the pole straight up and down, go ahead and have them all angled towards each other. And again, make sure that those guy lines are tight. As you stake down the side flaps, think diagonal. We want to stake in a star-shape pattern. So grab the flap and instead of looking to its partner or straight across, you're gonna look to its diagonal counterpart over towards the back. So picture that line and then follow that and then this is where you will put your next stake. The guy lines for the side flaps will be a little different. They're gonna have this T-bone here, which will go into the side flap and then it pulls just like that. The other end will have a stake end and a tensioner similar to the ones from earlier. What not everyone knows is that these triangular tensioners lock on both ends. If you find that you can only stake super close to the tent, then go ahead and pull that knotted end further out. And then this knotted end will actually lock into your tensioner when it's staked. So just like how the tarp end of the rope locks when you pull it tight that way, it's the same for the bottom. But you do have to just double check because they do lock in the same spot. So make sure that there's enough space for both of those ropes. With the side secured, you're now able to see that there's a strap and this goes along the lengthwise of the tent and then buckles into the other side. They're able to adjust the tension based off of the height that you have your tent set to. This rope adds a little bit of support to the middle, but more importantly, this is what you can hook your lights or other things to. It has different loops throughout the strap that you can utilize. You still have two poles left over, so you have some options here. You can either put both poles on the longer side or on both shorter sides, whichever side you think needs a little bit more height. This will go into the pole end and then you'll just bring this up. So go ahead and adjust your different stakes and guy lines accordingly if this is the route you want to go. Now all you need to do is start making this homey, whether it's putting a mat in place, start putting lights up on the top of the tent, getting your camping chairs or your coolers, telling everyone, "Hey, the campsite's all set up. Just bring your stuff in here and let's have a great time." Now, there's general instructions from Thule on how to get your Starset tarp set up. But what I love doing is just customizing everything or giving trips and tricks so that you can figure out the best fit for you. While there's not many parts involved with the Starset tarp, there's a lot of different ways you can adjust it depending on where you put your stakes, where you put the poles, the different heights, things like that. So hopefully this video kind of guided you through my process of getting this set up so that you can now set it up for your own adventures.
Info for this part was:
At etrailer we provide the best information available about the products we sell. We take the quality of our information seriously so that you can get the right part the first time. Let us know if anything is missing or if you have any questions.
















Thank you! Your comment has been submitted successfully. You should be able to view your question/comment here within a few days.
Error submitting comment. Please try again momentarily.