

To see if this custom-fit item will work for you please tell us what vehicle you'll use it with.


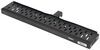
Make your lifted truck more accessible with running boards and adjustable height mounting brackets. 6" Wide boards can be set at 4 different heights depending on your needs. Serrated tread provides great traction. Custom fit for your vehicle.
Features:
Specs:
Videos are provided as a guide only. Refer to manufacturer installation instructions and specs for complete information.
Hi, everyone! Aiden here with etrailer.com. Today, we're gonna take a look at and show you how to install these running boards from Romik on our 2022 Toyota Tundra. Now, this is gonna be a very wide running board, so if you're looking for something that's gonna give you a great foothold as you step up into your vehicle, this is gonna be a great option. You've got six inches of width from outside to inside edge there, as well as a ton of grip for your shoe. So if you have some muddy shoes or anything like that, (shoe thudding) or maybe it's wet, these are gonna provide great traction for you. One other unique thing about them is the fact that they are height adjustable.
This is something we'll touch on more during the install process, but whenever you are installing them, you can pick whatever height you want it to be, anywhere from zero inches of the drop to three inches of drop. We've got it in the position right now where it's dropping down two inches, so it is gonna hang down a little bit lower this way. So, whatever height you need to comfortably get into your truck, you can set that. One downside to that height adjustability is that there are just more pieces to the bracket. Rather than one full piece, it's the two pieces joined together that you can adjust the height on.
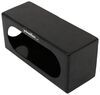
The downside to that is that it just doesn't feel as stable as other options out there. So if that is something you're concerned about, maybe check out something that has a single piece bracket that won't be moving around as much. One thing to point out is that we are using this with the optional covers, that will actually hide the brackets underneath and give it a bit of a cleaner look. It's gonna be an aluminum construction, so I'm not too worried about rust and corrosion over time, and then it's gonna have a 500 pound weight capacity. I'm about 220 right now, and I'd say I feel pretty stable even though those brackets do flex a little bit more, I feel like it stops out, and I feel pretty comfortable on here, and especially if I had someone hopping in the front seat at the same time as someone hopping in the back seat, I wouldn't be too worried about it.
Now personally, I'm not the biggest fan of the design of these running boards, I just don't feel like they fit with the Tundra super well. They're a very boxy, rectangular design, which is great for function because you get a wide foothold, and it's plenty of room to step on, but I just don't think it really matches the look of the Tundra. You might think something different, it's really just down to personal preference though. And then, as far as the install goes, everything's gonna be pretty straightforward. The brackets that actually attach to the vehicle are custom fit for the Tundra and use existing factory bolts, so it's really straightforward, and we can show you how to do it right now.
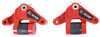
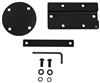
Starting off the install, we'll move underneath the vehicle, and we're gonna have four spots where we can attach these brackets. Now, you wanna be mindful of what brackets you're using. Luckily though, they'll only fit based on the driver's or passenger's side, and they'll line up with factory holes. So, we've got three brackets here (brackets clinking) that are all the exact same. That'll be for our middle and rear positions on the passenger side. (brackets clinking) And then, the driver's side ones will look like this, just a mirror image of them. And then, we've got one that's slightly different for the frontmost mounting point, and that's gonna be the same for the driver's side. It's gonna be this but just a mirror image of it. So, make sure you've got the right brackets, and we'll move underneath the vehicle. For that first mounting location, a great way to find it is just go to where it says Tundra on your door, straight down from that, and up underneath here, and underneath right there, we'll find two existing factory bolts in line with each other. I'm just gonna come through and remove those. Make sure you save these (drill shuffling) because we will reuse them. (drill clicking and buzzing) (drill shuffling) (drill buzzing) (drill clicking) Right up there is where we removed our first two bolts for that first bracket. And then, if you just move straight back, eventually, you'll see two more bolts directly in our line with each other. That's the point for our second bracket. Move on back. (wheels swishing) We've got another pair that's for a third, and then move on back, another pair for our fourth. Those are gonna be the ones we want to remove and install our brackets. And then, we'll take those brackets we saw before, this is that unique front one. We'll just put it up into place and secure it (component clinking) with our factory hardware that we just removed. (component shuffling) So, I'm just gonna get these hand tight for now, and then we can move on down the line with the rest of the brackets. With all those in place on the vehicle hand tight still, we can take our other four brackets. These are the ones that will attach to the vehicle brackets, and then attach (hand tapping) to our running boards. Just like before, we've got three (running board clinking) that are identical, and then we've got one that is a little bit different. You can see here, it mostly matches up, but this portion that the running board will sit on right here is flipped. This unique bracket will go in the rearmost mounting location, and then all the other three will be (running board clinking) in the two middle and the front most one, the flat face on here will attach to the flat face of our vehicle bracket, and secure, using two of these flange bolts (bolts clinking) pass through just like this, and secured with flange nuts on the other side. You can choose whatever height you want to at this point, so you can go from these holes here for a zero inch drop, or you can go all the way up top for a three-inch drop. For our customer today, we're going with this one here for a two-inch drop, and we'll be using those holes to mount everything up. So, we've got our flange bolts pass through. Those will also (running board clinking) pass through the vehicle bracket. And then, like we mentioned, secure on the other side with that flange nut. (flange nut swishing) These are again gonna be hand tight just for now, we'll come back through and tighten them in just a bit. We'll repeat this process down the line for our other brackets. (component clinking) (component clinking) At this point, I'm gonna go back through and fully tighten down the vehicle brackets first. (tool shuffling) (tool buzzing) (tool shuffling) (tool buzzing) At this point, it's a good idea to grab a level because we're gonna be tightening down these brackets that our running board will sit on. You see, we've got a fair bit of play in there right now, and a magnetic level would probably be the most helpful 'cause you can let it just sit here, and we can tighten down the flange nut and flange bolt using our 13 millimeter wrench and socket. (tool shuffling) And I'm gonna torque these down to the specifications in our instructions. So, lemme get that close to level here. And once we're happy with where it is, we can torque it down, making sure that it stays level while we do that. (tool clinking) (tool creaking) (tool beeping and humming) And then, (tool shuffling) once you've got that torqued down, you can move down the line and just repeat that process. Now, for the running board, if we want to get it laid out, these ridges here are gonna face the outside of the vehicle, and I'm just gonna actually flip this upside down right now. (ridge clanking) And so, in this state, this is the outside edge, and this is the inside edge that'll face the vehicle. And we're gonna have a couple things to take care of here. We've got these plates (plates clinking) that are already in these tracks, and we'll just slide back and forth, and you've got four of them. So, we'll just start with one for now. We've got two carriage bolts that I'm going to (bolts shuffling) pass through with the threads facing up towards me right now, eventually, these will be face down towards the ground. And just secure those (bolts clicking) with these plastic rings. Those will kind of grab (bolts clicking) onto the threads and hold it in place, so I don't need to hold them there myself. We've got this plate that has a bit of an indentation there that will match with this part of (plate clicking) the running board. Just drop that over the threads. And then, we wanna repeat that for the other three plates, just leaving them roughly in the right position. (plates shuffling) (component shuffling) And then, we're gonna have these cover portions. These are basically just going to sit over here and sort of block the bracketry going on right here, and just give a cleaner look. Now, these are adjustable as well because we have these dropped down one position, I'm gonna go to this first marker line on the back and actually just cut along that so it fits properly. If you have this at the lowest setting, you don't need to make any modifications, so just find the appropriate line where you have yours set and make that cut. A pair of scissors will do just fine. With those covers cut, we're gonna go ahead and line up the threads of our carriage bolt with the middle slot right here, (component clinking) just like that. And then, loosely secure these flange nuts on the other side. It will do that for all the other carriage bolts. With all those in place, I found it helpful to just set the running board kind of vertically like this, mostly in place where it's gonna go. And just slide all of those brackets roughly in line with these slotted holes on our vehicle brackets. (bracket shuffling) And (component swishing) once they're all loosely in place, you can lift it up and try to get those carriage bolts to slot in here with the flange nut underneath. Might be helpful to have an extra set of hands for this part, just to make sure everything's secure, but it is doable on your own. (bracket clinking) (bracket shuffling) It is pretty snug to get these properly wrapped around the slotted holes here 'cause the brackets are fairly thick. So, I found it helpful, once you've got it up there most of the way, since these brackets on the vehicle are level, (bracket clinking) it will hold itself pretty all right. And you can take those flange nuts off and kind of apply (flange nut clicking) some pressure on the head of the carriage bolt to get those threads to pop down through and secure the flange nuts underneath rather than trying to have them loose enough that it can just slide on on its own. Once everything's loosely in place, I'm just going to go ahead (running board clicking) and push the running board in. It'll kind of stop out once it hits those brackets, so we know it's all relatively even this way. And then, you can make your front (running board swishing) to back adjustments, and really just set it wherever you want. I'm gonna get mine lined up to where this edge lines up with that door panel right there just like I did on the other side of the vehicle. And once we're happy with where everything's positioned, just make sure your carriage bolts underneath are in the right position, spread out a little bit, and we can go through, tighten those down, and make sure that they're torqued to the specifications in our instructions. (tool creaking) (tool beeping and clicking) Once you've got that done on both the passenger and the driver's side, your install is pretty much done. there's just one thing (car door clicking) left to do, and that is test it out. (feet shuffling) I'd say overall, it feels good, and that's about it! (car door thudding) That'll conclude our installation on this 2022 Toyota Tundra, thanks for watchin'.

I like the boards themselves. The only issue is that my Tundra has pretapped holes for four brackets and it only comes with three. For the cost and quality of the boards there should be four brakets. It would stiffens up the flex of the alumimun boards.
Brackets and hardware are in good shape.The running boards are what I expected and appear to be decent quality. They have only been mounted for 4 days so time will tell how they hold up here in Upstate New York. The mounting instructions were OK, the detail on mounting the running boards to the brackets was vague and could do with a little more detail on how to mount the running board brackets to the truck mounted brackets.
Info for this part was:
At etrailer.com we provide the best information available about the products we sell. We take the quality of our information seriously so that you can get the right part the first time. Let us know if anything is missing or if you have any questions.


Thank you! Your comment has been submitted successfully. You should be able to view your question/comment here within a few days.
Error submitting comment. Please try again momentarily.