
To see if this custom-fit item will work for you please tell us what vehicle you'll use it with.


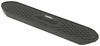
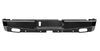
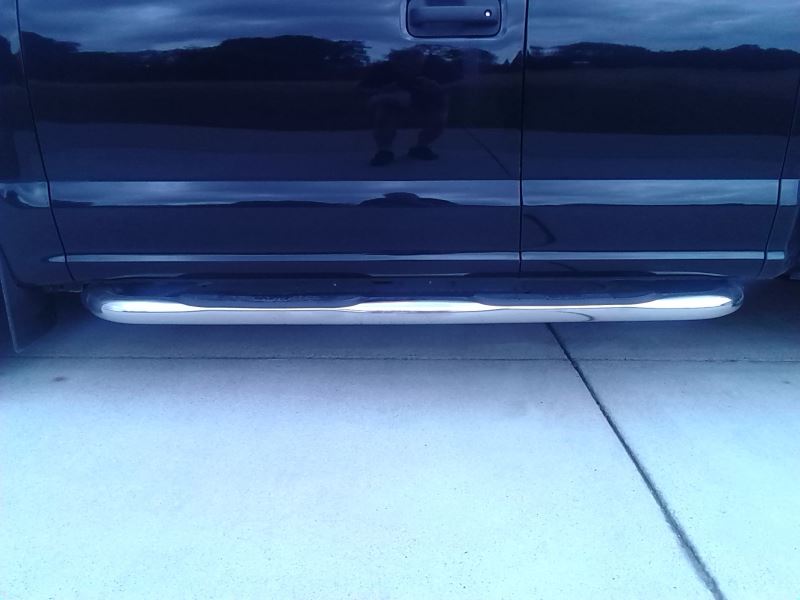
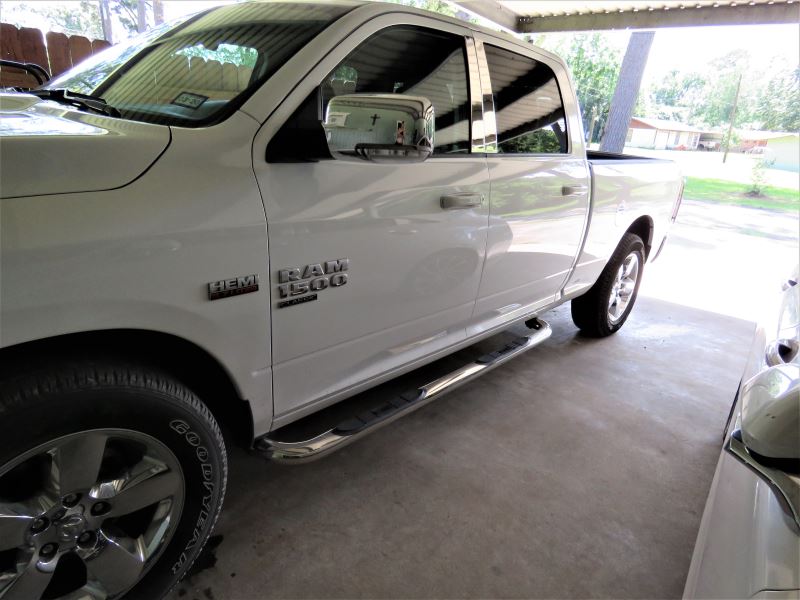
The curved ends on these affordably priced step bars give your Ram 1500 a streamlined look. The non-slip step pads in these powder coated steel, 3" diameter bars sit in recessed areas instead of cutouts to inhibit internal corrosion.
Features:
Specs:
The step pad areas in Westin's E-Series round nerf bars are indented instead of cut out, maintaining the structural integrity of the steel tubing and preventing internal corrosion.
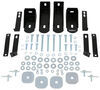
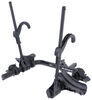
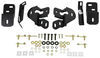
As shown in the image above, these step bars have a U-style tubing, which ensures that each bar conforms perfectly to your vehicle. Installation is quick and simple - just bolt the mounting brackets to existing holes in your truck's frame. No drilling is required.
California residents: click here
Videos are provided as a guide only. Refer to manufacturer installation instructions and specs for complete information.
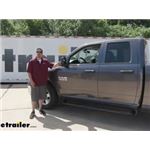
Hey everybody. It's Rob here at etrailer.com and today we're going to be taking a look at the Westin E-Series round tube steps on our 2017 RAM 1500. Now, we're going to go ahead and show you what they look like once they're installed, go over some of the features because we know that's what people want to see. But if you stick around to the end of the video, we are going to show you how to install it as well.Now, our Westin E-Series nerf bars here do come in two different variations. Here, we have the black powder-coated steel version. So it's just going to be black powder coat over a steel construction, but they also have a stainless steel polished version.
The steps are still going to be black, just like on here. But the tube itself is going to be a really high polished stainless steel.And really it's just going to come down to a personal preference. We have a dark grey truck. I think the black looks really good on here. It compliments everything, has that dark blacked-out look.
But at the same time, if you have chrome wheels and the stainless steel bumpers, I think the stainless steel steps would look really well. Again, I just really think that's a personal preference.So, tube steps are going to serve two different purposes. They are going to make it a little bit easier for us to get in and out of our truck. But at the same time, they're going to have a style to them. They're going to allow us to make our truck our own.
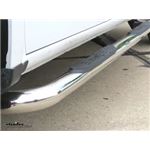
And again, whether we have black, stainless steel, chrome, anything like that, we can really customize our vehicle to make it our own and show off our own personal style.Our Westin E-Series here, are what I consider to be a classic tube step or a Nerf bar. They're going to be three inches in diameter. And what I do like about them, is if we look at the end here, they curve in and it ends underneath the truck. So, we have a really clean look to it. It'll curve in, come out and we have that nice straight section with our steps on it, but then it's going to curve in at the back.
So, it has a big U shape. So it really has a finished look. Some tube steps tend to just stop and there's a cap on the end. It doesn't look bad, but I think this just has more of a finished look to it. And again, it has that classic Nerf bar look to it as well.I think our Western East series look pretty nice on our truck. To me, they have that traditional classic Nerf bar style look. But one thing I really do appreciate that they did with it is the ends here. Normally, a lot of Nerf bars, they just stop and there's an end cap, but I like how it curves in and goes under the truck. It's going to do that on the front and the back. So it's a U shape and it definitely has a more finished, streamlined look to it.As far as functionality, if the steps weren't here, you can see that the threshold of the door is pretty high off the ground. Having to lift your leg that high to get in the truck can be a little bothersome, but now with our steps here, you can see it's only about half the distance. So, it makes it a lot easier for us to get in and out of our truck.Another thing a lot of people don't think about when it comes to tube steps, is they actually will save your seat quite a bit. Because if you don't have the tube steps, we end up leaning out in our seat like this so we can get our leg down far enough. And we just end up mushing this side of our seat down over time, it starts breaking down and that cushion doesn't last as long.Another thing that having tube steps definitely helps out, I'm not that tall of a person, so whenever I'm washing my truck, it takes a lot for me to reach all the way to the center. But using the steps here, I can reach almost to the center of the truck and then wash the other side that way. And we don't have to step inside the carpet and try to balance.Now you can see our steps are going to be a cab length, so they're going to run from the front, behind the front wheel well, all the way to the end of the cab here. And we are going to get a step for each door. So, since we've got a crew cab here, the people in the back still have a step, so they can get in and out with confidence and not have to worry about slipping.And each one of the steps is going to be the full width of the bar. So, we're going to get a full three-inch step pad here, and it's going to be right about 21 inches long. So, we've got a decent amount of space here to find a footing and get in or out of our truck.Now, the steps are going to come with all the brackets, hardware and everything you need to get it installed. Speaking of which, let's go and bring our RAM into the shop and we'll go through the installation process to get together.To begin our installation, we're going to come to the driver's side and we're going to be coming right underneath the rocker panel here. Where we want to be in between the frame and the rocker panel. We'll come to the inside and you're going to see a lot of tape covering up some factory holes that we need to pull off.So, at the very front, behind the front tire, we'll find a piece of tape covering up a factory hole, and then one right behind it, and there may be a brace like we have here. I just want to peel that tape off. And even if it's underneath that bracket, that's fine. You just want to get the tape out of the way so we have access to that hole. We're going to get a few things in place. We're going to have a bolt block. And along with that bolt block, we're also going to have this little plastic retainer. That retainer is going to help hold the bolt in place. And the bolt needs to come through this hole right here.Now you can see it's not quite going to fit. So, what we're going to do is we're going to grab our pull-wire out of our kit. We're going to take the coiled end, we'll go into that hole. We're going to feed it back towards that large oval hole. And typically you can put your finger in there, grab the coiled end. Sometimes you can just wiggle the wire to get it to come out. You want to make sure the tail end and the coiled end are sticking out. We're going to take that pull-wire, we're going to thread on the block that has the M10 bolts on it. It's going to be the one that only has a single bolt on it. So, when you know you have the right one, we'll push that into the frame and I have to work it in there. See how you can get it in there.Once you have it in, you want to pull on that pull-wire to where that stud is coming straight out. You want to remove the pull-wire from the bolt, but you don't want to drop the bolt. And you also want to be careful because we're going to have to reuse the pull-wire on the other side. So, you don't want to damage it, just unscrew it, hold the bolt with your finger. Then we want to grab that plastic retainer and we're going to put it right on the edge. And you can start that thread on there a little bit. Once you have it on there, you can grab the edge of it. And we want to thread that plastic retainer to where the bolt be nice and snug against the sheet metal. That way the bolt won't fall in, and we have a nice stud sticking out of the frame.Now we can grab our driver's side bracket. If you look at it, it's going to have an L shape to it. That's going to fit right on this lip here on the rocker panel. You'll also notice that we're going to have one hole that's higher, it's round, and we'll have a slotted hole. The round hole is going to fit right over that stud. Just gently put it in place. We want to follow that up with a flat washer, then we'll follow it up with a M10 lock washer. Finally, we're going to loosely secure it using an N10 hex nut.You don't really need a crank on this just yet. We just want to get it nice and snug, to where we know the bracket's not going to come off. And for our other mounting location here, we already have a free threaded hole. So, you want to grab the M8 bolts out of our kit, follow it up with a split lock washer and then a large flat washer. And again, we just want to get this loosely started just so we know that it's actually threading in, but it's not going to cross thread. The threads are a little dirty. You may want to clean them out, but again, just get a couple of threads in there so it'll hold the bracket in place.Now, if we move towards the center, we're going to find our front factory body mount. There's a bolt right going to the bottom. You need to pull that bolt out, but I will let you know from experience, especially if it's been raining recently where you are, your truck may be dry on the outside, but when you remove this bolt, there's a bushing inside of there. And it does tend to hold a lot of water. So, when you pull this bolt down, just make sure you're not in the way too much, because if you're using an impact, it can start spraying that water everywhere. And typically it's pretty dirty water.So, we're going to use an 18 millimeter socket and pull that bolt out. Once you have the bolt removed, again, if there was a bunch of water coming out, just to save yourself from making an even bigger mess, I would wipe it down. Because again, once we go to tighten it back up, the bolts just started spinning. And I don't think anybody wants water being flung around while they're trying to work. So let's clean all that gunk off.Then we want to grab the brace here. Now, you'll notice that we have a couple slotted holes, we want this gusset it to be towards the back. So, it's going to line up with the body bolt and then the bolt in the front bracket here. So, just go through the body mount using that factory bolt, get it lined up. For now, we just want to get it loosely in place. You don't need to really crank on it yet, but let's get it loosely tightened up and snug it down just a little bit. And that oval hole on the dropdown section should line up with the bracket down here. If it doesn't, again, still a little loose, you should have a little bit of movement in both the brackets still.With the front brackets loosely in place, we want to move to the rear of the cab. That's going to be the very back corner of the cab, right where the cab meets the bed of our truck here. We'll come underneath, again on the inside of the rocker panel. This time, we're going to find another piece of tape with two holes right below it. Again, we want to peel that tape off, get it out of the way. And now we want to grab our bolt with a nut plate on it. It's going to be an M12 bolt and an M10 nut. We also want to grab one of the M12 retaining plates, and this one is going to fit over the larger bolt. And we want to put our bolts in. Make sure that bolt goes all the way in, but you want to thread on that plastic retainer so you can hold onto it. And again, we're going to tighten it up to where it sits pretty close to the body.Now, it is going to move around on you a little bit, just because it will hold it in place, but it's not going to really hold until our nut stays lined up with that hole. But that's eventually where it needs to be. We need to grab our rear bracket now, and again, it's going to have an L shape to it. You want to make sure the lower hole is going towards the front of the truck. So, we'll line up our bracket. You see, it's going to slide right over the stud. You want to follow up that bolt with a flat washer. And we're going to grab an M12 lock washer and secure it down with a nut. Now, again, we don't need to crank down on this. We actually want to leave it a little loose because we are going to have to pivot the nut to where we can line it up with the hole right here. So, if you just get a couple threads on there, just enough to make sure that it's not going to come off.So, we'll grab our M 10 bolts, slide a lock washer and a flat washer over it. And then again, we're just going to rotate our nut plate until we can get it to line up. We're going to go through the bracket and then thread in our M10 bolt into that nut plate. Make sure that it actually grabs and is threading in place. Get a few turns on each one of them.Now, each one of our brackets here, the rear one, as well as the front one, have those holes going through. Those are going to be our actual mounting locations for our boards. We're going to take the half-inch bolts out of our kit, follow it up with a split lock washer. We're going to put a large flat washer on it. That bolt will go through the bracket. And then our board is going to be right here and screw directly into the board. So at this point, we want to have our bolts at least halfway ready, close to the brackets so we can lift up the board and get them in place.So at this point, we can grab our boards. They are going to be labeled in the package. So, you don't really have to worry about putting them on incorrectly, but I'm going to rest one side of my board down, lift up one end and pass our bolt through. And then on the end of the board, there's actually a nut on the inside. So, we just want to get that bolt loosely started to where we know it's going to be secure and not fall. Then we can move forward, lift the front end up, and get that secure as well.Once you have your board secured down, we can come back with the 19 millimeter socket and start snugging up the large bolts that are going into the board. We can go back, and we're going to start tightening all of our hardware. And that does include that body mount, vertically going up.For all your M10 bolts and nuts, you want to use a 16 millimeter socket. And since it's behind this bracket, you may want to use a hand ratchet, just so you have a little bit more space to actually get in there and tighten everything down. For our M12 bolts, we're going to be using an 18 millimeter socket to tighten those up. Then finally, our M8 bolt, we're going to be using a 14 millimeter socket to tighten that up.With the driver's side on, the passenger side is going to install the exact same way it's just a mirror image, and the brackets are going to go in the exact same locations and use the same combination of hardware.With all that being said, again, I'm Rob here at etrailer.com and that'll finish up your look at the Westin E-Series round Nerf bars on our 2017 RAM 1500..
Average Customer Rating: 4.8 out of 5 stars (264 Customer Reviews)
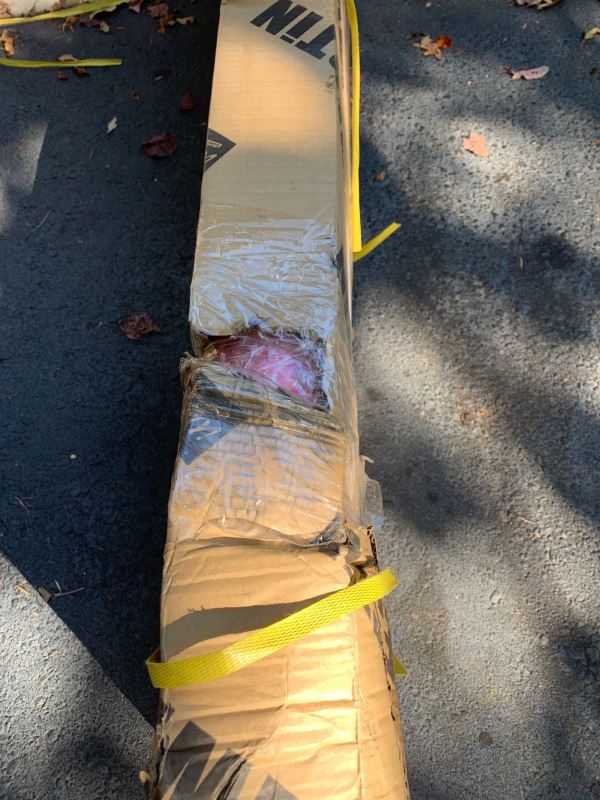
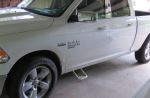
The curved ends on these affordably priced step bars give your vehicle a streamlined look. The non-slip step pads in these powder coated steel, 3" diameter bars sit in recessed areas instead of cutouts to inhibit internal corrosion.I believe I was shipped incorrect front mounts that will not get flush with the underside of the vehicle. Most videos show a mounting plate that is cut off where you see my finger in the photo but the larger plates here cause an issue with the 2019 ram 1500
Everything went smoothly from ordering to installation. I’ve been very happy with everything I’ve ordered from etrailer.
I have just finished the install of these bars on my 2002 2500HD. The installation went quickly and efficiently due to the quality of the product and in large part from the detailed installation videos provided by Trailer. The included instructions were next to useless, but referring to etrailer's video made the difference. I go out of my way to use Trailer for many needs, not just for the product, but for the support that this company offers.
My delivery was two days earlier than expected which was great. The nerf bars were very easy to install. It took me about an hour to remove the old ones and install the new ones. I am very satisfied with the product and the company. Thank you for a stress free project.
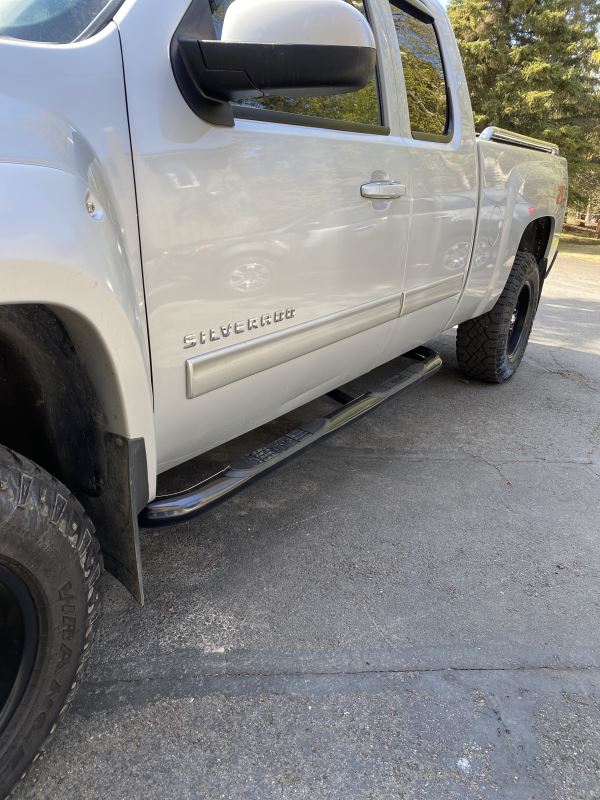
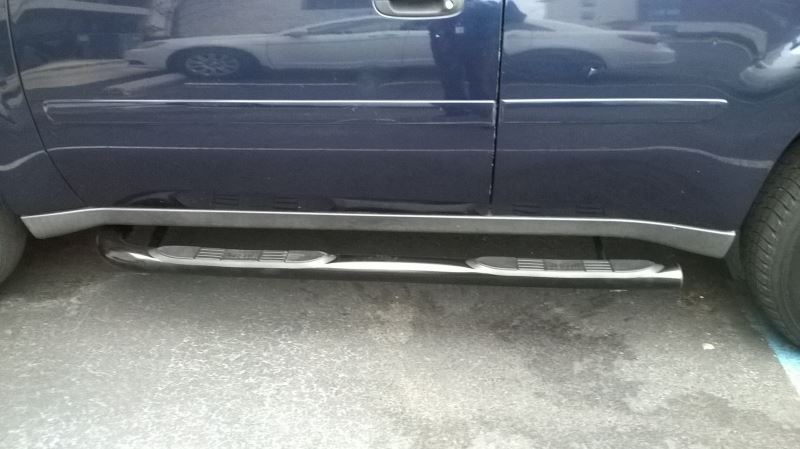
They came well packaged but one end was kinda opened but everything seemed to be there. The first one the driver side I tightened as I went. I had to go back and forth loosening and tightening. The passenger side I left loose and mounted the bars to the mounts tight. Then I came back and tightened the large bolts to the frame. This worked a lot better. I used a impact to loosen the frame bolts and an air Ratchet to tighten the bars to the brackets. The air tools speeds up the process I learned this working on aircraft.I bought the green in the photos in 1997 it is a 96 it had 5445 miles on it now it has 253000 miles it. I bought the Westin bars for it shortly after I bought the truck. They still look good when clean.
you guys are great.answered my question quickly.thanks for your help and I would recamend etrailer for your needs.
Very fast delivery. UPS did not handle the shipment with care as the package was not in good shape when received but the contents were not damaged. The boards were installed by a reccomend installer and add to the appearance of the vehicle.
I had the chrome nerf bars before. Apparently Westin stopped making them. The black ones look just as sharp. Very happy with etrailer, Westin and the bars. Thank you!
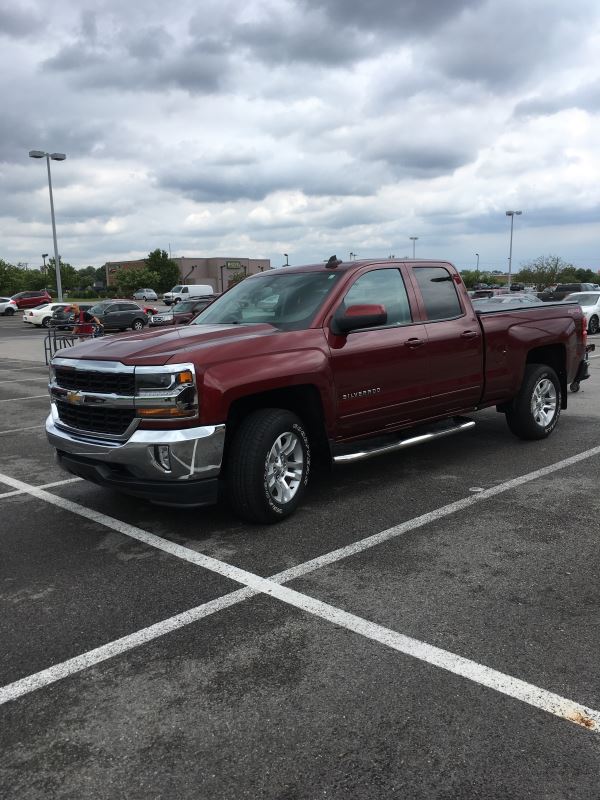
We ordered the Westin Nerf Bars on Wednesday, and they were here on Friday. The new Nerf Bars were packaged very well and no dents or dings in the sturdy package. My friend and I had them installed in 1 hour. Simple to install and fit perfect. I still have a pair on my 2005 Silverado Z71 and they are still in great shape. The Nerf Bars accent the 2023 Silverado Z71 perfectly with the chrome and black. Thanks foe a great product. Bruce in Texas
3" Nerf Bars look great on my new 4Runner but there is a slight bend when a 185lb person steps on them to get into the vehicle. Still a good product and the price was way below what I thought I would have to pay.

Bars look great on Silverado 2500. Highly recommend etrailer.com. They were very patient with returns when we ordered the wrong size. Very fast delivery. Great people.
Great service and everything went smoothly attaching the running boards to truck. You won't go wrong dealing with etrailer.
Package arrived in a timely manner. It was packaged well and there was no damage to the nerf bars. They look good.
etrailer is Very awesome company. I was dealing with a wonderful person named Diana. I needed 46 in in length 3 inch diameter for my Chevy regular cab 2002 Silverado. I was totally amazed on how quick and fast and smooth everything went. Diana is a joy to talk with and work with. I highly recommend etrailer. Thank you Diana and Company!
Had Westin step rails (nerf bars) on an old Ranger and got them for my new F150. This time I needed them to be able to get up into the rig (full-size pickups have gotten a lot bigger and taller in the past few years!). They installed easily, look good, and gave me the step I needed. I am as pleased with the latest step rails I got as I was with the old ones (which are now 21 years old and still functional … but not as pretty).
The Nerf Bars are a perfect fit, and they look great on my truck. Korren C. was the greatest help. She is very knowledgeable about the products, and her follow-up is spectacular.
Looks clean easy to install but I wish they would cap the ends so water and road salt would not get inside of the tube and rust from the inside out
The Nerf bars were easy to install. Each side took me 10 minutes. The instructions were very good and easy to follow
Just got new Nerf Bars Mounted and they were easy to do and look great on our Ford F250.
Have had these for a year now and they work great. No problems with install or everyday use
My son suggested I order from etrailer because he had dealt w/them before w/very good success. The running boards came yesterday afternoon. VERY well packaged w/banding & bubble wrap. They were in very good condition w/all necessary hardware to install. After unwrapping took him, my son, approx 45 min to install w/hand tools & an air impact on the ground in driveway. Instructions were "adequate" but a simple video I found online helped - We learn better by seeing. These boards are high quality, fast delivery & VERY good experience dealing w/etrailer.
I installed the 23-4010 nerf bars on my GMC Canyon Crew Cab SLT. Installation instructions from Westin were missing a few details that the etrailer installation video shows.
The nerf bars are polished stainless steel, but the are NOT protected by a clear coat. They will required polishing with a metal polish to keep them looking great. I rated them 4 stars due to no clear coat.
The first set delivered was shipped in just the Westin box & was damaged by UPS. etrailer promptly sent out a replacement set that was doubled boxed & arrived in good shape. Hopefully etrailer will double box in the future.
Very well pleased with this product.No complaints.
Shipping was fast and nerf bars were in perfect shape. Installation was easy. The bars look great on my truck and are easy to use when getting in or out. I would suggest that anyone installing these on a 2019 Ram 1500 Big Horn Classic like mine remove the factory bolts on both sides while they are easiest to get to. I had to use a breaker bar as they are tight. I would also suggest to only engage 3 or 4 threads on the bolts that you have to fish through openings. I broke the supplied fishing wire on my first hole as I screwed it onto about ten threads and had trouble removing it when the time came to take it off the stud. Luckily, I was able to make another one from a similar sized spring I had on hand.
2007 Chevy Trailblazer - Parts fit with ease. Each side took about 30 minutes in my home garage floor with home garage hand tools I.e. Craftsman tools. Steps seem a bit too forward on the running boards, however, after installed the step is actually in the perfect location.
Customer service as always Very Helpfull! Thanks Etrailer!
Info for this part was:
At etrailer.com we provide the best information available about the products we sell. We take the quality of our information seriously so that you can get the right part the first time. Let us know if anything is missing or if you have any questions.


Thank you! Your comment has been submitted successfully. You should be able to view your question/comment here within a few days.
Error submitting comment. Please try again momentarily.