


To see if this custom-fit item will work for you please tell us what vehicle you'll use it with.


You use your truck bed for work or hauling, but loose gear ends up sliding around or piled in the way. This Demco MOLLE panel mounts to the front of your bed so you can strap items in place, including disassembled Recon Stealth hitch sections.
This Demco MOLLE panel mounts to the bulkhead of your truck bed and gives you a fixed storage point for securing Recon Stealth hitch sections or other gear instead of leaving them loose in the bed or stacked in your garage. The panel provides multiple tie-down points so heavier parts can be strapped in place at the front of the bed where they stay put when you brake or turn. Installation uses the included Demco mounting bracket kit to secure the panel to the bed.
Videos are provided as a guide only. Refer to manufacturer installation instructions and specs for complete information.
Hey there neighbors, Kevin here with etrailer and today we're gonna be taking a closer look at and showing you how to install both the Demco MOLLE Panel for truck beds along with the GM specific bracket kit. So that way you can mount it up to your 2016 GMC Sierra 2500 like we're gonna be showing you today. So if you've recently purchased the Demco Recon Stealth or maybe you're starting to look into it and you really like the idea of being able to easily just collapse up your hitch and store it out of the way while still in your truck bed, then getting the Demco Recon MOLLE panel and specific brackets for your specific truck is going to be a must have. Now this panel is gonna go together in just a couple of seconds. It is super easy to build and then the specific brackets that are gonna go with it are pretty simple to pop in. I mean, we could do this in just probably about 10, 15 minutes and have a easy storage system for our fifth wheel hitch in just a matter of seconds, like I said.
Now this is gonna be adjustable since it is a MOLLE panel and you will also be able to use it for some other items as well. So even if you don't have your hitch in here, you can pop out the little brackets for each one of those hitch components and then be able to pop in some other accessories. So this is kind of a multi-use item here where you can really get a lot of benefit out of it for a small little installation. For those of you that maybe just don't own any tools but wanna be able to get this installed in the bed or maybe honestly just don't have time to get it put in, maybe you got a big trip coming up, then definitely feel free to use our dealer locator and you can enter your zip code to find a shop near you and get it professionally installed. If you are wanting to do this yourself but wanting a little bit of a walkthrough, just stick around and we will take you through the process.
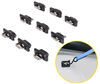
Now to begin our install, I've kind of set everything out, making sure that I have all my components and then the correct tools to do this job. Now socket wise and wrench wise, we're gonna need half inch socket and wrench and then also a 7/16" socket wrench. And then when it comes to our hardware, we're gonna be starting out with these larger U-shaped brackets here. We'll have a big slot in them versus the smaller ones that just have a little hole. These are gonna be your ones that are gonna sit on the bottom of the bed and then these larger ones are gonna sit up on our bulkhead.
Now to get these mounted up to our bulkhead, we're gonna be needing one of our 5/16" bolts and then a split lock washer and then a washer. And what's gonna happen is this spacer is gonna live inside of that bulkhead. The bolt's gonna come through and tie into that. And then as it gets into this spot, the spacer, we're gonna kind of turn that and then it will kind of press up on the inside of the bulkhead. So I'm gonna show you that right now.
And this is also where you wanna grab that half inch socket. I got 7/16" and our bracket and I've got my MOLLE panel already up in here. So take your bolt, pass it through the bracket. You can thread it on a little bit with the spacer block. Give yourself a little bit of wiggle room because we do need to get this in to the hole here still. We should be able to kind of pass that in. It may have to only have just a few threads on there actually, there we go. So if you kind of come in towards the side, push it over and then you can kind of come back with it. We wanna center this so that way, our bracket is sitting good and luckily with the spray-in liner, it kind of forces us to be in the center of this one and then we can start tightening this down. (tool buzzing) All right, that's nice and snug. Don't even go too crazy with it yet. We might kind of need to adjust that just to make sure it's nice and level with our MOLLE panel. But we're gonna repeat this over on the driver's side as well. Next we're gonna grab four more of our 5/16" bolts. We'll put a washer on each one of those. And then we're also gonna be grabbing some nylock nuts because we're gonna be mounting up these brackets onto our MOLLE panel here. So you'll want it facing just like so you see how it's kinda got that L shape here We want this fitting, so it's just like this where it's kind of flushed with the MOLLE panel. And we're just gonna drop these bolts in and then throw on our nylock nut below. Now these are slotted, so you will wanna make sure that you kind of center it between the two, but also you might need to kind of adjust it just kind of depends when we get over to those other brackets. So I wouldn't go too tight just to begin with 'cause we might need to slide this around to get everything lined up properly. Next we're gonna grab those smaller U-shaped brackets. Those are gonna go down on the bottom here. So we will need to grab two more bolts per bracket. We're gonna throw a flat washer on the bolt head side and then also on the nylock nut side too. And our truck bed, they've drilled out the hole for us on one side but not on the other. So what you're looking for is these holes that are running down the front of the bed, you'll see a much larger slotted one on the driver's side. Sometimes you'll have that on the passenger side as well. Sometimes you won't. They do list in the instructions that if you don't want to actually drill out the hole and make it larger that you can just leave that off. But you might have to kind of readjust where your attachment points are on the MOLLE panel, just depending on the weight. You probably wanna put more weight on the side where you do actually run the bolt through just so that way it's not wiggling around on you. But let me get this over in place and then we can decide where we wanna put our brackets. So you'll see four slotted holes down at the bottom, and that's what these brackets are attaching to and that's why I said you had to kind of get it in place first 'cause you can see we could easily slide it into either of those two sets of holes. And I think in our case we're gonna be sliding into that hole right there so that way, we can match up with that slotted hole. So yeah, it's lining up, I'll lay this down a little bit so I can get my hardware here. And then we got another flat washer. A nut. Now this one I am gonna kind of run down a little bit. I'm gonna leave just a tiny little bit of wiggle room so we can move it to adjust for that slotted hole. But I want a little bit less play with this one. (tool buzzing) I want a little bit more, that one, (tool buzzing) get that off just a bit, a little bit more too. There we go, I can kind of adjust it. Now for the other one, like I said, we don't have that hole so I am gonna have to drill that up just a bit bigger to get that to fit. So now's a good time to grab my drills. Now if you are cool drilling it out and you're gonna do so too, you're gonna want a 1/4" drill bit, (tool buzzing) it's gonna be as simple as that. Now mine, I might have to kind of waller it out just a bit more 'cause of the bedliner, might fight me so I may go one size higher. Yeah, I think I will just 'cause it's kind of sticking on the bedliner and I don't wanna sit there and kind of go side to side to wall it out. (tool buzzing) All right, so I just put a 17/64" drill bit through there, popping right through, no problem. It is still kind of catching on the bedliner a little bit, but that's to be expected. So we'll get that little burrs out of the way and now we'll get our other bracket on. Now have everything kinda loosely in place right now. Now is your time where you're gonna want to go kind of to each single bracket here and then adjust it, you know, putting it side to side until you get all of those bolt holes lined up together. And then once you have it that way, I'd kinda lock or like grab onto it as best you can and then we can start tightening down those bolts. I think what I'm gonna do is I've got some clamps, I'm gonna get it where I want it. I'm just gonna put a clamp on it real quick and I can tighten those down without having to worry about it sliding on me. (tool buzzing) We are also gonna adjust that bottom one as well. So I've got it right over the hole. What you can do is put your wrench on it and I'm just gonna slightly lean it forward, get my socket on the pull head side, (tool buzzing) this one locked as well. Now's also a great time 'cause they're gonna tell you at the end of the instructions to go back and torque everything. But once you have these bolts up, it's gonna be really hard to get a torque wrench in there. So I'm gonna go ahead and torque all the bolts that we can actually see, including the ones up here to what they list in the instructions. So that way it's a lot easier at the end of this because the next thing that we're gonna do after that is just the two bolts that connect this up to these brackets here. Check that one more time and right there. There we go. All right, we're gonna grab two more bolts per side here, flat washer on the bolt. We're gonna pass that through the slotted hole and then into the hole in our bolt head. And I've loosely done that on the passenger side just so it'll kind of help hold this up. Once you have that in there, you probably will have to kind of back it out a little bit just to get the flat washer on and then throw in that nylock nut. And I'm just gonna get a couple of threads going on it. Pop in the next one because we do still need to get that lower bolt. So I wanna have a little bit of wiggle room to, as you can see, I'm already kind of pinching a little bit just from putting the bolts in that I had over there. This part might be a little bit easier if you stick it into a wrench into the closed end of the wrench. You can put a little piece of tape over it to help kind of hold it from falling out and then use the wrench as your backer to kinda get it started. Now you're gonna have two more bolts that are gonna be real small compared to the other ones and those are gonna also have some smaller flat washers. We're gonna put one on the bolt head and then we're gonna drop that through the lower brackets down below and then below that under our bed, we're gonna have to get under there, throw on another flat washer and then the smaller lock nuts that you got inside your kit. So that's why I was saying to just kinda wait on tightening everything down because we're gonna be bolt head up a little hard to get your fingers in there. There we go. Strapped down. Do the same over on the passenger side. Make sure our holes are lined up properly. At this point it is gonna be good. Once you lock in the bolts up top, it's not honestly gonna be able to really move on you that much anyway to where that bolt would kind of wiggle out of place or anything like that. So our next step's gonna be tightening and torquing down the two bolts on each one of these brackets here. (tool buzzing) Now with all of our hardware torqued, we can actually throw our hitch components all up on our MOLLE panel and have them stored so that way it's out of the way and we've got a nice clear bed for our pickup truck so that way, we can throw anything else we want to in here as well without having to worry about working our way around the hitch or potentially hitting the hitch and damaging it because it's all kind of just rolling around in our bed right where the hitch is right in the center. So with all that being said, that is gonna do it for our look at and installation of the Demco MOLLE panel and bracket kit here on our 2016 GMC Sierra 2500. My name's Kevin and if you still have some questions about this MOLLE Panel kit, the brackets to go along with it and the hitch itself, definitely feel free to reach out to us via our Ask the Experts link, comment on this video or a phone call to our customer service department and we'd be happy to help you out on your journey.
Info for this part was:
At etrailer we provide the best information available about the products we sell. We take the quality of our information seriously so that you can get the right part the first time. Let us know if anything is missing or if you have any questions.
















Thank you! Your comment has been submitted successfully. You should be able to view your question/comment here within a few days.
Error submitting comment. Please try again momentarily.