


To see if this custom-fit item will work for you please tell us what vehicle you'll use it with.



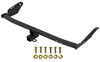
This Class I hitch has a 1-1/4" receiver that handles up to 200 lbs of tongue weight and 2,000 lbs of gross trailer weight. It’s the right size for bike racks, small campers, or lightweight cargo carriers, giving you solid, dependable strength for day trips and weekend hauls. The square-tube design keeps everything stable while maintaining a clean, factory-like look.
The matte black powder coat isn’t just for looks—it adds a fourth layer of protection against rust and wear. Unlike glossy hitches that show every scuff, this finish hides dirt and scratches while standing up to road salt and rain. You get a tough, low-glare surface that stays sharp through years of towing and travel.
This hitch bolts directly to your vehicle’s existing attachment points using the included hardware. There’s no welding or drilling required, so installation is simple with basic tools in your garage or driveway. The precise alignment means everything lines up the first time, making it a great fit for DIY projects.
Videos are provided as a guide only. Refer to manufacturer installation instructions and specs for complete information.
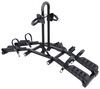
Hi, I'm Daniel with etrailer, and today we're going to take a look at, I'm going to show you how to install the etrailer 1-1/4 trailer hitch on our 2025 Toyota Camry. Adding a hitch to your Toyota Camry is going to allow you to put accessories back here, like cargo carriers for some extra luggage if you're going on those long trips or bike racks, or you can even do some light duty towing. Taking a closer look, all you really see is your matte black finish hitch receiver. Those cross tubes are completely behind your rear fascia, so it doesn't really take away anything from your Camry. Now I will mention this is an 1-1/4 That's not your standard size. We do have adapters where you can put it in here and it's going to bring it up to two inches, but most of the time that will decrease your tongue weight by half.
So if you're planning on maybe having some really heavy cargo carriers, you really want to max out the weight capacities of your hitch. I would recommend either getting a two inch hitch receiver or just getting accessories that will fit in your 1-1/4. To secure your accessories in this hitch, you will need a half inch pin and clip. And I would always recommend just getting a locking pin so you can lock whatever's in your hitch so no one can come and take it. Now if you are planning on doing some light duty towing, the loops on the bottom, that can easily accept an S hook or a clevis style safety chin.
Now I'll get you a couple measurements. So for your ground clearance, it's going to be the ground to the top of the inside of the hitch receiver. That's going to be about 9-1/2 inches. Now from the center of the hitch pin hole to the outside of your bumper, that's going to be about four inches. So that'll help you determine if you have a folding accessory like a bike rack.
You can fold that up without hitting your bumper. Now as far as weight capacities go for this hitch, I do recommend towing super light with your Camry if you do plan on towing, but the total towing for the hitch is going to be 2,000 pounds and that's going to be your trailer plus what's inside of it. And the tongue weight, that's the weight pushing down on the hitch, that's going to be 200 pounds. So that way it's good to know how much you can load up bike racks and cargo carriers. So like I said, if you are getting that adapter to the two inches, that will decrease that number by half.
I would always recommend checking your owner's manual and make sure you're towing what your Camry can handle. Now, if you have any questions about what hitch is going to work best, please feel free to reach out. If you're wanting to get these installed yourself, I will tell you that the two inch hitch is a little more in depth. If you're planning on getting that one installed, you will have to remove your entire rear fascia. If you're wanting to get this one installed, it's pretty simple. You're lowering some panels and opening up some holes in your frame. If you don't have the time or tools, you can check out our installer locator and we can get an installer local to you to get anything you need installed. If you want to do this install yourself, follow along and I'll walk you through the process. Starting off, we're going to take down this underbody panel. I have a flat head. There's going to be several push pin style fasteners. And to get those out, we're going to get the center section pushed out by giving it a twist. And then you can pull the whole thing out. There's going to be two more on our passenger side. There's going to be some plastic nuts. I'm going to use a 12 millimeter. There's two in the middle. (drill grinding) Loosen that up. You may need to pull down while you loosen those up. They are attached to the plastic. (drill grinding) And then there's going to be three more towards the front of the vehicle, and that's going to be a 10 millimeter socket. (drill grinding) And finally there's one more. It's going to be a metal bolt. I'm going to use a 10 millimeter to get that removed. And with that removed, we can pull this panel down and set it to the side. Now we need to lower the exhaust so I have a strap supporting it. And I'll start at the front. I like to use soapy water to spray on the rubber isolators, makes it a lot easier for this to slide off. Got a pry bar. Work that off. And there's another one closer to the front of the vehicle. On our exhaust bracket, there's two bolts we'll remove. I'm going to use a 12 millimeter. (drill grinding) And get this taken down. We'll also be removing our heat shield. I'm going to use a 10 millimeter socket. (drill grinding) Now on our passenger side, there's going to be a backup alarm. We'll use a 10 millimeter. There's one bolt on the bracket. (drill grinding) Take that off and that can drop down and we'll get that out of our way. We're going to remove some caps. These are going to be our access holes for our hardware. And I'm going to use a flathead and unscrew these. And if they're not coming, you can get up behind it and pull them down that way. Trim panel tool helps. And we're going to have one more and we'll get this one out. And we are going to have to enlarge this for our hardware to fit through. And to enlarge that hole, I'm going to be using a step bit. And I have our hardware and all we really need is for that head to fit in there. So I'm going to kind of go at angles side to side just to enlarge it at an oval. (drill grinding) I don't want to make it too big, so I'm going to finish it off with a die grinding bit and just get those edges. (drill grinding) After enlarging it just enough for your bolt to fit, I'm going to use some black spray paint. Cover up that bare metal so this doesn't rust in the future. And we just want to repeat that process for our driver's side. (drill grinding) We're going to take our carriage bolt, a rectangular spacer block. We'll put that on. Then I'll thread on our fish wire. Now we can put everything up into the frame. We'll start with our bolt. Followed by the block. Pull everything down and get that out. We can trim out the heat shield and they'll give you dimensions in the instructions, but I started on this ridge that's curved up. I went three inches and then I went 4-1/2. I'm just going to use some tin snips and get this cut out. I got our heat shield put back in place and I did have to trim a little bit more of this on the sides and on the back just to make sure this doesn't interfere with our hitch. I just put those nuts back in place. I put our heat shield back in place and I did notice I had to trim it a bit more. So I trimmed it on the sides and a little bit on the back just to make sure this doesn't interfere with the hitch. And then I put the nuts back in place. Just one more push pin fastener we'll remove so we can get our hitch up. Get this flap down. And we can get our hitch lifted in place. It's a lot easier with a friend. So I got Scott over there giving me a hand. We'll get our fish wire, put it through the back hole in the hitch. And we can get this lifted up behind that fascia. I'll pull our hardware down. We'll pull that fish wire off. I'll take our nut and get that tightened on. Scott's doing the same thing on the other side and that'll support the weight of the hitch for us. And we can take our smaller bolts and these will go through those threaded holes. So I'll lift this up. When you're putting in those smaller bolts on your driver's side, you will need to put your exhaust hanger back in place. So get this put on top of the hitch and get these threaded on. And we can tighten and torque everything down. I'll start with a 19 millimeter socket for our larger bolt. (drill grinding) And I'll switch to a 13 millimeter and get these tightened down. (drill grinding) I'll torque everything down to the specs and the instructions. And if you don't have a torque wrench at home, you can usually rent one from a local auto parts store. To get our backup alarm relocated, I'm going to cut the zip tie so we can get some more length to this. And we're going to go on the stud that's in front of the stud it was already on. Get this put back right here. And I'll take our nut, get that tightened back down. And to keep this from dangling, I'm just going to use a zip tie and zip tie this right around our hitch up out of the way. We need to trim our underbody panel before we put this back. I have it marked out. So basically on this corner, we're going to cut it all the way. And then this is where our hitch is going to be. So I just cut it between these two holes. (saw grinding) And we can put our underbody panel back in place. And you just want to push all those plastic nuts back on those studs. Now we'll start putting all of our push bins back in. And when you're putting that metal bolt back in place, you can hit these back three. Usually they'll just push in like the two in the middle when we hit these at the 10 millimeter and tighten these up. (drill grinding) Now the last thing to do is to put your exhaust back in place. I'll remove our strap and that just about does it for our look at our etrailer hitch on our 2025 Toyota Camry.
Customer Satisfaction Score:
96% were satisfied with this product
4% of customers were not satisfied
Ratings & Reviews

It wasn’t the easiest receiver I’ve installed but it’s on there correctly and all the instructions on their YouTube sight for the Curt receiver were all I needed. Bought it for a bike rack and the rack fits flush enough in the receiver that it doesn’t rock at all when tightened up. That’s all I can ask for.
I had it professionally installed. It seems sturdy and durable.
Horrible experience, I was missing a lot of parts
complete kit, perfect fit. very very high quality.
Extremely satisfied with my purchase, quality of the hitch is top notch not to mention customer service is on point delivery was made in a quickly manner as well. I’m happy with this business service and quality of product
I’d give 10 if I could Thank you !!!!
Super fast shipping, fair price, good quality and east to install
Installation on this hitch receiver wasn't too bad. The video for installation made it much more straight forward. Trimming the vacuum-formed under-car panel was simple with die grinder after I marked the part (video suggested a multi-tool, but the grinder worked great. I found it best to cut as I went so I would not cut too much off.
I did enlarge the frame rails with a Dremel tool with a cutoff wheel as described in the video. That was the hardest part of the entire installation. Applying finishing torque to the large flange nut to the specified value was not easy in the location above muffler especially.
Working on a brand new car made this job 10x easier than what I was used to for hitch receiver installs. The muffler isolators came right off the studs, and the fasteners all came out easily. Made a world of difference in relative difficulty!
I will be using this with a 1-UP bike rack that I've owned for years. I don't expect issues. Everything is really solid in the final state.
This was a pretty easy install
Two things would have made it much easier to install
1 if Toyota had put the mounting areas like on previous Toyota Camrys
For a hitch
2 company that made this hitch had made the muffler mounting holes a little wider for alignment
Over all was good insulation
Info for this part was:
At etrailer we provide the best information available about the products we sell. We take the quality of our information seriously so that you can get the right part the first time.














Thank you! Your comment has been submitted successfully. You should be able to view your question/comment here within a few days.
Error submitting comment. Please try again momentarily.