
EcoHitch Stealth Trailer Hitch Receiver - Custom Fit - 2"


To see if this custom-fit item will work for you please tell us what vehicle you'll use it with.


Thank you! Your comment has been submitted successfully. You should be able to view your question/comment here within a few days.
Error submitting comment. Please try again momentarily.



When you’re not towing, you shouldn’t have to see a hitch hanging below your bumper. This one stays completely out of sight thanks to a hidden cross tube that mounts behind the rear bumper. The 2" receiver can even be removed when not in use, leaving nothing visible at all. It keeps your vehicle looking clean and factory-fresh while still being ready to tow or haul whenever you need it.
Whether you’re hauling bikes, a small trailer, or some weekend gear, this hitch is built to handle it. With a 2,500 lbs maximum gross trailer weight and 375 lbs maximum tongue weight, it’s rated Class III for solid everyday performance. The stainless steel receiver and alloy body give it the strength for towing, carrying cargo carriers, or mounting bike racks—all while keeping a low profile.
This hitch pairs lightweight design with serious durability. The stainless steel receiver resists rust and corrosion, while the alloy body—made from recycled aluminum, steel, and stainless steel—keeps weight down without sacrificing strength. A black powder coat finish adds another layer of protection against tough road conditions so it stays looking sharp and solid over time.
You don’t need special tools or a lift to get this hitch on your vehicle. It bolts directly to existing points on the frame with no drilling or welding required. The setup is straightforward for anyone comfortable with basic tools, making it a great choice for do-it-yourself installation projects right in your own driveway.
Videos are provided as a guide only. Refer to manufacturer installation instructions and specs for complete information.
Hi, I'm Daniel with etrailer, and today we're gonna take a look at and I'm gonna show you how to install the EcoHitch Stealth Trailer Hitch Receiver on our 2024 Kia EV6. Adding a hitch to your Kia is gonna allow you to put accessories back here, so if you're wanting to take your bikes out on the trail, you can get a bike rack. If you want some extra room, you can get a cargo carrier for some luggage, or you can even do some light-duty towing. This hitch does have a two-inch by two-inch hitch receiver opening, and that's gonna fit most of your standard accessories. You're going to need a 5/8-inch pin and clip to secure those accessories in your hitch. I would recommend getting a locking pin so you can lock whatever's in here up so no one can come and take it.
And if you are planning on towing, those safety cable loops, they are pretty far back there, and they're a little bit difficult to get in, but they can still easily accept an S-hook style or a clevis-style safety cable. Now I'll get you a couple measurements. So from the ground to the top of the inside of the hitch receiver, that's gonna be about 12 inches, so that's gonna be your ground clearance for those longer accessories back here. And that's also gonna help you level out a trailer, so you can just measure out to your coupler with your trailer level. That's gonna give you the size of ball you need.
Now, the next measurement's gonna be from the center of the hitch pin hole to the outside of the bumper, and that's gonna be about five inches. So that'll help you determine if you have a bike rack that has a folding capability and you want to make sure that folds up without hitting your bumper. As far as weight capacities go, your total towing capacity with this hitch is going to be 2,500 pounds, and that is gonna be your trailer plus what's inside of it. And then your tongue weight, that's the weight pushing down on the hitch, that's gonna be 375 pounds. But if you are planning on towing with your Kia, please check your owner's manual and make sure you're towing what your Kia can handle, and you're towing at your lowest-rated component so you're nice and safe out there.
So this is gonna be a great hitch for you, but if you're planning on towing, I would recommend the Curt hitch. These safety loops are on the bottom of the hitch. They're a lot easier to get to, and the weight capacities are slightly higher. Now, if you're just planning on doing a bike rack, this is gonna work perfectly fine for you. If you have any further questions about what hitch is gonna work best with your Kia and setup, please feel free to reach out, we'll be happy to point in the right direction.
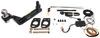
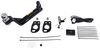
Now, as far as getting this installed, it really isn't too bad, it won't take you too long. But if you don't have the time or tools to do this yourself, you can check out our installer locator and we can find an installer local to you to get this installed for you. If you want to do it yourself, follow along. In this video, we'll walk you through it. Starting off, I do have our vehicle up on some lifts, and that's just so you guys can see this a bit easier. You can do this on the ground. First, we're gonna be taking off this underbody panel, so I'm gonna use a flathead. I'm gonna start on the end and get all these push-pin-style fasteners removed. I'll take the flat side, put it in one of these grooves, give it a twist, and that center section will pop out and you can pull the rest of it out. I'm gonna use a 10-millimeter socket and there's gonna be a couple of nuts we'll have to remove on the back. (tool whirring) There's three of those. And then closer to the center, I'll switch out to a 14-millimeter and there's gonna be a plastic fastener. And this is attached to the fascia. So while I'm loosening this, I'll pull down and then I can set this to the side. Up on the sides of our frame, we can locate the three holes and these are gonna have threads in them. And I'm gonna get these cleaned out before I get our hitch in place. So I'm gonna use some silicone lubricant and a wire brush and get these cleaned up. Now, if there is a ton of rust in here, may need some penetrating oil to break that up. And if they're really bad, you may need to tap them out. But they're pretty far up there so they shouldn't get too rusted on you. So I'll get all these cleaned up on both sides. And we can take our bolts with the fine threads and I like to run these in before I get our hitch in as well, make sure these go in nice. I'm gonna use a 19-millimeter socket and get these ran in. (tool whirring) Now we can get our side plates in place, They are side-specific. So the one with the curve, that's gonna be on our passenger side, and the one with the angle, that's gonna be on our driver. So I'll start with our passenger, get this in place. And you want that welded-on spacer, that's gonna be facing the frame. And then that curved piece, that's gonna go towards the back of the vehicle. We'll get this put up, lined up, and I'll take those bolts and I got a split washer as well as a flat washer. I'll get these all threaded in. On our driver's side, before we get the plate up, I am going to remove this wiring harness from our frame. So I have a trim panel tool. Get that under the fastener and pull that out. Now we can get our hitch lifted up into place. We just want to make sure those safety chain loops are pointed down. Get this lifted up. And then through the inside, I'll take our bolt, get this put in. And then the other side of our bolt, I'll get a split washer and secure our nut. And I'll just do this on the other side so it holds the weight of the hitch for us. And I'll do this with the remainder of our bolts. We can tighten and torque everything down. I'm gonna start with tightening up our bolts that are going into our side plate into our center section. We use a 19-millimeter socket and wrench. I got everything tightened already. So now I'll torque it to the specs in the instructions. And if you don't have a torque wrench at home, you can usually rent one from a local auto parts store. (torque wrench beeping) For the upper bolts on our passenger side, it is a bit hard to get to because of our wiring harness. So I just have a three-inch extender and that's helping me get past it. (torque wrench beeping) Now, we do need to trim out our fascia. So I'm gonna take our center section, slide this up, and then mark on both sides. And then we're gonna cut up to where this bends. I'm just gonna use an oscillator tool and get this trimmed up. (tool whirring) I'll use a knife to clean up some of these edges. Our underneath trim panel needs to be trimmed up. So I went from this flange here, an inch and three quarters on both sides, went straight back, and where this bends, that's where I'll cut this off. (tool whirring) Now we can get our hitch receiver, slide this up. I'll take our larger bolt. I got a split washer, flat washer, slide this through and get this threaded in. And then I'll use a 15/16 socket and tighten it down. With that tightened up, we'll go back through and torque this down to spec. (torque wrench beeping) The wire harness that we did pop off, we can just get that zip tied up out of the way so it's not dangling. Then we can put our underbody panel back up. Man Okay. (tool whirring) Once you got that panel back in place, you're good to go and you can start using your EcoHitch on your 2024 Kia EV6.
Customer Satisfaction Score:
62% were satisfied with this product
38% of customers were not satisfied
Ratings & Reviews

On the ev6 the trim piece can't be re-installed properly due to the placement of the safety chain holes. Even install videos on youtube show the problem, but don't talk about it. Do not buy this for the Kia EV6.
Info for this part was:
At etrailer we provide the best information available about the products we sell. We take the quality of our information seriously so that you can get the right part the first time. Let us know if anything is missing or if you have any questions.





















Nick S.
12/8/2025
I am sorry to hear that the trim piece/fascia is not re-installing like it should. We will reach out shortly and help resolve this.