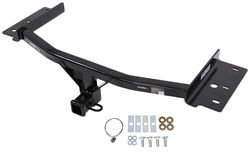
Most Popular Class IV for 2020 Ford Explorer
change vehicle# 1
Draw-Tite Max-Frame Trailer Hitch Receiver - Custom Fit - Class IV - 2"
- view all Trailer Hitch
- Custom Fit Hitch
- Class IV
- 900 lbs TW
- 6000 lbs GTW
- 2 Inch Hitch
- Concealed Cross Tube
- Draw-Tite
More Information >
Perfect fit.
The 3 stars is because I read that I can't use my WDH, which is a first for me...and because it took me over 4 hours to install this hitch! OK, so I've installed probably 15 hitch's on trucks and SUV's in the past 20 years, and this was, by far, the most challenging. Note: the tech support at etrailer was great though, I actually could talk to someone on a Sunday afternoon...Thank you! And is the main reason I chose to pay a little more and buy from etrailer. Why this was so challenging is because several, hard to reach panels and fasteners, had to be removed, and cut and fabricated. Lowering the exhaust turned out to be the easiest part, with just a little simple green on the rubber mount, so they could slide easily out. The exhaust heat shields could not be full removed without the car being on a lift, they could only be slid to the side. So I had to wedge a grinder in there with a slicer wheel to cut the hole for it to clear the new carriage bolts when put back in place. I tried the snips they recommend, but that metal is way to thick, and I couldn't get the correct angles to get leverage on the snip handles. Then there's the issue of fishing the carriage bolt and spacers down the vehicle frame which kept getting hung up somewhere, so I ended up just using a dremmel and an abrasive wheel to widen the rear mounting holes. Then getting the hitch in place takes two strong guys, because it seriously has to be wedged and tucked under the bumper cover just right. Finally cutting the slot on the bottom of the bumper cover/fascia is also tricky, because if you don't cut it just right, there will be a bulge on one side of the bumper bottom. I'd suggest to etrailer, they include a cutting template that could be aligned with the inner edge. After everything went back together, the heat shields didn't sit as flat because they are on top of the hitch now, and were rubbing on the exhaust, so I had to bend the heat shield edges in so they don't hit the exhaust. I ended up using a grinder, dremmel, impact wrench, cut-out tool, three different extensions, and a handful of other tools. I hope this helps all those attempting to do this yourself...
# 2
Draw-Tite Max-Frame Trailer Hitch Receiver - Custom Fit - Class IV - 2"
- view all Trailer Hitch
- Custom Fit Hitch
- Class IV
- 600 lbs TW
- 6000 lbs GTW
- 12000 lbs WD GTW
- 2 Inch Hitch
- 1200 lbs WD TW
- Concealed Cross Tube
- Draw-Tite
More Information >
Quality hitch and fair price
Well built hitch and easy to install. 2010 F150.

# 3
Curt Trailer Hitch Receiver - Custom Fit - Class IV - 2"
- view all Trailer Hitch
- Custom Fit Hitch
- Class IV
- 1000 lbs TW
- 10000 lbs GTW
- 12000 lbs WD GTW
- 2 Inch Hitch
- 1200 lbs WD TW
- Visible Cross Tube
- CURT
More Information >
Robust construction, nearly perfect fit. Installation was straightforward.
I received this hitch with some chips down to the metal. So I repaired these. Alll holes lined up except one. The hitch was bent 1/2 inch on one side. So with a steel rod, wood blocks, and a pump jack, I bent the hitch into place. All the extra work is why I gave this hitch a 3 star rating. I now have a 5 star hitch that works great with my Thule bike rack.


What our customers are saying:
"Thanks for the quick service. Shipment was recived OK. Trailer hitch was easy to install. Looks good. Ed"