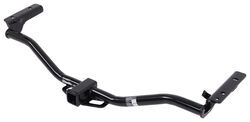
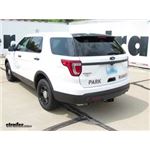
Most Popular 4500 lbs GTW for 2016 Ford Explorer
change vehicle# 1
Draw-Tite Max-Frame Trailer Hitch Receiver - Custom Fit - Class III - 2"
- view all Trailer Hitch
- Custom Fit Hitch
- Class III
- 675 lbs TW
- 4500 lbs GTW
- 5000 lbs WD GTW
- 2 Inch Hitch
- 500 lbs WD TW
- Visible Cross Tube
- Draw-Tite
More Information >
In this month of July, I’ve purchased a receiver hitch for both of my rigs. I have successfully installed both of them and have used our bicycle rack on both. I’m 68 years old and recently retired. The videos supplied by e trailer were so precise and accurate in helping me get the job done. I took my time on both installs. The receiver on the 2016 Ford Fusion took me two hours and the install on my 2013 Ford Explorer took 3 hours. A second set of hands would have been helpful, but I didn’t have help. I used my hydraulic jack and zip ties to lift and hold the receiver hitches in place while bolting to vehicles. It worked very well. Thanks e trailer for delivering quality to my door and providing excellent videos to help this garage do it yourselfer
I purchased this hitch through etrailer because they were able to get it to me in less than a week and it was $50 less than what I found on Amazon. The hitch was packaged good with only a small rip in the box. Very solid product and very easy to install myself in less than hour verses spending $200 to have a shop install it for me. I would recommend etrailer and Draw Tite hitches to anyone.
# 2
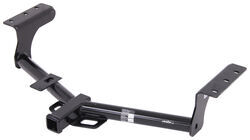
Draw-Tite Max-Frame Trailer Hitch Receiver - Custom Fit - Class III - 2"
- view all Trailer Hitch
- Custom Fit Hitch
- Class III
- 675 lbs TW
- 4500 lbs GTW
- 4500 lbs WD GTW
- 2 Inch Hitch
- 675 lbs WD TW
- Visible Cross Tube
- Draw-Tite
More Information >
Excellent product. and great service from etrailer . Shipping was very quick and price was right.
This is a nice, heavy duty hitch. Probably heavier duty than the 2011 Rav4 I put it on, but I like the 2" size reciever for the flexibility. You can always adapt down, but going up can be tricky. It was about a 20 minute install with about 40 minuets of up and down looking for a tool. Mine dod not have the bolt on muffler hanger the instructions referenced, but that was just a couple of bolts I didn't have to worry about. One trick I have learned with installing hitches on the ground by yourself is to use a jack to hold it up and in place while you start the bolts. The other is to run the bolts into the holes before you get the hitch into position. If the hole wasn't use, it ca be full of grit and road grime and it is a lot easier to deal with it before you have an 80 pound hitch hovering over you head. As always, eTrailer was a great source. I think this is the seventh hitch I have bought and installed from them over the years. I still the they need to include an "I got hitched at eTrailer" bumper sticker with every purchase, but I suppose solid service and affordable pricing is good enough.

# 3
Draw-Tite Max-Frame Trailer Hitch Receiver - Custom Fit - Class III - 2"
- view all Trailer Hitch
- Custom Fit Hitch
- Class III
- 675 lbs TW
- 4500 lbs GTW
- 4500 lbs WD GTW
- 2 Inch Hitch
- 675 lbs WD TW
- Concealed Cross Tube
- Draw-Tite
More Information >
I bought the Draw-Tite for a 2018 Ford Edge Sport. I saw lots of discussion about throwing out the heat shield, which left the rear bumper flimsy. I was able to trim the heat shield, reinstall it, which firmed up the rear bumper cover. Attached are some pics showing how this was done. Basically, trim off the ends and center piece, anything that would extend back towards the hitch. I used a Dremel cut off wheel and Tin snips, worked great. Then, cut a 3 inch square next to the centerpiece opening. Do not cut the heat shield material. This allows the receiver part of the hitch to fit in the opening. Then, trim the ends by following the heat shield material. Slide the heat shield back in place starting from one end and pushing it across and back into place. Reattach all bumper cover bolts, that will firm up the bumper cover. Pull wires worked great. I used jack stands to hold the hitch in place and installed it myself. Just watch the video a couple of times, it was not that hard. I bought the Curt wiring harness as I wanted to keep the pigtail inside when not using, which will be about 95% of the time. Good product, easy install.


The install went easier than expected. 3 Hours start to finish by myself. There were a few bare edges where paint was removed during shipping, which will be the first to rust. I might try to touch it up but in past experience this doesn't help much. Adding some padding on the edges of the frame might prevent damage during shipment. To the install. I am a moderately skilled shade-tree mechanic, and anyone who can do minor car repairs should be able to tackle this install. Removing the trim was easy. Using a strap to lower the muffler was not too bad (even detaching the hangers wasn't too bad). I would definitely go this route instead of removing the bumper cover as some others have mentioned... much easier. The hardest part was getting the hitch frame in place without a helper. I ended up using some landscaping bricks and an old empty car battery to lay one end of the frame on while I attached the other. Having someone to hold one side while you attach the other would make this part MUCH easier. Still, I was able to tackle it without too much trouble. Note the frame IS heavy, so you won't be able to just hold it up while you get the bolts attached. After that, I tightened the bolts, re-hung the muffler, and put the trim back on and it looks and works great! Now I can go fishing again with my new Edge. Also of note, the backup camera and the automatic rear hatch sensor still work fine. You do have to "kick" to just one side of the hitch or the other... but it works no differently than before. Very satisfied with the product, as long as it lasts the life of the car without rusting to pieces... which time will tell on that front.


What our customers are saying:
"hitch arrived on time, and it took me about 10 min to put it on . thanks alex"