


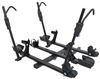
This handy add-on turns your Thule Verse 2-bike rack into a 4-bike hauler - because adventures are better with company. It bolts right into the shank, giving you space for two more bikes and zero excuses for leaving anyone - or their ride - behind.
Videos are provided as a guide only. Refer to manufacturer installation instructions and specs for complete information.
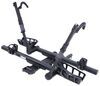
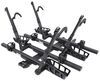
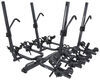
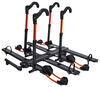
You made two more friends. Great. Now you can use the Thule Verse two bike add-on for your Thule Verse two bike carrier. Now this is gonna be a great way to get more bikes onto the back of your vehicle so you can get out there and have a great time. It's a wheel mounted system, so let's take a closer look and see what's special about it. When you extend out your carrier to four bike configuration, you actually reduce your weight capacity per bike.
In the two bike, you're at 60 pounds each. When you go to the four bike, you're limited to a total of 140 pounds, which averages about 35 pounds of per bike. So keep that in mind. Now as far as your wheel cradles, these guys are gonna support your fat tires up to five inches and your wheel base is right at 52. So that's gonna cover a wide range of different types of bikes.
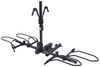
And using our handle, we're gonna tilt this in the upright position. And you can see it sits up pretty high. And as far as how it's gonna obstruct, you're definitely gonna need some means of repositioning your lights and your license plate. The Thule Verse makes it super easy for the people that like to get out and hit the trail to not worry about how complicated is it to get my bike transported, and just focus on getting out there and making those memories. Because here at etrailer, a bunch of us love hopping on our bikes and hitting the trail.
And we would like to see your bike, show us the trail, add some photos because we love having that interaction with you. Now I'm gonna show you how to add this extension to your existing Thule two bike. Let's get it done. At this point, you've broken down your two bike carrier to the shank. So we're gonna take our new extension piece from our packaging and we're gonna put it right here on the end.
Now you wanna make sure that you have this additional slide plate right before you slip it under the lip. All right, we are just gonna align it with our screw holes and work it under the plastic here. It's kind of rigid, so just get it under first, and then boom, we're right in the position. Then we're gonna fasten our hardware in using our included Allen key. There we go. So we're just gonna fasten these guys down and then we'll move on to the next step. Now we're gonna put the extension for our latch handle on and it does have to fasten in place. Now not reading the instructions, just guessing, I found that this guy will just get stuck on the inside if you don't make this connection. So right here you're just gonna twist the bottom of the extension and it'll just stay in place. Got my Allen key in, and you can see how you're moving this guy. And now it's in place. So now we're gonna take this to the end of the shank and install it. So now we're gonna go here, and we're just gonna slide this guy in. And we're gonna watch out for the plastic lip down here. Let's give it a little, work it in a little bit underneath the plate. And boom, we're right in position. You can see how it wraps around down here. And then we just have two more bolts. All right, we're just gonna fasten this guy down, and we're gonna make sure all of these guys are torqued to the manufacturer recommended spec just to make sure everything's nice and safe. This is a lot of weight you're gonna throw on the back of your vehicle. So now we're gonna make our connection for our latch handle. I'm gonna twist it into the locked position, and now our latch is gonna work. And then from here we're gonna be able to add our final two bolts on the back. So we have our two set screws right here. We're gonna get those fastened in, and now it's starting to look like a bike rack. So we are just gonna use our included Allen key. And I know some people may be tempted to want to go with power tools for this, but genuinely you don't wanna do that because you can easily overtighten or strip it. So you know, take your time, put it together right. All right, so now we're gonna go ahead and install our cradles, and it's gonna be the same process going all the way down. It's just a matter of aligning our holes. And the cool thing is Thule actually gives you a nice little handy tool that works as another set of hands for you to keep everything nice in place. So we're just gonna get that aligned. And now, making sure we have a right hand side cradle, we're gonna add this to the other side. And I found just sliding it along the track before you add your holder tool just makes it a little easier. There we go. And now we can get that hardware going through. So from here, we're gonna take our hex head bolts and fasten this guy down. I'm just gonna hand tighten it and then come back with my wrench. So from here we're just gonna go ahead and repeat the same step for the remaining cradles, making sure everything's nice and tight. Now we're gonna put our panel on the side and this just snaps right into place. You can see that it's made to fit right around our cradles. And then we're gonna reuse our other two bike one from this two bike setup. And it just pops right into place for the top portion. And we'll do the same on the bottom. And just like everything else, you wanna make sure that you're paying attention if you have the left hand or right hand part because, you know, it is molded to work in only one direction. So now we're gonna put our rear cradle on and it just slides right onto the track. So just to make sure that you have it going the right way. If you have a hook, you want this three stripes pointing towards your hook. And we're just gonna slide it onto our track. Now there are tabs here that could get in the way of it going right on. So I have a trim panel tool and it'll help me get everything going where I need it to go if necessary. I'm just relieving the pressure off of the tab. There we go, and now we're over the hump. And we're gonna do the same on our other side right here. So with the cradle, you're gonna have a handle here and it's gonna allow you to slide it over the track. You're just gonna align these notches here along with the sides of the platform. And this guy just slides right on, and then you can reinstall your cap. Once we get all of our cradles on, we're gonna put our end cap on, and look at that. You just converted your two bike Thule Verse into a four bike Thule Verse.
Ratings & Reviews

Condition: Missing Parts
Notes: Item is missing 1 of the medium sized bolts. Otherwise unused.
Info for this part was:
At etrailer we provide the best information available about the products we sell. We take the quality of our information seriously so that you can get the right part the first time. Let us know if anything is missing or if you have any questions.























Thank you! Your comment has been submitted successfully. You should be able to view your question/comment here within a few days.
Error submitting comment. Please try again momentarily.