
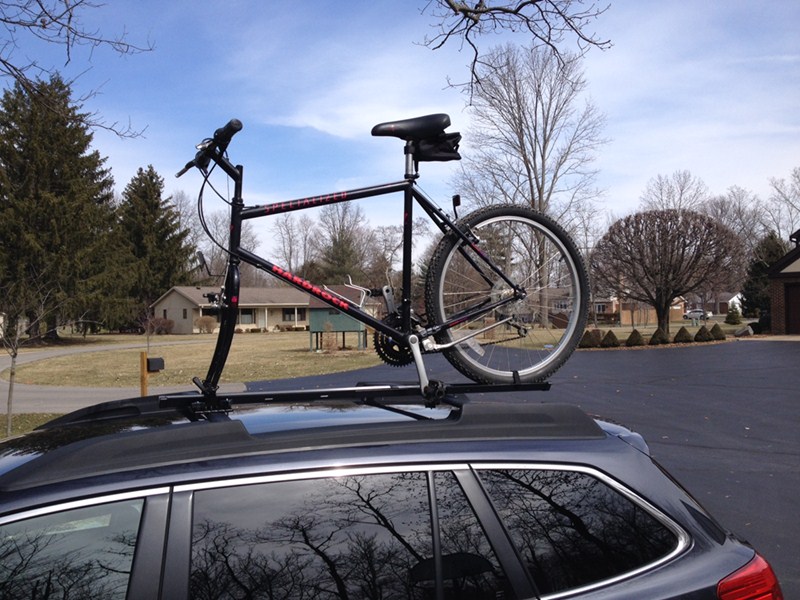
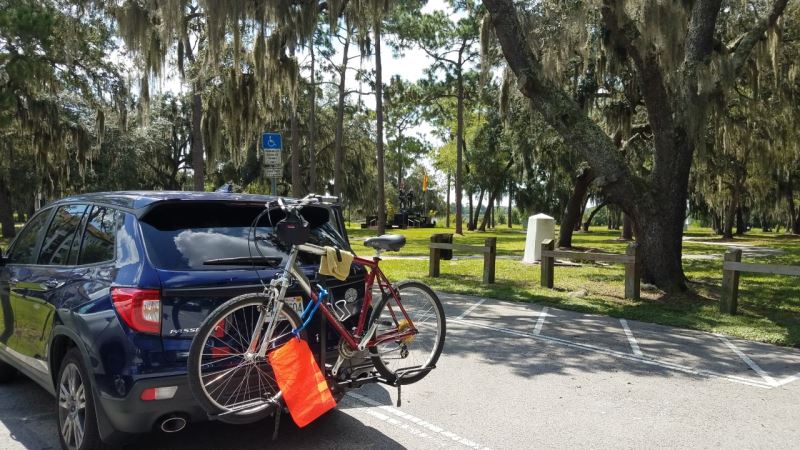
# 1
Swagman Fork Down Roof Mounted Bike Carrier - Fork Mount
Goes together quickly, appears that it will fit my needs in terms of being cross-compatible on a variety of vehicles. Fit on a Subaru Outback factory crossbar and transported bike locally with no issues when I got it out to set up and test (not quite warm enough to ride much yet where I live). Instructions are not super, but the assembly is pretty straightforward so that is not a problem. At the price point, if this rack indeed holds up to swapping onto multiple vehicles and lasts me a few years, I'll be thrilled with the purchase.
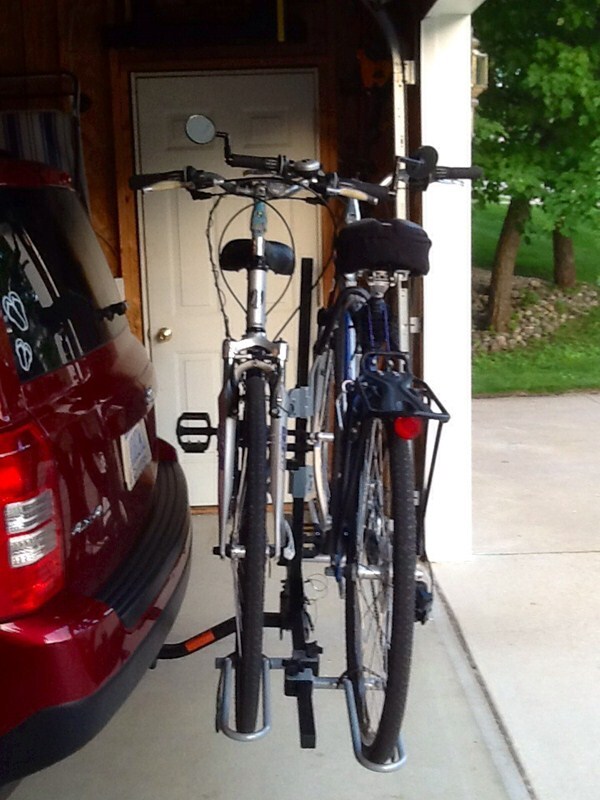
I purchased two of these racks, along with another rack that is meant to hold bikes with both tires still installed. I am extremely happy with all three of them. This rack specifically is very sturdy. Installation was sort of a pain, but that was mostly due to me installing it on the top of my 2004 GMC Yukon XL...it is so high that it was a little hard to install. But now that it's installed, it's actually very simple to take the bikes on and off. I've made one round trip with these racks, so I've put the bikes up there and removed them twice. Both trips (about 100 miles each way) they bikes were super sturdy and I had no concerns about them falling off or anything like that. I would definitely recommend this rack if you're looking for a fork down roof mounted bike carrier. In fact, I will very likely get another one when we add another bike to the family. I think I'll be able to fit four racks on the top of my Yukon easily. One last note - I was initially concerned about the height of my vehicle when bikes were on top of them. I brushed a couple of tree limbs when pulling into my camping spot, but it was no big deal. I think the total height of my load was about 10 feet, which was lower than the camper that I was pulling.
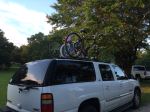
# 2
Swagman Upright Bike Rack for 1 Bike - Roof Rack Crossbars - Frame Mount
Planning on bringing bikes while camping. I mounted 2 of the Swagman bike racks to my new Sportrack on my pop-up camper. The bikes fit perfectly. The racks seem sturdy enough. Not heavy duty, but for my needs they should be fine. Assembly was relatively fast and easy.

We have used the Swagman Roof Rack a number of times when we have needed the additional bike carrying capacity. It took a couple attempts to get the initial spacing of the bike rack properly balanced on the van’s roof rack as recommended by the instructions. But it was easy to do and once set was very easy and quick to put on and take off. The rack works great, the bike is easy to put into place and secure. The bike and rack are very stable and quiet and haven’t required any mid-trip adjustments. We always put the cheapest bike on the roof (lol) but do use a bit of duct tape to protect the finish just Incase. We are very satisfied with the rack and consider it quite a deal for the money.
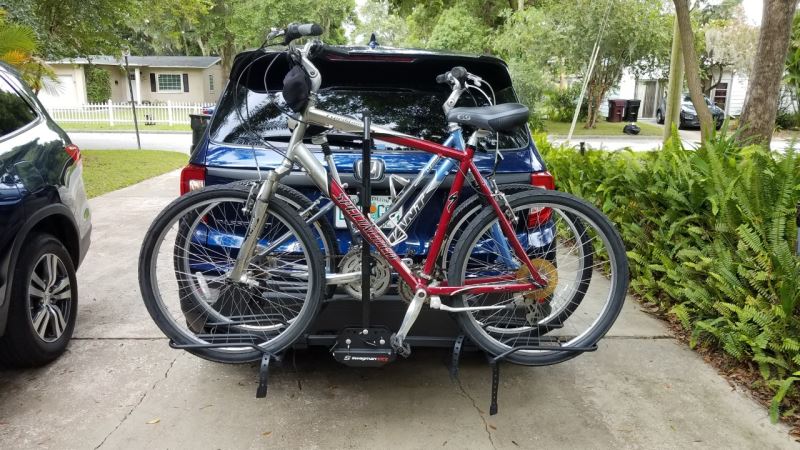
# 3
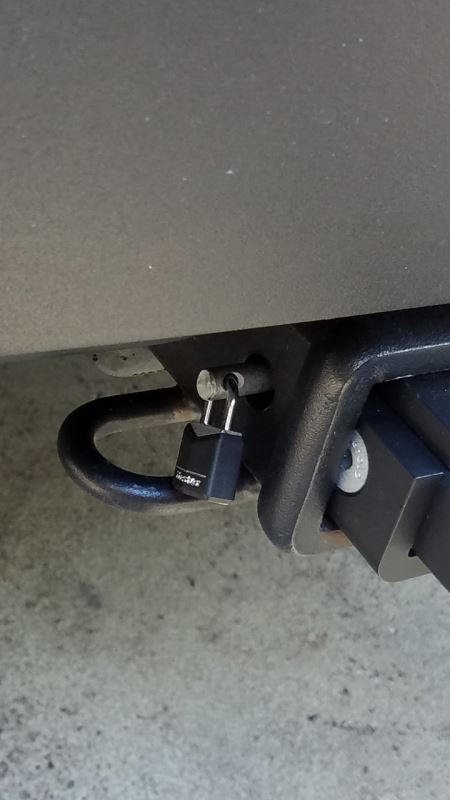
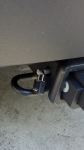
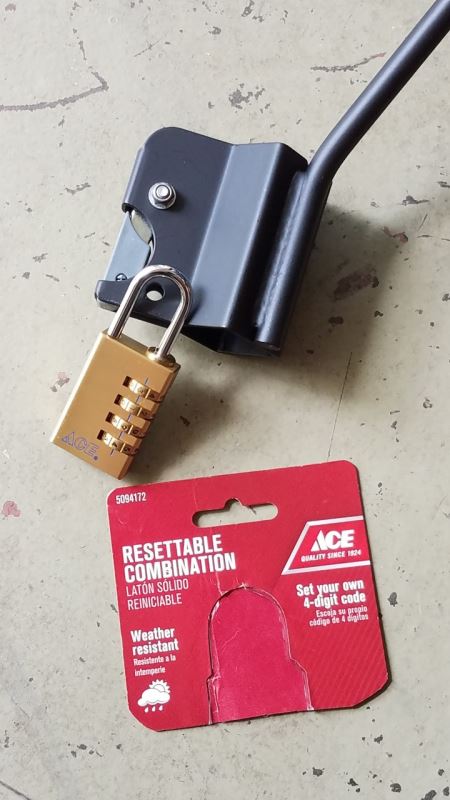
Swagman XTC2 Bike Rack for 2 Bikes - 1-1/4" and 2" Hitches - Frame Mount
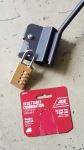
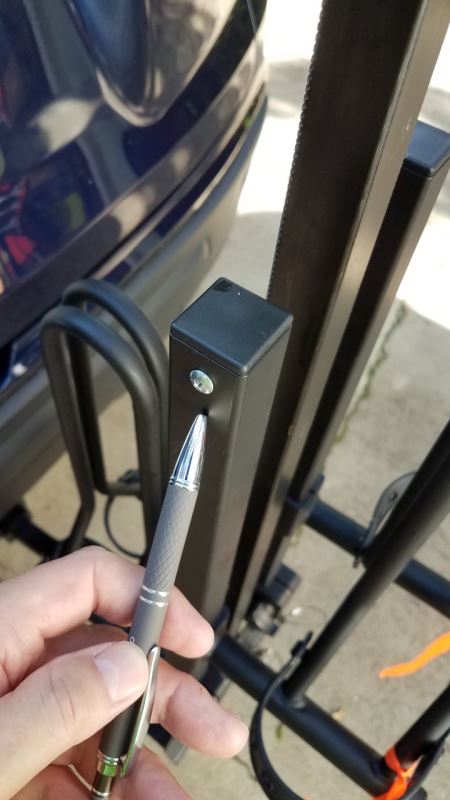
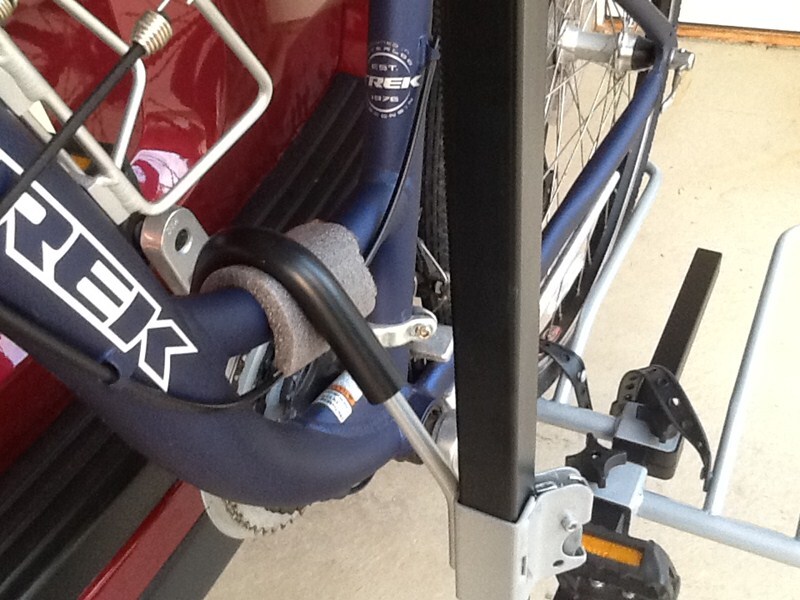
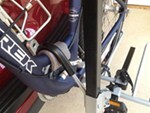
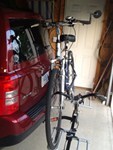
First-time rack buyer / owner / installer. The rack arrived in a timely fashion, maybe a day or 2 ahead of schedule. It was well packaged. I’m LOVING this bike rack. It was easy to put together and to mount on my new Honda Passport. Thus far, no squeaks in my 2” receiver. Hardest part of initial set-up is figuring out the best way to position two bikes. Trial & error and some patience. The directions weren’t clear as to where the 2 left-over screws went. I found the answer in another review and have posted a pic in case others have the same problem (photo with pen pointing at screw). These screws go in the underneath side of both of the folding arms. They appear to keep the wheel wells from sliding off in case in you drive with an empty, un-folded rack, and forgot to tighten down the wheel wells. The folding arm push / pull pins can be difficult at times. I coated the tips with some lube. That and a little jiggling seems to solve that issue. I guess it’s better for the pins to be snug vs popping right out. I added a small Master lock to the hitch pin (in lieu of the provided cotter pin) as a theft deterrent. I read that a 3/16 shackle lock will fit into the bike clamp down arms to also act as a deterrent. I had an old 3/16 lock that did snugly fit and appeared to be locked. HOWEVER, I yanked on the lock and it came open as there isn’t quite enough clearance for the shackle to lock. I discovered that longer 3/16 shackle locks are hard to find. Have attached a photo of the lock that actually fits and works (Ace Hardware). One lock on the upper clamp down arm will secure both arms as the lower arm can’t be removed without removing the upper arm. The clamp down arms appear to be coated to prevent damage to your bike. I’ve tried a simple rag and ultimately settled on pool noodle pieces as a precautionary measure. I CAN NOT open my tailgate (regardless of whether or not the rack is fold up and in the bike carry position). If that’s a concern for you, then spring for the more costly titling version. My back-up camera still functions.
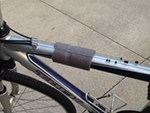
The Swagman XTC-2 platform bike carrier arrived very quickly from etrailer and in good shape, the actual carrier box is inside another shipper box, which I'm sure helped with its condition. Assembly was relatively quick and painless, even though the instructions could be a little more thorough. Installing the carrier on the back of our Jeep Patriot also was quick, it helps to have an extra ratchet & 3/4" socket laying around for just this purpose. Installing the bikes takes a little patience and trial and error the first time you try and put them on the carrier. It's easy enough to adjust the wheel holders to fit the wheelbase of your bikes, but for us at least, the challenge was trying to swing the vertical support bar up into position after putting on the first bike (closest to the Jeep). We couldn't angle the bike enough toward the Jeep to have the bar clear the bike. We learned that the easiest way to secure the first bike was to remove the ratcheting frame hooks altogether, put the bike in the carrier, swing up the vertical support bar, put in the pin, and then slide one of the frame hooks down on the bar. The outside bike is much easier because you can set the bike in the carrier at whatever angle you need, not being limited by the back of the vehicle. One thing we did to protect the bike frames was to use some foam pipe insulation as cushion between the frame hook and the frame (see pictures). Once you get a system for installing the bikes, it is very quick to load/unload them. The rack seems to be well made and doesn't wiggle excessively when traveling. All in all a good product for a good price, would definitely recommend it for anyone looking for a platform bike carrier.
# 4
Saris SuperClamp EX Bike Rack for 2 Bikes - 1-1/4" and 2" Hitches - Wheel Mount
At the age of 70, I needed a “friendlier” mounting and bike access rack. A platform rack seemed to be the solution. I had one caveat. My Subaru Forester had a 1and 1/4” receiver (with a non-standard 3/4” length mounting hole). My Volvo had a tuck away 2” receiver. After some research I gravitated toward Thule only to find out they had no solution for my above conundrum. In fact their customer service offered no interest in solving my problem which others also must have had. More research…enter Saris! An American made company with an innovative solution. I quickly received my SuperClamp EX-2 from ETrailer along with excellent customer service support. The ease of constructing the unit for use and the obvious structural integrity was immediately apparent. My wife couldn’t believe how easy it was to use and to stow away on my garage wall after use. Thank you Saris and ETrailer for a wonderful product and experience. I guess American made is still alive and well. I highly recommend this product and the associated companies.
Purchased this bike rack last year and am very pleased with the stability of the rack. The straps and clamps secure the bike well to the rack. Some things that I learned: When attaching the rack onto your hitch, it helps to put a piece of tape on the rack (hitchtite) once you have lined up the holes. This will make it easier to find the exact location of the holes the next time that you want to use the rack. Finding the exact location allows you to smoothly hand tighten the bolt to the end of the hitch. At that point, just use a socket wrench to finish the tightening. When putting the bike on the rack, I loosely secure the clamps to the tires at first. This allows me to rotate the tires to find the right location in the wheel well for the straps to go around the spokes. I next secure the bike with the straps and then fininsh securing the clamps to the tires.


What our customers are saying:
"The bike rack went together with ease. Everything was in the box, no missing parts. It was very stable on my first trip with it.Works well with womens bikes also. Delivery was prompt with no mishaps. Good job"