
# 1
Swagman Upright Bike Rack for 1 Bike - Roof Rack Crossbars - Frame Mount
Bought two. Easy to put together and install. Holds bikes tight.
Planning on bringing bikes while camping. I mounted 2 of the Swagman bike racks to my new Sportrack on my pop-up camper. The bikes fit perfectly. The racks seem sturdy enough. Not heavy duty, but for my needs they should be fine. Assembly was relatively fast and easy.
# 2
Swagman Fork Down Roof Mounted Bike Carrier - Fork Mount

I am very pleased with this bike rack. For the price and sturdiness it works perfectly for my mountain bike. I will probably buy another one for the other side of my roof rack an my Toyota Rav4.
I've been using this rack weekly hauling a TT setup and a heavy mountain bike. I highly recommend this product to anyone seeking affordable dependability! -c
Thule Big Mouth Roof Bike Rack Review - 2013 Toyota RAV4
Today on our 2013 Toyota Rav4, we will be test fitting the Thule Big Mount Roof Mounted Bike Rack, part number TH599XTR. With the Thule crossroad roof rack system assembled on to our vehicle, we will begin our test fit by placing the bike rack directly on to our load bars. Here at the front, well bring the clamp around the front bar, drop the T-bolt through the appropriate slot and use the wing nut to tighten it in place. Well do this at both sides at the front platform to secure the front of our bike rack. At the rear, well loosen up the wing nut and bring our bracket around the rear bar. Well drop the bolt through the hole in the bracket and tighten both the wing nuts.With our bike rack securer, we can undo the wheel straps and get ready to load our bike.
Yakima FrontLoader Roof Bike Rack Review - 2013 Toyota RAV4

Today on our 2013 Toyota Rav 4, we'll be test fitting the Yakima FrontLoader roof-mounted bike rack, part number Y02103. We'll begin our test fit by placing the bike rack onto the vehicle's crossbars. We'll then loosen up the large black T handle at the front of the carrier to loosen up the front bracket to go around the front crossbar. We'll then move to the rear, where we can also loosen up the black wing nut t put the rear bracket around the underside of the rear crossbar, and slide in the sliver T bolt and tighten down the wing nut. We can then move back up to the front to finish tightening the front bracket. Now with everything all tightened down and secured, we're ready to load up our bike.
Yakima ForkLift Roof Mounted Bike Rack Review - 2013 Toyota RAV4

Today on our 2013 Toyota Rav 4, we'll be test fitting the Yakima ForkLift roof-mounted bike rack, part number Y02098. We'll begin our test fit by placing the bike rack onto the crossbars. We'll first start at the rear to bring the rear bracket around the underside of the rear crossbar. We'll loosen up the black wing nut to insert the silver T bolt into the bracket. We'll move back up to the front and adjust the front bracket to fit the size of the front crossbar. With both brackets in place, we can turn the black wing nuts to tighten them down.
Swagman Fork Down Roof Bike Rack Review - 2013 Toyota RAV4

Today on our 2013 Toyota Rav 4, we'll be test fitting the Swagman Fork-Down roof-mounted bike rack, part number S64710. We'll begin our test fit by placing the bike rack onto the vehicle's crossbars. We'll then pull out our hardware and take the silver bracket to go on the underside of the front load bar into the pre-drilled holes in the front part of the bike rack. We'll then thread on our black wing nuts to pinch the bike rack and the bracket up against the load bar, securing the front part of the bike rack to the front load bar. We'll now go to the rear of the carrier, where we will this time slide the silver bracket down on through the holes in the bike rack, and take the silver plate to slide on to the silver bracket up against the bottom portion of the rear load bar. We'll then thread on our wing nuts and tighten them down.
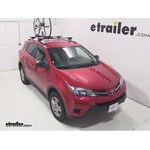
RockyMounts TieRod Stretch Roof Bike Rack Review - 2013 Toyota RAV4

Today on our 2013 Toyota Rav 4, we'll be test fitting the RockyMounts Tierod stretch roof-mounted bike rack, part number RKY1011. We'll begin our test fit by placing the bike rack onto the vehicle's crossbars. We'll bring the rubber-coated steel straps around the underside of the front bar, and move to the rear to loosen up the Allen bolts to bring our rear bracket around the underside of the rear load bar. We'll move back up to the front, remove the black plastic cover, and hook the straps into the connection point. We'll then use the included Allen key to turn the silver bolt to bring the straps up around tightly against the front bar. We'll then move back to the rear to finish tightening down the Allen bolts.


What our customers are saying:
"I purchased a hitch, wiring harness, bike carrier and bike adapter for a newly redesigned 2007 Hyundai Santa Fe. Everything arrived in a matter of days and either fit or worked perfectly. Great prices, quality and service support. Rest assured, I'll be recommending you to anyone who asks. Thanks again."