
To see if this custom-fit item will work for you please tell us what vehicle you'll use it with.
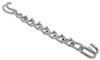
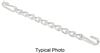
These low-profile, lightweight cable chains are great for driving in light snow. Perfect for those trips where you need chains "just in case." Designed to fit passenger vehicles with tight clearance around the wheels.
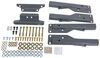
Features:
Specs:
Note: To determine whether you can use snow chains on your vehicle, or if they might affect your ABS/EPS functionality, consult your owner's manual.
These chains are great for giving you a little extra traction in the snow. But if you live somewhere where you experience heavy snow often, you'll definitely want something more heavy duty than cables. Because these cable chains are lightweight and don't take up a lot of storage space, they are also perfect for keeping in your trunk if you occasionally travel through areas that require you to have chains on hand.
SAE Class S tire chains are designed for use on passenger vehicles with restricted wheel-well clearance. Most newer cars, vans, and small trucks - especially those with large aftermarket tires - will require Class S chains. If you're unsure about the class of your vehicle, consult your vehicle's user manual.
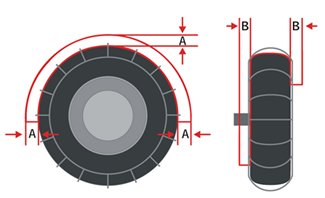
These chains will fit your tires provided there is both:
If you know your tire size, you may think you won't need to test fit your new chains. But there are a lot of variables that can affect whether chains will fit your specific tires, including your tire type, the amount of air pressure in the tire, the amount of tread wear, and the tire manufacturer. You'll also need to know how much clearance is in your wheel well, which you can determine by measuring from your tire tread to the sidewall of the wheel well.
We recommend that you order chains as early in the season as possible to give yourself plenty of time to test fit the chains and reorder if needed. This way, you won't be stuck out in the cold later with snow chains that don't fit.
You can test fit these chains in your garage or driveway, but you'll want to wait until there's snow on the ground to actually drive with them. Likewise, if you're out in the snow and come across bare pavement, you'll want to pull over and remove the chains. Even low-profile chains can cause damage to the bare pavement, your garage floor, or your vehicle if they break from the wear of riding on a harsh surface.
Installing these chains is simple.
1. Lay out the chains on the ground to make sure there are no twists or kinks.
2. Drape the chain over the tire or lay the chain out and drive onto it.
3. Reach around to the back of the tire and fasten the rear side cable by running the end with the metal stops through the eye of the hook on the opposite end.
4. Run any excess side cable through the metal clip.
5. Repeat this process on the front side of the tire.
6. Drive forward 1 car length, then check the chain and hand tighten it again if needed.
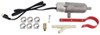
Rubber adjusters (sold separately) are recommended to help ensure a tight fit. Connect these to the front side of the cable in a star pattern. Make sure the hooks face away from your tire so your wheels don't get scratched.
Quick Tips:
How to Choose Snow Chains for Your Vehicle
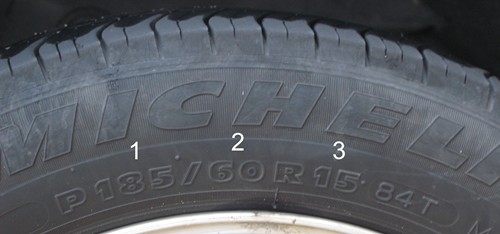
To choose the right snow chains, you must match your tire size. Those measurements can be found on the side of your tire, as shown below.
185/60-15
These chains fit the following tire sizes:
Videos are provided as a guide only. Refer to manufacturer installation instructions and specs for complete information.
On this 2014 Ford Fiesta, we're going to review and install the Titan Chain Cable Snow Tire Chains, Part Number TC1026. For reference we're working with a tire size today 185 x 60 x 15. We're going ahead and show what to look for before we put them on. Now this low-profile chain is DOT approved to meet minimum requirements. This will be your best bet for around town use such as a snowy day, so that way you'll be spinning out at every stop sign or stop light. This is a great to keep in your vehicle on the highway, in case you climb a hill and everybody else is spinning out on that as well. This end of a snow chain always goes towards the front of the vehicle. If you look underneath the crossbar here, it has an actual label Tire Side so we want this side to face the ice and snow.
Run to the other side of the chain, the cables with the stops on it here, always goes towards the back of the vehicle when its installed. All right, a quick few details about the chain itself. This obviously is the cable style chain with a ladder-style pattern on the tire. It has rollers on top of a coil-wrapped cable here. These will move around as needed to get a grip on the ice and snow. Now we take a look at the cable, its pretty thin assembly here and that makes it a Class S Chain, so its good for vehicles that do not have a lot of clearance between the fender and the tire and the components behind the tire as well. Lets go ahead and put them on our tire.
Drape it across the top of the tire first. Make sure your crossbars are even across the tread of the tire. It doesnt have to be exact, you can go by feel. Make sure the ends are tucked underneath the tire as far as possible and not tangled up. Then what may be helpful, to get easier access to the inside of the tire is turn the whole outside so you can see the inside of the tire. Now to connect the ends together, we'll simply run the two ends through the stops and take up the slack.
You dont have to take up a lot of it. It doesnt have to be super tight, but basically follow the circle of the rim I think will work good. Go ahead and count the number of stops you used. Then we'll go ahead and need that for the outside of the chain. Extra cable will go through this little clip right here to help hold it in place. Now lets go ahead and turn the wheel back in, and do the outside.
Right we'll do the outside, the same as the inside. We'll go ahead and run it up as tight as we can. Now for instance, on our chain here, we used number four on the inside as well. We can use one more or one less if we need to. Anything more than that, then we would probably want to readjust on the inside again. We also have an extra length that will go into this clip right here. At this point, our chains are installed on the tire. The manufacturer does recommend using a rubber adjuster on top of our cables here. We're going to show you Part Number TCMA2. This simple adjuster has six points of contact with the chain. Just make sure the hook stays away from the tire, and try to keep it as even as possible. Once its in place, you can see how it adds tension to the cable and gives a much firmer grip on the tire, yet it still can move around as needed to work with the tire and dig into the ice and snow. When you're done using them, basically take them apart in the reverse order you put them on. With that, that will finish it for the Titan Chain Cable Snow Tire Chains, Part Number TC1026 on this 2014 Ford Fiesta.

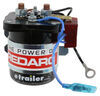
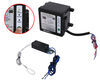
Info for this part was:
At etrailer.com we provide the best information available about the products we sell. We take the quality of our information seriously so that you can get the right part the first time. Let us know if anything is missing or if you have any questions.


Thank you! Your comment has been submitted successfully. You should be able to view your question/comment here within a few days.
Error submitting comment. Please try again momentarily.