Video of Carr Custom-Fit Side Steps - Hoop II - Black Powder Coated Aluminum - 7" Step - 1 Pair
![Video Thumbnail]()
![Video Player Dialog]()
Videos are provided as a guide only. Refer to manufacturer installation instructions and specs for complete information.
Video Transcript for Install: Carr Custom-Fit Side Steps on a 2017 Chevrolet Colorado
Speaker 1: Today on our 2017 Chevrolet Colorado, you're going to be taking a look at and I'm going to show you how install the Car Custom Fit side steps in black, part number CARR103331. These are also available in polished aluminum and titanium silver. This is what our step looks like when it's installed. This is going to allow us to easily enter and exit our vehicle. It's going to have an XP3 extreme black powder coat finish so it's going to resist chipping, peeling and fading. The step itself is going to be seven by three and a half.
It's going to offer non-slip diamond tread. It's really going to help in icy and wet conditions. It's going to have a U shape design to help maintain that rugged look on a truck.First thing you would want to do is you would want to set your seat to your normal driving position and you're going to take the front bracket on the step, you're going to set it in like this and you're going to mark the holes. Now, our customer has already done it by where he drives, so we're going to take this part and we're going to go right behind this lip, this is going to go up on or behind the frame rail. Take a black marker and I'm going to mark the spot.The difficult part about this whole installation is being able to get something in between here and the frame rail.
You need a right angle drill like this. Even that is hard to get in, so what I had to do is I had to take a drill bit and I had to cut it down. We had to make it shorter so I could get it up in there. Right now, I'm just doing a pilot hole. We'll make our hole bigger here in just a second.
Now, we'll take our five-eighths drill bit and open our hole the rest of the way.Now, I'm having trouble getting my bolt to go through that hole. I ran my drill bit through there a couple of times and tried to wallow it out a little bit and I still can't get it to go through. I don't want my hole to be oblong, so what I'm going to do is going to jump up one more bit size and use a 21-64ths drill bit and open it up just a little bit more. I'm just going to take a paint marker, I'm going to kind of coat the inside of that hole to help keep any corrosion later on down the road.Now, we're going to have four bolts like this, hex bolts. You're going to put two flat washers on.
You'll put one of first, push it through, put another flat washer on the inside. Now, we'll take a 13 millimeter socket and wrench and we're going to go ahead and tighten that into place. In order to get this up here, we'll have to kind of pull this wiring clamp off of our frame mount. I think I'm going to go ahead and pull this one out too. Just like that will give me a little extra room. And again, we're going to drill a small hole there. We're actually going to be putting a self-tapping screw in, but with the bit trying to get the self-tapping screw in, being the frame rail, you can't get enough pressure on it to get the self-tapping start so we're going to drill a small pilot hole first.Now, we're going to take our self-tapping screw that comes in our kit and I'm going to see if I can't get it to stay up there by hand. Take a five-16ths drill bit and we'll go ahead and sink that in.Now, with my front one installed, I put my second one on my step, you can see its loose. I'm just going to use my step as a guide to go ahead and get my hardware just installed there. Now I can push my bracket up into place and I'm going to go ahead and mark my top hole again, and then what I'm going to do is I'm going to mark around my bracket, kind of like this and we'll go ahead and take this back down. Line up my mark that I made, and then mark the center hole here.Then we're going to repeat the same process that we did with this. We'll drill our bottom one first, get our bolt in place to hold our bracket and then we'll drill the top. Now, with our brackets installed, we're going to install our step. You're going to have four bolts that look like this. You're going to put a flat washer on it and we're going to feed it from the outside in just like that. And then I'm going to go ahead and get one on this side just to hold it up. We're going to put a flat washer on and then our lock nut. We're going to do that with the remaining bolts. We'll take an 11 millimeter socket and wrench and we're going to tighten our hardware.With one step installed, you're going to repeat the same process on the other side of the vehicle. That will do it for a look at and installation on the Car Custom Fit side steps in black, part number CARR10331 on our 2017 Chevrolet Colorado.

 Product Experts Available Now!
Call 1-800-940-8924
6 MIN
Est. call wait time: 6 MIN




































Larry
5/22/2023
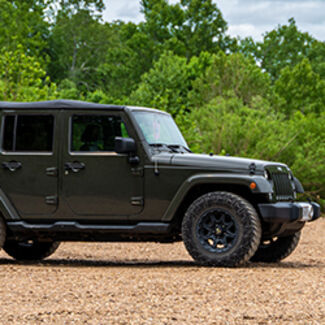
They look like the day I put then on. No sign of wear. Still rock solid on vehicle. Very well made.