


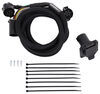
Say goodbye to annoying cranking! This smooth and powerful 8K hydraulic jack does all the hard work for you. Plus, it comes with everything you need. Easy, bolt on installation and you won't break a sweat next time you are hooking up!
Features:
Specs:

Videos are provided as a guide only. Refer to manufacturer installation instructions and specs for complete information.
Hey there, neighbors. Kevin here with etrailer. And today we're gonna be taking a look at and showing you how to install the Bigfoot hydraulic trailer jack here on our Diamond C flatbed trailer. If you own a heavy duty equipment trailer or maybe a gooseneck trailer and you're tired of that old school manual, crank-style jack system, or maybe you do have a hydraulic jack system that just isn't really cutting it, then swapping over to the Bigfoot hydraulic jack is gonna make your life a whole lot easier. This jack is going to be a bolt-on design so that way you can match up to a variety of different trailers really easily and be able to quickly get it installed because it's all self-contained. The only thing we're gonna need is a 12 volt source of power so that way we can power the pump inside of it.
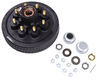
Now with these jacks, there are a few different options and setups when it comes to them. So the one we have right here is the 8K and this is the single pump design. Now say you have that gooseneck trailer where you have two landing gears and you wanna swap over, you can still go with a single pump and then just have a slave leg to go with that so that way you can easily have that power both at the same time. Or maybe you have a lot of heavy duty stuff on your trailer and you need two landing gears and you need both of those to have pumps, that's also going to be an option. So if the 8K is not enough for you, there's also a 12K and then a 20K.
So with that 20K, you're getting a single pump and then also a slave leg and then the 24K, which is gonna be dual pumps. So you're gonna be getting two 12K pumps with that setup so that way you can fully lift all of that heavy equipment. And one of the cool things about this pump is that with it being self-contained, we can actually disconnect the pump portion from the jack leg itself and run longer hoses and then move the pump to wherever we need it to be. So say we know we have a lot of heavy duty stuff kind coming across here, we don't want to potentially hit our pump and damage it, we could reroute those hoses and have it down inside of a storage container. Or maybe we're putting this on a fifth wheel.
Maybe you're landing gears on that fifth wheel trailer have wore out and there's not enough space to get both the leg and the pump right where the old landing gear sat, but maybe you could put the pump up against the wall and that front pass through and then have those legs sit where they need to so that way you can get that full power out of it. Along with that, there are instructions. So say you have that slave leg, they're gonna walk you through all of it so it makes the install a whole lot easier. They have a bunch of varieties of instructions going over exactly how to re-plumb this so that way you can power up that slave leg or power up both the dual motors there and have them functioning properly. When it comes to your control, it's gonna be super simple.
You're gonna have just this little remote, which you can easily take the key out of. Lock that up so no one else can come by and just start playing around with your trailer. It is magnetic, so right on the back there, you can have it pop right on there. Or it has a mounting point. So say you're not gonna move this at all, you could just get it where you want it and shoot a screw through there, probably a self-tapper right into the frame. When it is time to use it, simply pop in your key, put it onto on, and then we can extend or retract. Ours right now is currently in the fully extended position, but in just a matter of seconds, you can have that easily retracted down. (system whirring) Now we did a little time test with this and I was getting about 32 to 35 seconds for a full extend or a full retract. (system whirring) Keeping in mind, I don't have any weight on here. We're really just going off the tongue weight of the trailer itself with just a minimal amount of stuff down inside of our storage compartment here. So that can kind of throw that off. But still getting a full 24 inches of travel with our jack in just 30 seconds is pretty astounding in my book. So this is definitely a upgrade for your heavy duty trailer. Now let's talking about needing a 12 volt battery in order to power the pump. You will need to use that minimum four gauge wire. Also, you'll want to take into account your distance to that battery. You could get a voltage drop so you might need to size up that gauge. In our case, we had two aught gauge wire already ran through here, so that was plenty for what we we inchesre needing. We just stuck with that, which made it a little bit harder to fully make our connections inside just 'cause it is a little bit of a tight space. But once you are fully hooked up to the battery, that is going to power that pump. Now say your battery's dead, there are some options where you can come with a manual override. Ours does not have the manual override, but you would be seeing a little spot up top here where you could put a drill on and then easily run the jack up and down in those events where your battery is not functioning. Now at the base of our jack, we're gonna have about a 10 inch by 10 inch foot pad here. So we've got a nice wide space here. Now the lip of this kinda curls up a little bit, which is pretty common. A lot of the time, these jacks unfortunately just get kind of dragged around or not lifted up enough. So that should give you a little bit more of a clearance there to kind of help clear that and not have it run into the edge of that lip and then kind of bend it up. 'Cause usually with heavy duty equipment trailers, you're not always paying that much attention or you're going over some real rough terrain. But that should give us a nice wide space to kind of spread out that weight and not sink so far down into the ground if we are on something that's pretty soft. Now we've gone over some of the details on our jacks here. Why don't we talk about the actual install itself Now in our case we have a custom fit plate that was already on here and it just so happened to match up with the bolt pattern for the brackets that are already welded up to the jack. So we lucked out quite a bit. You might not have that same setup. If that is the case, they list out a few different ways to mount this up and they give you extra mounting brackets that you could either weld on or bolt on. So there is a variety of different ways to get this set up on your trailer. And especially you might not be going with an A-frame. You might be hooking this up straight up to like a front of a gooseneck trailer where the installation could be a little bit simpler. Aside from that though, there are a few things you might wanna pick up. One of those being a probably about a gallon of Dexron III or IV hydro ATF fluid and that is going to be what fluid is used to actually pump through here. And then also keeping in mind that they want you to use at least a minimum of four gauge wire. And if that is gonna be a bigger distance between your battery and your pump, you will want to kind of measure that distance and figure out what the voltage drop's gonna be so you can size your wire up appropriately. Aside from that, I think the only other thing we really had to pick up was just a couple of ring terminals so that way we could connect our remote to our solenoids inside of our pump. So really everything should kind of come with the package here. They did give us a lot of extra hardware and some tees and stuff, so if we did want to add on a slave leg later on, we always have all those parts ready to go. But with that being said, if this is something you don't feel comfortable doing yourself or maybe you can't lift this up, maybe it's just a bit too heavy for you to handle, definitely feel free to use our dealer locator and you can enter in your zip code to find a shop near you and get it professionally installed. If you are wanna do this yourself though, stick around, and I'll help walk you through the process. So to begin our installation, we first have to remove our current jack here, and what I wanna first do is get myself some jack stands. I've lifted it up onto that. I've got maybe like a 16th of an inch under the jack foot here just so that we have some room. I didn't want to have it too far up to where when I take it off of the bolts that it's just gonna like kind of drop down on me 'cause this is a little heavy. So from there, I'm gonna cut the power. So with that cut, we will now pop off the cover. (tool whirs) And we'll set that aside. Now inside, you can see, we have our power and ground coming in to our unit from our battery. We're gonna need to disconnect that. So on our particular one, this is gonna be a 10 millimeter socket we're using. This might vary though. Looks like also this is gonna be part of our old jet. Yep, this is for the controller, so I do need to pop that off as well. All right, we've got our controller disconnected out of there. We've got our power and ground. Pop that up out there. And honestly, we'll probably keep our power and ground how it is. But I'm gonna undo the controller 'cause we're gonna have a new one to go with this. Get that out of the way. This is our seven-way cable. We can get that out of the way as well. Now when it comes to mounting up the new one, it's gonna be a little different. We're not gonna be using the hardware that comes with it just because our neighbor has a special plate that he had welded together and then mounted up to this trailer so that way he could mount his jack. And it luckily comes out to the same six inch width and 12 inch center to center height there for our bolt pattern. So we're gonna go ahead and just reuse the hardware that's on here 'cause this is a little bit bigger, a little bit beefier than what we have included with our kit. But there are options in there. They list a couple of different ways to mount it up. They even give you these brackets which you could weld onto. Say you have like a four by four tube about the front of your trailer, you could weld these onto it and then have something to bolt the jack right too. They don't really recommend bolting or welding the jack straight up to the frame just because if you had any kind of issue, it's gonna be a lot harder to take back off. But getting those brackets welded up will make it a lot easier. But like I said, in our case, we're gonna be reusing our hardware so I'm gonna fit all this to the side. Just make sure if you are using that factory hardware that comes with yours that you are following the rules with the weight rating. It'll tell you how many bolts you're supposed to use per weight rating and make sure that you're following those so that way you have it nice and supported. All right, now that everything's disconnected, I'm gonna start loosening up the bolts that attaches to this plate here. I'm not gonna fully take them off yet. I do want to make sure that I have this supported. It's not gonna just fall over on me. So at this point, I've got all four of the bolts that are out or we inchesre in this plate out, and now it's time for me to get this out of here. So I'm gonna probably have to grab a seconds set of hands 'cause this hydraulic jack is not light and neither is the one that you're gonna be putting in. So grab yourself that set of hands so that you can also pop in the new one. I'm gonna just drop this in myself. Got a block below to kind of help, but we'll still have to raise this up a bit. Now that I got it in here, I can kind of reposition. All right, so Chris put the camera down to help me out. He was my second set of hands, so unfortunately we didn't get to see the real struggle here. This is very heavy. Definitely get yourself some people to help you out. Maybe put a floor jack under it, that way you can kind of raise it and lower it just to get it just lined up perfect for you. In my case, we got it to where I can get the top bolts in. Now I'm gonna kinda shift it around and get the lower bolts in. Just got a little bit of wiggle room with the slots there that are kind of throwing it off. All right, now that I got all those bolts in, I'm gonna start tightening them down and then we can torque 'em. Obviously, my tightening for the torque is gonna be a little bit different just 'cause I'm using different hardware. Just make sure you're either following the instructions that are there or that you're going by the grade and sizing of that bolt so that way you're properly torquing it. Next, we have our power wire that's coming back to this circuit breaker. This one's rated differently than ours, so I am gonna be swapping it over. And this is a automatic, so if this ever did trip it should pop back up for us. And it is also waterproof, which I don't believe our current one is. So that'll be a nice upgrade. But we need to first get it off. Now for the one that comes with your kit, it's an 11 millimeter socket for those nuts and it looks like it is also the same for this one as well. Should have brought in a deep well socket to get that off fully, but should be able to get that loose and then just pop those power wires off. And you can see those just run right up to the battery here. And that's a little hard to see, but on one side, it'll say BAT and that's gonna be your battery post. The other side's gonna say AUX, and that is gonna be our outgoing or our load. So we wanna make sure that we are putting this on correctly. I'm gonna be taking my wire from the battery, popping it onto the BAT side. Oop. (tool grinds) I make sure this is nice and tight, but I wanna be careful 'cause this is plastic. You can still break these. So make sure you're just getting nice contact with it. Looks like the ring terminal is pretty big for the last one so it looks like they bent it up and that's kind of causing a little bit of issues with this actually going down straight. But I do believe we got it on there nice and tight now. Now for the other side, running out to jack, same thing. (tool thuds) Now for our wiring connections, there's gonna be a few things here. We're gonna have our power and ground. So power is gonna come in up here. It'll go across this bus bar up to our other solenoid as well. Down below here is our ground going up to the motor. So I'm gonna stick our 12 volt ground from the battery onto this post as well. And then we're gonna have our controller, which is gonna have three wires. So our green wire's gonna come up on this post right here. Our white or gray wire is gonna come up on the post up top here. And then the black wire is gonna come to the same spot we're gonna be putting that 12 volt power. Now for the controller wires, we do have to add on some ring terminals. I used a 3/16 opening for the green and the white wires. You see those are a little bit smaller of a ring terminal, and a larger one for the black because we need more like a 3/8 so that way it can actually fit over that stud there. So we're gonna need to route our wires up. I'm gonna kind of just pop those through this hole here. Got my green wire coming right here, so I'm just gonna throw that on right now. That's snug. White wire's coming up above. Same thing. (tool grinds) And then finally, our black wire, but I'm gonna get that ready with our other power wire. So I'm gonna need to switch. I believe this is a 13. Yeah, it's 13 or a half inch socket that you're gonna need. (tool grinding) I am gonna put my power wire on first just because this is a lot fatter and this is gonna be more of a struggle to get to sit flat. I might have to just bring a bunch of it up into here to kind of get it to sit down. All right, now we can bring in that black wire from our controller. And then we'll pop the split lock washer and nut back on. There we go. And then we'll snug that back down. (tool grinding) All right, I've got the nut off of our ground here. And now finally, the split lock. This is gonna be fun to try and get this to sit right with my cable just 'cause it's so thick of a gauge here. So I'm gonna play around with this for a little bit and get that figured out and then we can show you how we got it. So I did have to kind of curl this back to get it down into there, but we do have it on finally. Now that all the electrical is finished, it's not time to fill this up with some Dexron III or IV ATF fluid. We're gonna be going with IV today 'cause that's what we have on hand and I've got a nice funnel here to help. Now this is gonna fill up about three quarters of the way while the jack is still retracted. So that's what we're gonna be looking for. 'Cause they say two quarts, but obviously no one's got a scale and it built into their brain to know exactly what that's gonna be. Now we're gonna test this out, just making sure that everything's functioning properly before we get to the bleeding process. So I've got my key in, I have it turned on, and we can hit extend. (system whirring) Pushing the jack out. (system whirring) We'll go until it touches the ground and then I'll bring it back up. (system whirring) All right, now that we've confirmed that it is functioning properly, it's time to now bleed the hydraulic lines. And to do so, what you're gonna wanna do is fully extend the jack. So now's a great time to make sure that you have good wheel chocks behind the trailer because this is gonna go really, really nose high. And then we're gonna let that sit for 30 minutes and that's gonna force all of the air bubbles out. It's gonna force it back to the reservoir. And at the reservoir, that little plug that we popped in has a small hole in it and that's gonna allow that air to escape out of there. All right, so like I said, we we inchesre gonna let this sit for 30 minutes. We ended up letting it sit for about a day here. Went on to some other things and now we're back. But last part is going to be just popping on the cover here. We're is gonna have two holes and you'll have some self-tapping screws that come with it, which will line right up. Get those pots in. (tool whirs) And also right there. Now the only other thing I did was just run some wire loom over the exposed wire at the back here for our control. Now you could route this into the cabinet in here, but our neighbor is gonna leave it out. So the nice thing about this is it's gonna have a magnet built into it. So it's just gonna click right on and then you gotta kind of pull off. It's got a decent strength magnet a little bit better than what was on there before. So we should be able to just tuck this right up in here. Now for the wiring, I'd probably throw like some kind of zip tie with some other wiring like maybe the the seven-way cable just to kind of help hold that up off the ground. Or this is where you'd start to kind of route it into whatever kind of storage you got up front so that way you don't have that dragging and getting damaged. But with all that being said, that is gonna do it for our look at and installation of the series of Bigfoot jacks here on our Diamond C trailer. My name's Kevin. Maybe you still have some questions, especially with the install, definitely feel free to reach out to us via ask the experts link, a comment on this video, or a phone call to our customer service department and we'd be happy to help you out on your journey.

Info for this part was:
At etrailer we provide the best information available about the products we sell. We take the quality of our information seriously so that you can get the right part the first time. Let us know if anything is missing or if you have any questions.


Thank you! Your comment has been submitted successfully. You should be able to view your question/comment here within a few days.
Error submitting comment. Please try again momentarily.