


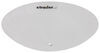
At your RV dinette, you shouldn't have to hunt for a wall switch. This hoop-style ceiling light has an integrated switch for direct control, so you flip it on at the fixture and light the table.
Specs:
Reaching for a wall switch across the dinette gets old fast, especially in a small cabin. This hoop-style RV dinette ceiling fixture has an integrated switch for direct control, so the on and off is right on the light. You can flip it on from the seat and keep moving without hunting for another switch.
Taller fixtures can feel in the way when your ceiling space is already limited. This one uses a low-profile design suited to tight interior spaces, so it sits up close instead of hanging down. You keep more open space over the table and the light stays out of your line of sight.
Plug-in lights can look cluttered when cords have to run where you do not want them. This fixture uses a hardwired installation, no plug required, so everything routes through the wiring instead of a dangling cord. You end up with a cleaner ceiling setup that stays put.
Mismatched finishes stand out fast in a small RV interior. This fixture comes in a satin black finish for a uniform look in the cabin, so it blends with other black hardware and trim. The ceiling stays visually consistent instead of looking pieced together.
Videos are provided as a guide only. Refer to manufacturer installation instructions and specs for complete information.
Hi, everyone. Steve here with etrailer.com. Today we're looking at our Gustafson hoop ceiling light in a nice satin black finish. So folks, as you can see, I've got this suspended here with the fish wire and it's very simple, elegant hoop design. So maybe an RV dinette ceiling fixture, something of that nature. It does have a built-in switch here.
Let's go ahead and zoom in and take a better look at this. So as I was mentioning, you do have a nice built-in switch here. You can toggle it on or off, and of course you got your two wires, white and black. And this runs on 12 volts of power. And you can see there's two holes here where I've got my line here hanging this.
Dimensions on that center to center is gonna be 10 and 3/8th inches. There's no hardware included. Most likely you already have some screws laying around you can use or you can source that locally. Overall, edge to edge, I got 11 and 3/4 inches on a diameter and on the thickness or a tall, I got one and 5/8th inches overall. And it's just a very nice finish on the lamp assembly.
I do want to go ahead and power this up for you so you can go ahead and see how it looks with the lights on and with the lights off in the studio. So again, 12 volts of power. So as you can see, I've already got it turned on here, off, on, and I do want to go ahead and tilt it here so you can see it lit up. Very nice, very elegant. And let's go ahead and shut off the overhead lights in the studio.
So as you can see, very nice, very bright. And zooming back out. Now I'm approximately six feet away from my studio camera. So as you can see, it's putting off really good light. And again, it has that nice round design, that hoop design. So again, very elegant, very nice. It'll make a great addition or replacement, depending on what your needs are in your RV, camper or whatnot. And again, running on 12 volts of power. Very easy for you to wire up yourself and use. Now we'll wrap up our quick look together. I'm Steven with etrailer. If you have questions about this or any other product we carry, reach out to us. We're here to help you. Have a good one.
Info for this part was:
At etrailer we provide the best information available about the products we sell. We take the quality of our information seriously so that you can get the right part the first time. Let us know if anything is missing or if you have any questions.















Thank you! Your comment has been submitted successfully. You should be able to view your question/comment here within a few days.
Error submitting comment. Please try again momentarily.