


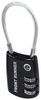
These quick-release awning brackets let you easily mount and remove an awning on your Front Runner Slimline II platform rack. Built-in latches quickly secure and release - no tools needed. Wall brackets let you easily store your awning indoors.
Features:
Specs:
Note: Not compatible with 270-degree awnings.

California residents: click here
Videos are provided as a guide only. Refer to manufacturer installation instructions and specs for complete information.
Hi, everyone, Aidan here with etrailer. Today, we're gonna be taking a look at the Front Runner Quick-Release Awning Brackets. We've got an awning setup right now to show it working, but this is gonna be more about the brackets. And what they do is they'll mount up to your Front Runner platform, specifically the Slimline II platform, because it does rely on this side rail as a connection point, and give you a quick-release, so you can very easily pop the awning off or put it back on whenever you're ready to use it, leaving just the brackets behind. So it's a very minimal footprint, and you don't have to worry about the awning sitting out in the elements year round if you're not using it year round. Let's check it out.
Now, one thing to note is that the brackets do say they won't work with 270 degree awnings, but that's exactly what we have set up today, and it's working fine. The only issue is just hatch clearance on our 4Runner, because the awning is sitting quite low. So there's maybe something to be said for that, although it will change depending on the vehicle you put this on. Just know that depending on your awning, there may be some variance there where some 270 degree ones don't work, but our Batwing Compact is working fine. What this is really about though is that quick-release.
Now, you're not gonna be able to see it right now, because the awning's in the way, but I'll undo it here in real time, so you can see just how quick it is. And then once it's undone, I'll show you where it all hooks in. So there's just two latches, push up, and release it. So this is the bracket that's going to attach to your awning. We're using the hardware that came with the awning to attach it, and everything else is included with the bracket kit.
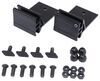
This circular puck shape is going to slide into the quick-release, and then this hooked portion here is where we will latch it in. And then all these different holes all throughout you'll see are for the different styles of awnings that you may have, and that's what lets it work with so many different brands. Now, on the platform side of things. Here, you can see the slot where that puck will drop in, and then here's the latch that will go down over and snap into place, and that's what actually gets this to fully tighten down. So I'll just grab the awning now, lift it back up, and we'll see how quickly we can get this back in.
Now, this part's a little tricky just because it is pretty close, and you don't have great visibility. So an extra set of hands could be helpful, but right there, it's slotted in, and all I have to do now is just reach my hand up through and latch it down, which when I do latch it, it actually does pull some tension on the awning and helps to just make sure it's a little bit more stable. That's one thing that I was a little worried about when I was looking at this at first is how secure is it. But there's no movement there, everything is rock solid, and we're ready to hit the road and actually use the awning. As far as how this attaches, it's going to have a bolt that slides in the top channel of the main slats here, and two nuts that will slide into the side channel here. And this bracket actually kind of sandwiches around that side rail, so you will need to undo one of the screws at the bottom, but it's all pretty simple and it just has to line up with one of these slats, because of this outer bracket here. Once you've got that determined, then you just set it up however fits with your awning. And that's all there is to it. I think it's going to be a really great addition, so that you don't have to leave your awning on all the time. A couple things to note, it's got a 44 pound capacity, so just make sure you don't overload it. And then the kit does come with brackets that can actually be wall-mounted in your garage. So when you take this off of the platform, you can hang it up on those wall brackets. It just uses the same quick-release system, so it actually stores off the ground. I think it's just a nice extra touch, so that when this is off of the vehicle, it's not just on the ground, it actually elevates it and keeps it protected, which I think is the whole purpose of this. Keeping it off the vehicle between uses is going to increase the life of your awning and just make sure that it lasts a lot longer, but makes the setup process much quicker and easier when you're ready to go. Thanks for watching.
Info for this part was:
At etrailer we provide the best information available about the products we sell. We take the quality of our information seriously so that you can get the right part the first time. Let us know if anything is missing or if you have any questions.


Thank you! Your comment has been submitted successfully. You should be able to view your question/comment here within a few days.
Error submitting comment. Please try again momentarily.