


This awning-style bunk window is built for camper vans with a bed platform along the wall, where a full-height window would cut into cabinetry or structure. It brings in light and opens outward for airflow without giving up your sleeping space.
This window fits the wall space above a bed platform where a full-height window would interfere with cabinetry, structure, or both. It brings in light while keeping the sleeping area intact.
The glass panel opens outward using a T-handle crank, creating airflow inside the van. Because it tilts upward, the window can remain open during light rain without water entering through the opening.
This bunk window sits at eye level from outside, creating a direct view into the sleeping area when parked near others or in public spaces. The 17% gray tint limits how much someone can see inside while still allowing visibility out. It also blocks 83% of UV rays, reducing sun exposure through that section of glass.
The clamp ring sandwiches the van wall between the interior and exterior frame to secure the window in place. When installed with foam seal tape, it forms a weathertight seal around the cut-out, so you get airflow and light at the bed without giving up wall space or getting rain inside.

Videos are provided as a guide only. Refer to manufacturer installation instructions and specs for complete information.
Hi everyone, Steven here with etrailer. Let's take a look at the Van Windows Direct awning van bunk window. Folks, this is a 41-1/4 by 16-3/8. When you're sleeping in a camper van, airflow can make all the difference. Fresh air can reduce condensation, it can keep your interior cooler and make overnight camping much more affordable. So again, folks, this is a vented window.
It's a premium vent window designed specifically for van conversions and camper builds. I'll throw some images on the screen there so you can kind of get an idea of what this could look like when it's completely installed. And unlike a fixed window, this model does feature a crank out awning design. So that's going to allow you to easily open the window for ventilation whenever the time comes. And I do want to go ahead and spin this around at the back and kind of show you the backside and show you that.
So there is a trim ring here that comes off. And then obviously when you're installing it, you're using that trim ring. I'm going to go ahead and set that down here, hopefully not knock it off. And then I'm going to go ahead and spin this sideways right here. And I'm going to crank on the crank here and then you're going to be able to see this open up for us.
There we go. And bear with me because I'm trying to do this with one hand. It's not installed, so it's a little difficult. So crank it and that's about as far as it's going to go. So you got about a 4-inch gap I'm guessing there.
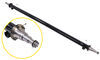
And then you can simply crank it back and it's going to close up nice and simple. And then coming back here to the back, you do have a screen on here. You can simply take these two tabs here. And again, I'm going to try to do it here, not installed. It's going to be a little difficult. And you can take this screen out. So I'm actually going to leave it there just because I think I'm going to drop this if I don't. But those tabs allow you to pop that screen out. And then again, you do have the trim ring here along with a set of screws for installation. So again, I mentioned this being a 41-1/4 overall by 16-3/8. The cutout, the backside that's towards me is 40 by 15. Now as you can see, this is a dark privacy tinted, tempered safety glass. So it's going to reduce that glare. If I tilt it up, you can see the reflection off my studio lights. So it does a great job of reflecting the light. And then as far as seeing through it, does a great job of tinting out, people aren't able to see through. And also it does a great job about keeping everything cool as far as blocking those UV rays and everything. Now, to install this, you've got a couple options. You can do it yourself or you can take it to a shop. We do have an install locator link below and we can find trusted shops in your area based on your zip code that we are affiliated with. Or if you wanna tackle it yourself, I do recommend getting an install kit. Now we do carry two kits, that one on the left there for large windows and the one on the right for small windows. This one I would consider a small window. You should be able to get this installed with that item number VW84ZR. I also recommend sold separately, maybe some foam tape, those kind of things. You're probably going to need a cutting tool, whether it's a, excuse me, a jigsaw, a die grinder or something of that nature. You're going to need some painter's tape. You're going to need some sandpaper and a couple other things as well. Primer, you know, once you cut that metal, you're going to make sure you reapply primer to keep it from rusty and those kind of things. So keep that out of mind. You can check it all out here at etrailer as well as far as the instruction links and seeing the literature on how to install these directly from the manufacturer's installation instructions. So, folks, again, the biggest advantage to me here is this is flexible. You can leave it partially open while you're parked, get that airflow in, keep that stagnant air out, keep it cool inside. You have the tinted option. You can pop the screen out for cleaning and it's a nice look on the outside of the van. Folks, that's going to wrap up our quick look together. It says Van Windows Direct awning van bunk window. I'm Steven, thanks for watching.
Info for this part was:
At etrailer we provide the best information available about the products we sell. We take the quality of our information seriously so that you can get the right part the first time. Let us know if anything is missing or if you have any questions.

















Thank you! Your comment has been submitted successfully. You should be able to view your question/comment here within a few days.
Error submitting comment. Please try again momentarily.