
Curt Trailer Hitch Receiver - Custom Fit - Class III - 2"


To see if this custom-fit item will work for you please tell us what vehicle you'll use it with.


Thank you! Your comment has been submitted successfully. You should be able to view your question/comment here within a few days.
Error submitting comment. Please try again momentarily.





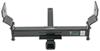
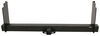
This Curt Trailer Hitch Receiver gives you real capability for light to moderate towing. With a 3,500 lbs maximum gross trailer weight and a 525 lbs maximum tongue weight rating, it’s built for small trailers, campers, or utility hauls. The 2" x 2" receiver opening works with a wide range of towing and cargo accessories so you can tow your gear or load up for a trip without worry.
The fully welded, custom-fit design bolts right onto the frame using included mounting hardware—no welding needed. The precision, robotic welding ensures alignment and strength, so when the holes line up, the install goes smooth. It’s designed for DIY installs using basic tools, making it easy to add towing capability at home without special equipment.
Built from sturdy steel and finished with a gloss black powder coat over a protective base coat, this hitch resists rust and corrosion from the road and weather. The round-tube construction adds strength while keeping it stylish under the bumper. It looks clean and finished instead of bulky or industrial, so it blends in when you’re not towing.
Because it’s a standard 2" Class III hitch, you can easily attach ball mounts (sold separately), bike racks, or cargo carriers whenever you need them. The receiver’s size makes it compatible with most common hitch-mounted gear, giving you more ways to use your vehicle for work or play without needing adapters or extra fittings.

Customer Satisfaction Score:
99% were satisfied with this product
1% of customers were not satisfied
Ratings & Reviews

Had a few challanges. One the directions say to drill out the existing hole for fishing the bolts. But the bolts are 1” in diameter. The other was a small problem with the width between the frame. But that can change from vehicle to vehicle!
The hitch showed up in a timely manner and I installed it immediately based on the video.
In the video, the fishing of the bolts\washers was glossed over. I ended up using a 12 gauge wire to fish around to the openings where I would tape the supplied fish wire. Also, you have to go OVER the hub for the suspension. If your wire goes under, when you fish, the bolt head won't fit. Once the bolts were all fished through, installation went easier than I would have expected.
Is instaled already in the van, look good and I believe will be right for what I need, pull a trailer with 2 motorcycles and my other trailer with my jet ski if I need,but the main purpose is to hold a basket in the hitch to carry 4 or 5 cans with fuel and a small generator in long trips, installation was not difficult when my son and I found the way, fit perfect, look strong and I’m satisfied with my purchase.
The hitch is awesome, I had trouble getting the bolt plates thru the side rails in the frame. after a few hours fighting it, I just drilled a hole thru the floor will use the metal that came out with hole saw to plug the holes. the back to bolts were ok to put in. all in all, for a guy that has not put a hitch on in over 20 years, it took me about 4 hours with my Neighbors help.
Nearly impossible to install because it didn't fit properly. Fishing the bolts thru kept getting hung. Had to drill holes to fish them out an back in. The hitch was to wide and tight fit. Had to use a jack on blocks to press it up, it lifted the van up instead of going in place. While jacked up i beat it n place with a hammer.
The hitch is solid and is well hidden under the bumper but it has started to rust a little from paint scratches at the receiver. Overall installation was challenging (the hitch had warped during shipoing( but strainer customer service was very helpful.
Good heavy hitch, it looked flimsy in the picture.
Don't install this hitch if you're not comfortable with a 1" hole saw (not 7/8" like the instructions say). Wear eye protection. The metal pieces go everywhere!
Don't even try to fish the bolt thru the rear access hole- just do the optional bolt installation. (Enlarge the forward frame access hole to 1" just in front of the hitch bolt holes.)
Have some help and put vehicle on a lift if possible.
Mark and trim the plastic part by holding the hitch up to the bumper and mark what needs to be trimmed before you take the trim fasteners out.
Fits perfect , only only thing I would highly stress about installation and do believe should be added to footnotes is when you feed the wire thru frame to drag bolt thru make sure the wire is on top of the shackle bolt inside the frame .
I learned the hard way . Fed wire thru , then attached bolt and washer and went to pull thru and it got wedged under the lower bolt shackle inside frame and was stuck . Had to drill a hole inside van right above the area to retrieve bolt .
Really need to add to instructions . After I figured that out rest were fairly easy . But big set back back for one bolt .
Fishing the carriage bolts in worked in 3 of the 4. The last one got stuck to the extent that I had to abandon it. Your instructional video pointed out that was the difficult part and how to proceed. It took me a while to find a replacement for the bolt because your only option to buy the full pack again didn't feel right.
Regarding the fishing. To get the bolt to where it needs to go you can go over or under the sheet spring mount. Maybe I got lucky 3 times a s the last time the fish wire got through the other path - I never know. If there is more feedback maybe there is enough data to discern why it sometimes just won't work .
It all worked out in the end, though. 6
The instruction pictures are terrible. I understand fishing the bolt. The other method says to enlarge a hole to 7/8. Where is this hole located. There is a picture of location but pictures are so
Nissan nv200 curt hitch. A great product, but a bit misleading on the ease of mounting. Bolts are 2 big to fish around leaf spring mount. And no demo on the difficulty enlarging hole to access mt. Points.
Sam

3/9/2023
No issues
This the the 4th hitch I have ordered for a vehicle from etrailer. Service is always fast. Parts are accurate. Installation has never been difficult.
If I ever need another hitch, I'll be back.
Trailer H.
4/2/2018
All works fine. When I need trailer parts for my new vehicles, RV, or trailer, I always shop etrailer.
Well designed product.
Items to note;
The facia needs trimming but not how the instruction say.
Mine has the bumper proximity sensors which required loosening the wires and cutting a mounting stud.
The instructions show the four frame mounting bolts being feed through the frame with the 1x3" spacers kinked on the wire. This should me more obvious...

Evan
6/3/2020
A year later and still great. I don’t use it much though.
Thank you !!! No issues whatsoever

Albert M.
10/12/2018
Perfectly great product A+
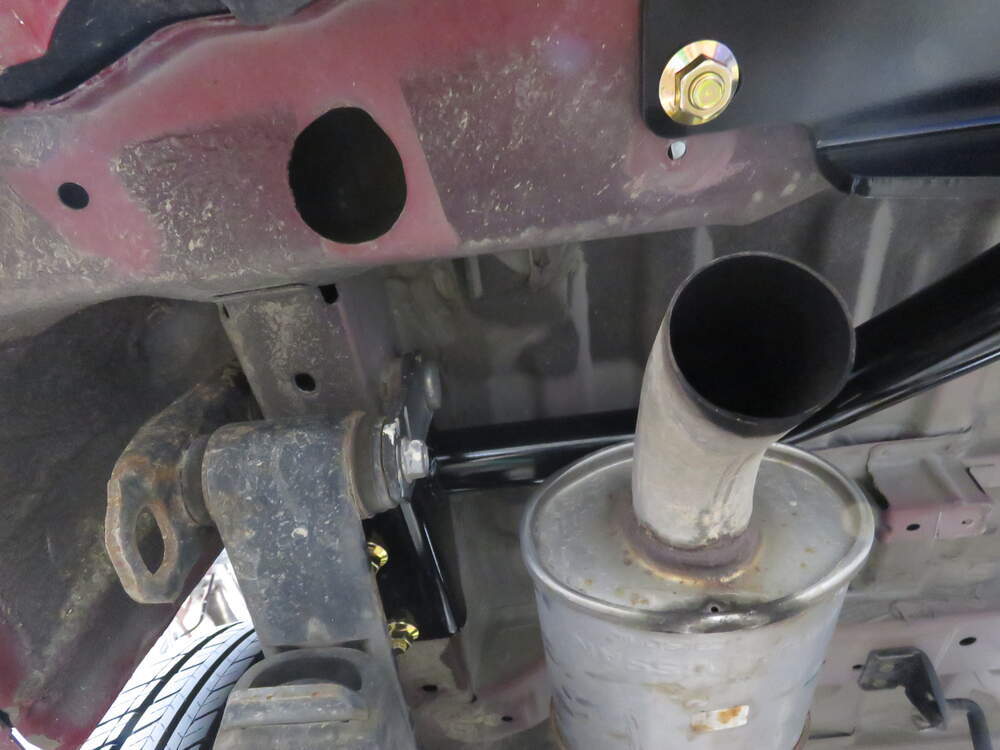
Didn't fit due to where the exhaust system is. Just because it's the right width doesn't mean it will fit.
perfect fit. easier install than I expected. fish wires worked great.
The website provided all kinds of useful information to make sure this was the hitch I wanted. The installation videos were great. I like the way you do business. The hitch arrived in a couple of days. Thanks!
Worked great had installed in less than an hour. Have to trim som plastic on the number and drill frame holes bigger with step bit to make hardware fit into frame rails but otherwise spot on bolt locations!!!!!
Nice people to talk with and has lots of information on hitches and providing excellent service.
Hitch fit my Nissan NV 200 exactly. No cutting or drilling was required to attach hitch. Ingenious method to get the mounting bolts to proper location!
I would surely recommend etrailer to anyone looking to buy a trailer hitch.
Pretty easy and straightforward install. I handled it alone in my carport, and it took about 3 hours, total. I didn't need to elevate the van at all, and I used basic tools, the scissor jack that came with the van as an extra hand at the end, and a dremel to enlarge the frame holes to fish the bolts through using method #2, as the process shown in the video was not possible on my '15 Chevy City Express. Enlarging the forward frame holes to fish the bolts through was the toughest part, but wasn't overly difficult, and I sprayed the holes with a little rustoleum paint I already had when I was finished to prevent rust. (Keep that in mind if you don't have any on hand.) I needed to remove one small bracket holding some wires from the frame on the passenger side, and just zip-tied the wire to the hitch in the same spot when I was done. The same wire also needed to be slightly relocated just below the rear bumper to allow the hitch to fit into place. Those two steps were not in the directions, but were obvious and very simple to take care of with 2 zip-ties. Overall, the fit of the hitch was really good, and so far it seems like a high quality piece. The paint looks good, it doesn't protrude from the rear bumper, and it is very sturdy but not excessively heavy. I am happy with the purchase and install. If you're handy and have tools don't waste your money paying a shop to put it on for you, and you don't need a lift, ramps, or jack stands.
This was a relatively straightforward install on my 2021 NV200 aside from the fact that I first tried option 1 (as described in the instructions) for fishing bolts from the back and just could not get the bolt and spacer past the suspension shackle. The guy in the video made it look easy but he’s probably done it a hundred times and has the right touch. No matter how many times I tried, over a period of about an hour, the bolt and spacer just got stuck on the suspension shackle (I was lured into a sense of confidence after watching the video and with the knowledge that I am pretty good at fishing wires; the skill did not readily transfer). Then it took me another hour to get the bolt back out again to try option 2. With a titanium unibit, enlarging the secondary frame access hole and fishing from the front was way easier (I just had a standard drill; a right angle drill would have made it easier to work in that tight space). I thought I would save time with option 1 and not having to enlarge the secondary access hole but in retrospect the whole process would have been much simpler if I had begun with option 2. With this one exception, the how to video and the instructions are excellent and I was able to tackle the project with confidence despite never having installed a hitch before. I loved the fish wires that came as part of the kit that were designed to thread onto the bolts (very clever). I of course removed the spare tire before I started to have space to work under the van and get the hitch into position, but could not get the exhaust detached from the rubber isolator. I just gave up on that as there was enough play in the system to get the hitch up and over the exhaust system without fully detaching. I had to remove a small bracket used to hold wiring on the right and cut away some of the trim to expose a rear mounting hole. One other detail I had to address was my van has an aftermarket rear seat installed and the anchor bracket for that interfered slightly with the positioning for the hitch. I used a grinder to cut a small notch in the hitch so it would fit around this bracket.
The product was delivered on time and the trailer hitch is very well made. I couldn’t be happier with it!
The overall installation was straightforward, and your online videos with Jake (Wiring Harness) and Scott (Hitch Receiver) were spot-on and extremely helpful. For the final part of the wiring install, I used a plumber’s snake to fish the power wire up into the engine bay — worked perfectly.
As for the hitch receiver, I definitely recommend drilling an access hole near the two mounting holes. That step alone saved a huge amount of time. The only moment of concern was aligning the receiver with the bolts. Without the grace of God, I’m sure I would have pushed one of those bolts back into the frame — and I don’t even want to imagine what that would have meant. After removing the fish wire to thread the nut, there is a risk of the bolt slipping upward, but I solved it by looping a string around the bolt and keeping tension on it while threading the nut. Then I cut the string and proceeded with the torquing.
This was a one-man operation, and I didn’t have a jack during the receiver installation, but it still came together successfully. Now all I need is the perfect plug-and-play trailer.
Update: After the initial install, I went back and added 1/4” split loom to the power wire for extra protection. It fit perfectly and made the whole run look factory.”
Thank you for such wonderful products and clear guidance.


Mike L.
4/2/2026
You're very welcome Bill. I'm so glad we could help. Congratulations on your successful install, good job! What are planning on dragging around?
Do you have a question about this Trailer Hitch?
Info for this part was:
At etrailer we provide the best information available about the products we sell. We take the quality of our information seriously so that you can get the right part the first time. Let us know if anything is missing or if you have any questions.




























Jenny N.
3/8/2022
I recommend using the bolt leader to fish wire the bolts through the hole in the frame towards the rear of the vehicle. The video link below shows this location after mark 3:20.
Helpful Links
tv-install-curt-class-iii-trailer-hitch-2014-nissan-nv200-c13165.aspx