Most Popular Canoe for 2016 Dodge Grand Caravan
change vehicle# 1
LockRack Adjustable XL Watersport Carrier - Canoe, Kayak, or 2 SUPs - Side Loading - Universal Mount
- view all Watersport Carriers
- Fishing Kayak
- Kayak
- Canoe
- Paddle Board
- Roof Mount Carrier
- Saddle-Style
- Folding
- Bars with T-Slots
- Side Loading
- Clamp On
- No Load Assist
- Lockrack
More Information >
The keys are an issue (wish they were metal), but everything else is great! I go sunrise kayaking only and hate putting straps on with cold hands at 3:30 in the morning. I have a Nissan Pathfinder and was able to put this on with another set of Malone J-hooks so that I can have a second kayak when I go with someone. Once the fear subsides of it possibly falling off, you realize how quick and easy this thing is to use. It takes me 1 minute instead of 9-18 minutes to get my kayak up and secure. I have tested it at 75mph without any jiggling or issues. I sat on this in my shopping cart forever and finally pulled the trigger. If you kayak at least 10 times a year or are going at high speeds for extended periods of time in warm weather, totally worth it. If not, well, there are cheaper options out there.
I mounted it on my Yakima racks. Very easy to do (directions could really be improved by having someone describe the steps more clearly). I have not used this. Could be a month or so. However, initially, it looks good. Too bad the angled arms that hold the kayak are not adjustable depending on the angle needed.
# 2
Yakima KeelOver Canoe Roof Rack w/ Tie-Downs - Gunwale Brackets - Clamp On
- view all Watersport Carriers
- Canoe
- Roof Mount Carrier
- Gunwale Brackets
- Aero Bars
- Elliptical Bars
- Factory Bars
- Round Bars
- Square Bars
- Side Loading
- Clamp On
- No Load Assist
- Yakima
More Information >
Arrived quickly was exactly what I was looking for.

I've been using the product for two summers now and it is perfect for what I'm using it for. My canoe is an Old Town Discovery 133, it's very wide and I initially had trouble fitting it in the brackets with how relatively narrow my Rav4 is, but the instructions that came with them mentioned I could just flip them around. That worked perfectly. I only use the brackets and the tie down straps from the kit to tie the boat to the crossbars, and then use the painter lines I put on the bow and stern of the boat to tie those to the car. That rides on the highway very easily with no shifting. With two people, the load/unload time is around 10 minutes as long as one person knows what they are doing. This kit had exactly what I was looking for, seems built to last, and if I ever need another kit to help tie a canoe to a car then I know I can trust this product to get the job done safely and reliably.
# 3
Thule Portage Canoe Carrier w/ Tie-Downs - Gunwale Brackets - Side Loading
- view all Watersport Carriers
- Canoe
- Roof Mount Carrier
- Gunwale Brackets
- Aero Bars
- Elliptical Bars
- Factory Bars
- Round Bars
- Square Bars
- Side Loading
- Clamp On
- No Load Assist
- Thule
More Information >
As all Thule products the Thule universally mounted canoe carrier is great. It came with all required items for safe and easy canoe transportation. There are two straps with pull to fasten for the canoe down, two tie down ropes for each end with nice pull tight and release mechanisms for the cord as well, along with two straps to fasten to the canoe ends used with the pull to tighten cords. The Chevy traverse cross bar had to have the plastic end caps removed for use with Thule canoe carrier. This was because my canoe took up the entire cross bar width to allow for Thule mounts. It is not a big deal to remove the plastic end caps. They only provide a finished stream lined look. Happy and Safe Canoeing


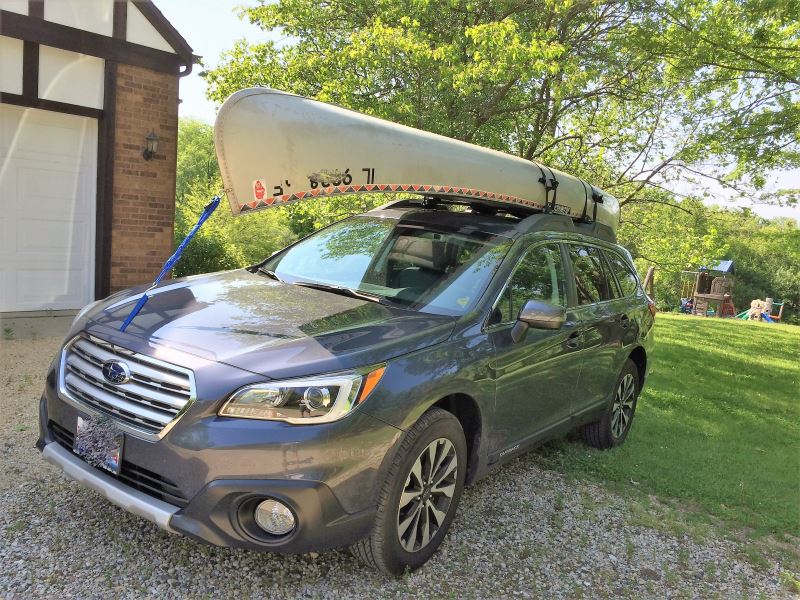
After retiring my 1999 Chevy Silverado 4x4 pickup, I purchased a 2017 Subaru Outback as a replacement vehicle. To transport my 1981 17 foot QT17C Alumacraft canoe on the factory installed roof rack crossbars that came with the Outback, I selected the Thule Portage Canoe Carrier w/ Tie-Downs - Gunwale Brackets - Side Loading - TH819 to do the trick. With one previous transport of the canoe sitting directly on the Outback roof racks, I realized those Outback roof racks were not as durable as the racks on my truck so I sought an improvement to avoid future scuffing and scratching. I did some advance research online and couldn’t be more pleased with this purchase from etrailer.com. I now have a quality product at the right price and these gunwale brackets are a simple solution for this veteran canoe man. The padded brackets grip the canoe and stopped the scratches. The high-quality load straps are nice with the rubber pad that covers the buckle and they easily snug the canoe tight to the racks. I’m also impressed with the bow/stern tie downs that have a very nice ratchet and clip on one end and I secured the supplied hook with a bowline knot to the other end of the ¼ inch rope. The Outback did not have convenient anchor points on the front or back of the vehicle for tie down locations but I found a good solution there as well by ordering the Thule Bow/Stern Tie-Downs - Qty 2 - TH530. This works well with the tie downs I mentioned previously. One limitation to be aware of with the Subaru Outback roof racks and this product is the width of your canoe. My 17-footer measures 34 inches at its widest point at the portage yoke. I had to place the four brackets up tight against the inside roof mounting to achieve the spread and accommodate the canoe placement. The canoe ended up fitting like a glove on the padded brackets. When placing the strap to hold the canoe down to the crossbars, I ran the strap through the vehicles tie down points and then under the crossbars for added security. Total product installation time including securing the canoe can easily be achieved in approximately 20 minutes. I look forward to many more years of safe and happy canoeing. I give etrailer.com an excellent rating for the entire ordering and shipping process on top of the high level of satisfaction with the products I purchased through them. Their customer service and price ensured me that I’ll do more business with them in the future.


# 4
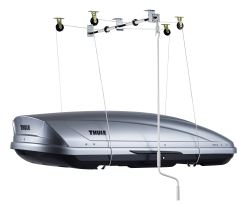
Thule MultiLift Cargo Lift and Storage System - Ceiling Mount - 220 lbs
- view all Watersport Carriers
- Fishing Kayak
- Kayak
- Canoe
- Storage Rack
- Ceiling Mount
- Thule
More Information >
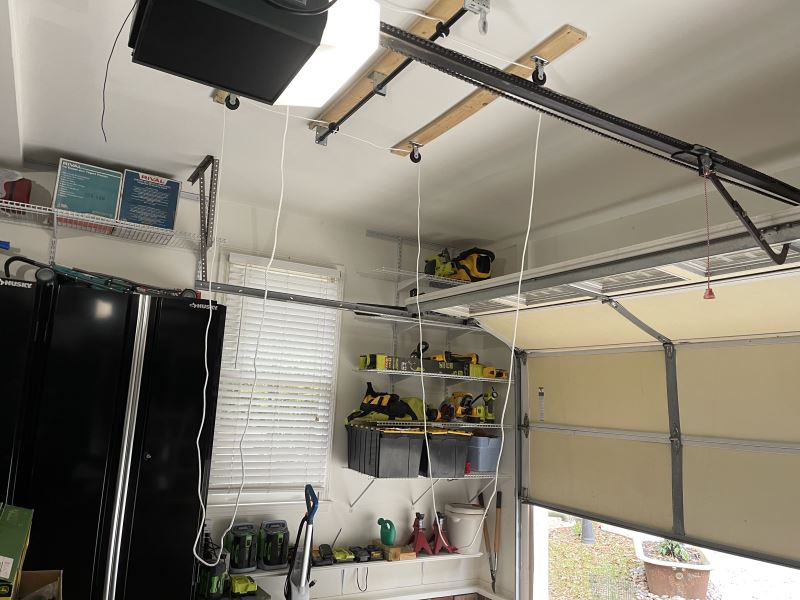
The product itself I would give 5 stars, but it took considerable effort before I could get it installed and tried out. The first obstacle I ran into is that there were no screws included. After opening the box I discovered this, read through the manual, looked at the product listing on etrailer's website, and on Thule's website. I did not see any notice that screw were not included. Finally I did see on one end of the box such a notice, and etrailer's customer service confirmed this to be the case. The second obstacle was how to install the product in my garage. The instructions were of marginal help. They are mostly devoid of words, but rather use pictures to instruct. Once I had a good idea of how all the parts were to fit together and be mounted I discovered my garage ceiling would not accommodate the parts. The ceiling rafters are installed on end, from one side of the garage to the other, and thus not wide enough for the screw holes in the pulleys or center rod mounting brackets. I improvised by installing in the garage attic two 2x8 boards perpendicular to the rafters, then three 2x4 boards snug under the garage ceiling, attached to the 2x8s by way of two 3/8 x 3.5" hex bolts on either end of the 2x4s. The 2x4s were 10', cut in half to allow room for the TH572 mounting hardware between the bolts. With appropriate structure in place (a 12-hour one man job), I started on installing the product. I used eight 1/4 x 1.5" lag screws to attach the pulleys to the 2x4s, and six #10 1.5" wood screws for the center rod mounting brackets. This part of the job took only about an hour... maybe two... it was late. Some suggestions: - make sure your garage can hand the load of the box (What you see in most attics are designed to hold the roof, not have stuff suspended from them -- I got lucky and had access to reinforced headers in the right places) - make sure your garage door can still open with whatever you are storing in place - make sure you can get your car in position under the load (rooftop box, kayak, etc) where everything is installed - make sure you can get your car out of the garage with the load attached So, my main complaints with this product are two: no screws, and minimal instructions. But with a little determination and some help from etrailer customer support, I was able to get the job done. Now I need to find someone who can make my garage door opening taller.

Overall I give this Thule Multilift Cargo Lift a five star rating; however installing this device takes some effort and skill. Maybe more effort and skill than the typical DYI'er can provide. The instructions provided do not have any words or dimensions, only pictures. Other than following the routing of the rope through the pullies it didn't provide me any benefit. Also, my system did not come with any screws or bolts. For me that was not a big deal as I have plenty of hardware I can use. There is one center bracket and four pullies to install. The spacing does not line up with typical dimensions so I had to improvise to get the Multilift installed. My garage ceiling has joist spacing that is 16" on center. That is typical, although some may have 24" on center spacing. Either way the spacing for the screws to secure the various components does not match. I guess you could use toggle bolts to hold the components to the ceiling sheetrock but I didn't trust that idea. What I did was to span my ceiling joists with 1"x4" wood and then attach the components to them. The kit comes with a template so getting the actual components set up on the 1"x4" wood strips was simple enough. Once all the components are installed then the rope is routed through the pullies. As you can see in the pictures I had a close clearance between the roof box and my roll-up garage door. I think it is about 2". Since I don't have a tall roll-up garage door I cannot drive my car in or out with the roof box installed. That didn't matter to me since my only goal was to store the roof box out of harms way. My last comment is that it takes two people to lift the roof box up and get the Multilift ropes in place. I tried to do it by myself but that did not work. I do like this Thule Multilift but it took some effort to install it. I really like the way it is raised and lowered by turning a mechanism with a handle. There is a less expensive lift sold on the internet but it did not use as many pullies to raise and lower the roof box and it relied on a rope to lift and lower it.

# 5
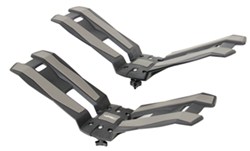
Swagman Exo Aero Rooftop Kayak Roof Rack w/ Tie-Downs - Saddle Style - Clamp On
- view all Watersport Carriers
- Canoe
- Kayak
- Roof Mount Carrier
- Saddle-Style
- Aero Bars
- Elliptical Bars
- Factory Bars
- Round Bars
- Square Bars
- Rear Loading
- Clamp On
- No Load Assist
- Swagman
More Information >
Hi Carol, I emailed my feed back. Out here in the sticks your website couldnt load properly. It a great product. Perfect for this light duty purpose.
I bought this rack to replace a Thule Dock Glide for use on my Malone Microsport kayak/canoe trailer. The Dock Glide worked fine on my rooftop wing bars but wouldn't hold my kayak in position on the trailer. Road vibrations and trailer bouncing would cause the kayak to twist no matter how tight my straps. The Swagman Exo Aero mount is an absolutely perfect fit on the Microsport crossbars with the cutout of the mount top portion and a depression in the bottom bar exactly fitting the cross bar (1 1/4") and is rock solid with no chance of shifting position. The Swagman mount is heavily constructed and the rubber strips on the wide bars hold the kayak like a vise. The boat doesn't shift at all no matter how bumpy the road. Great product.
# 6
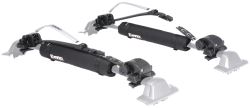
Inno Locker Watersport Roof Rack w/ Crossbar Pads - Locking - Clamp On
- view all Watersport Carriers
- Canoe
- Kayak
- Paddle Board
- Surfboard
- Roof Mount Carrier
- Saddle-Style
- Aero Bars
- Elliptical Bars
- Factory Bars
- Round Bars
- Square Bars
- Rear Loading
- Side Loading
- Clamp On
- No Load Assist
- Inno
More Information >
My representative who helped me was the most helpful representative that I have come in contact with. All representatives are very helpful, but she stood out as she assisted me from start to finish on my order. This is exactly why I use e-trailer for my shopping experiences.
Heavy duty. Easy enough to install. Instructions aren't great, but you can figure it out. The crane is a good idea in theory, but could use some design refinement as it only lifts just enough to tuck a paddleboard underneath. The rachet system is great and the rubber coverings for the wires are super helpful for preventing scratches.






What our customers are saying:
"Very helpful/friendly Customer Service. Competitive Pricing. Shipping was Fast."