


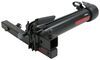
At the trailhead, getting bikes loaded and positioned correctly can take extra time. This rack uses wheel trays with a front tire hook and StadiumSeating tiers to keep bikes separated and stable for transport.
Loading heavier bikes creates immediate strain and uncertainty around what the rack can safely carry. This setup is rated for 65 lbs per bike across two positions, giving you the capacity needed for e-bikes, mountain bikes, and other heavier builds. You can load both trays and go without having to rethink what you're bringing.
Non-standard frames, step-through designs, or bikes with accessories often complicate how a bike gets secured. The StrongArm hook grabs the front tire while a flip-away rear wheel strap locks the back in place, keeping contact off the frame entirely. Bikes stay secured at the wheels, so you don't have to work around frame shapes or remove accessories just to get everything mounted.
When carrying two bikes, handlebars and pedals tend to collide during loading and transport. The StadiumSeating tiered spine positions bikes at different heights, creating separation between them. Combined with optional offset tray positioning, this layout cuts down on overlap so you're not wasting time untangling handlebars before every ride.
When you're making multiple stops to grab gear, snacks, or tools, unloading bikes every time slows your whole trip down. The remote 3-position tilt drops the rack away from the vehicle, even with bikes loaded, so stops stay quick and your ride day doesn't turn into constant unloading and reloading. When it's empty, the rack folds flat to stay out of the way.
Different bike sizes and tire widths can quickly limit what fits on a rack. This design supports wheel sizes from 16" to 29"/700c, tires up to 4-1/2" wide, and wheelbases from 32" to 52", covering everything from youth bikes to fat-tire setups. The trays are also compatible with the RampUp (Y39VR - sold separately), so you can roll bikes into place instead of lifting them when loading gets harder.

Videos are provided as a guide only. Refer to manufacturer installation instructions and specs for complete information.
Hello, neighbor, this is Curt with etrailer, and today we're gonna be taking a look at the Yakima StepUp bike rack for two bikes and for two by two inch hitches. Now the great things about the StepUp is this, the variety of bikes that will work on it. First and foremost, you're gonna be able to carry bikes up to 65 pounds per wheel tray. So it is going to be able to accommodate a lot of those e-bikes that are out there on the market. It is gonna be a wheel-mounted bike rack, so as long as your bike doesn't have fenders, it's gonna be able to work with it as well. It can work with wheel bases from 32 to 52 inches wide thanks to a tilting rear wheel tray to help accommodate for that, wheel sizes from 16 to 29 inches, so it's gonna be able to accommodate a lot of those youth bikes as well, and you can use bikes with tires up to 4 1/2 inches wide with these big wheel cups right here.
This is also gonna be a great bike rack for anybody whose hitch is a bit lower to the ground, like we have on our car today. And that's because the stem right here helps the wheel trays be tiered like a stadium seating. So they're gonna raise up as they get further away from the vehicle, and that's gonna really help out with your ground clearance. And to help us get into our cargo space, one of the features of this bike rack is that it does have a tilt-away so that we can get in and out of our cargo space without removing the bikes. It operates very, very simply.
There is a latch underneath here that we're gonna pull up against. So what we'll do is we'll hold the bike up so it doesn't fall down on us, pull back on this latch, and then we can slowly lower this away from the bumper. Now depending on the weight of your bikes, you might want to have somebody help you out with that, but if you're carrying two heavy bikes, you probably have an extra set of hands with you anyway to do that. We'll come around here, and this is gonna give us clearance to get in and out of our cargo space. And this is gonna be really convenient because maybe, you know, you're keeping shoes, helmets, whatever it is in here, extra water, you can get in and outta here really easily, or maybe on the way back from the trail, you just need to stop at the store and pick up some groceries.
Now you can do all of that without removing the bikes. And to get it back up into its riding position, all you need to do is you don't need to engage that latch, so you can grab it by the tray, lift it up until it clicks into place, and now you're ready to hit the road again. But in those situations when you do end up, you know, leaving the bikes on here for a minute and going into the store, you know, whatever it may be, if it's something longer than just hopping in and outta the gas station really quick, there is an included cable lock, and this cable lock can be run through this welded hoop that we have right here. And I really like that Yakima put a place for the cable lock on the bike rack itself. There are a lot of bike racks on there that just kinda leave it up to you where you can run it, and it's not always that easy to figure it out.
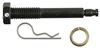
So with this included cable lock, it's also gonna be key-alike to our locking hitch pin, which we have down there. And that's really convenient too because you can use the same key for either lock, and it works with Yakima's SKS, or Same Key System. And what that allows you to do is to really get all of your Yakima accessories keyed-alike. So if you're running the bike rack and you have a Yakima roof box up there that you take with you as well, you've got the opportunity to get them keyed-alike and get everything down to one key instead of several. And the combination of those is gonna offer great security. The cable lock is gonna keep the bike secured to the rack while the locking hitch pin is gonna keep the rack secured into your hitch. And on top of that, in true Yakima fashion, we are gonna have included bottle cap openers. That's gonna be located right here under your front wheel cup. And when it comes to loading and unloading your bikes onto the rack, the operation is gonna be really, really simple. So we'll show you how to unload it. Loading it up, you just follow these steps in the opposite fashion. So the first thing I'm gonna need to do is unlock my cable lock. So we're gonna go ahead and get that run through and detached. And that's gonna run right down through that loop that we we inchesre looking at earlier. And this is something that I would probably just end up keeping in the back of my cargo space there. But with that removed, the first thing I want to do when I'm removing a bike is to disengage the rear wheel strap. We want to make sure that we leave this on. That way the bike can stay upright and secure while we're operating this latch. But all we're gonna do is to press this tab and take it out. When it comes to loading it up, we would just put it in and tighten it down. And it is ratcheting, so we could always look for that extra click to get it nice and snug. But in this case, we're just gonna feed it through our spokes and out the other side and clear the wheel. Then we're gonna come around here, I'm gonna grab onto the frame. This button here on the front of our hook, I'm just gonna depress that. It's gonna release my hook. I'll bring it all the way to the top of the post and it'll clear the wheel. Now, I'm free to just take my bike and bring it down and get it, you know, onto the trail, into storage, whatever I'm doing with it at the moment. All right, now with that bike removed, we're gonna talk about the bike closer on the tray. Now, whenever you're loading bikes onto a bike rack, the heaviest bike, regardless of the size, always goes closest to the vehicle. So let's say in this instance, for the sake of demonstration, we do have a heavier e-bike, a 60-pound e-bike on here. Not a whole lot of fun to take on and off just, you know, on your own by carrying it. In those cases, I think it's very valuable to have yourself the Yakima ramp. Now this is sold separately, and this is gonna go right behind your rear wheel. There's an opening right here for it. You're just gonna put it in and it'll lock in just like that. Now this ramp is also extendable. So if you do have a vehicle that is higher up, you're gonna be able to extend this out to give you a better angle to get it up and down. We don't need to do that in this case 'cause we do have a hitch that's a little bit closer to the ground. But when it comes to getting this off of the rack, it's gonna be the same process as before. I'm gonna disengage our rear wheel strap, feed that out, and then I'm gonna come around here and hold onto the bike, and I'm gonna do the same thing with this hook and clear it outta the way. Now before I roll this down, one of the things you'll notice is that the trays are in this V shape, and that's done on purpose specifically for using the ramp. It's just gonna help the bike stay on track as you roll it out in down the ramp and outta the way. And you don't necessarily have to have an e-bike to use the ramp. It's gonna work on the rear wheel side of both trays. It just, even if you're somebody that just doesn't feel like lifting the bikes up and down from here all the time, I think the ramp makes an excellent accessory for anybody who wants to use it with this. And with the bikes removed, if we put them in the garage in storage, whatever it may be, we don't need to be driving around with all this extra out here. We can, of course, remove it from the hitch if we want to, but there are a lot of people out there who have a hitch solely for the purpose of their bike rack, and it's technically gonna be living in there for the most part. So we do have a stowaway position with this. If we're gonna use that same latch that's down here underneath that we did for the tilt-away, we're just gonna pull against that. We're just gonna lift up against the back of the vehicle instead. Now we've significantly reduced that footprint. Depending on your vehicle, you might still get some blockage in, you know, taillights, rear camera, any of that. But for the most part, this is a pretty compact bike rack. So I'm not really too worried about too much blockage back here. There are a lot of bike racks out there in the folded-up position that even come up high enough that they block a lot of people's rear cameras. In this case, the rear view camera is right here. I don't think it's gonna get blocked all that much and you should get some pretty good visibility on top of the fact that you've just dropped about 2/3 of the bike rack by folding it up and not having to worry about it. And when it comes to getting it back down, if, say, you're coming back from the trail, you're rolling up with your bike, got your helmet in one hand, holding the bike with the other, your hands are full, you can actually drop the bike rack by depressing this foot pedal right here, and that'll release it and get it down for you. So you got that little bit of added convenience as well. And one of the things about this bike rack too that helps make it really adjustable and adaptable is the fact that you can adjust where these wheel trays set and how offset they are. I'm gonna move this outta the way so we could see. But right here, there are three different anchor points. It's got a plug in this one here. So the way we have it set now is really at its maximum offset. And when we did that on this vehicle, because it's kind of a smaller, narrower vehicle, the tires really hung well off to the side. If your bikes can fit, you can actually move this to where these are not as offset. We've got the same thing back here on this tray. So you can move them closer together and configure 'em to your vehicle as well as to your bikes. And the way that you do that, the tool for that actually happens to be the same tool as our hitch pin. So I'm gonna go ahead and unlock our hitch pin and take out the clip. We'll unlock it. And as we bring this out, we realize that we do have hex keys on the end here. One of 'em is a security tool and the other is this hex right here, and that's the end that's gonna fit in here and allow you to make your tray adjustments. This end here is gonna be for the wedge that's inside the shank of our bike rack. That helps get it in there and wedge it in so that there's no rattle to it. This is gonna go right in here down at the bottom. And I'm gonna go ahead and loosen this up and take it out so you could see that wedge. So as I loosen this, you could see it moves around in the hitch quite a bit. This acts as an excellent anti-rattle device as well as wedging it and securing it into the hitch. And as I pull this back, you could see that silver portion on the shank is the wedge. When I screw that tool in, it's gonna expand and it's gonna fill up the rest of that hitch receiver so that it's not gonna move around on us. So if I was going to be installing this, I'd be putting it in, lining up my pinhole. Once I have it lined up, I'm just gonna run it through, make sure I got clearance. I do. Now I'm gonna take this end and I'm gonna tighten it up into place. And then once I have it tightened in, I'm gonna run it right back through, and I'm gonna put the clip in and then get it locked. And the thing about it is the wedge is really doing the most of the work as far as keeping this, your bike rack in your hitch. This, being as loose as it is, is in my mind, like similar to towing a trailer. It's kind of the same thing as safety chains. If, for some reason, your wedge fails, this is gonna be a good backup to ensure that it stays in the hitch. And you'll know that if if it fails, for some reason, because you'll hear it rattling around a lot. In my experience though, I haven't really run into that at all. These wedge systems work really, really well and for a good long time as far as keeping the secured inside of your vehicle. And that was a look at the Yakima StepUp two-bike rack for two inch hitches. And if after watching this video, you've still got some questions about it, or maybe you've used one and you've got some experiences to share, go ahead and drop those in the comments below. We would love to share the answer to those questions and those stories to help other neighbors just like you make the best decision for themselves. Once again, this is Curt with etrailer. Thanks for stopping by.
Customer Satisfaction Score:
90% were satisfied with this product
10% of customers were not satisfied
Ratings & Reviews

Arrived in a timely manner and easy to track. Took about an hour and a half to put together. Easy for a 66 yr old woman to put bikes on and off a 2022 Toyota Venza.
Extremely well built, easy to load bikes and reasonable overall weight to lift the rack to secure lift to vehicle hitch.
Info for this part was:
At etrailer we provide the best information available about the products we sell. We take the quality of our information seriously so that you can get the right part the first time. Let us know if anything is missing or if you have any questions.



















Thank you! Your comment has been submitted successfully. You should be able to view your question/comment here within a few days.
Error submitting comment. Please try again momentarily.