
Roof Rack Includes:
Part Numbers: INB117S,INFR-6
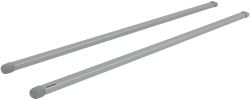
These steel, square crossbars attach to Inno feet to create a sturdy roof rack for your vehicle. Elastomer coating resists corrosion and helps cushion your load. Bars accommodate carriers and accessories that clamp around bars.
Features:
Specs:

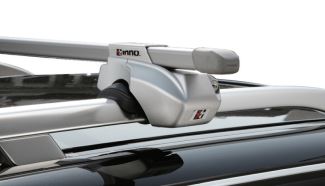
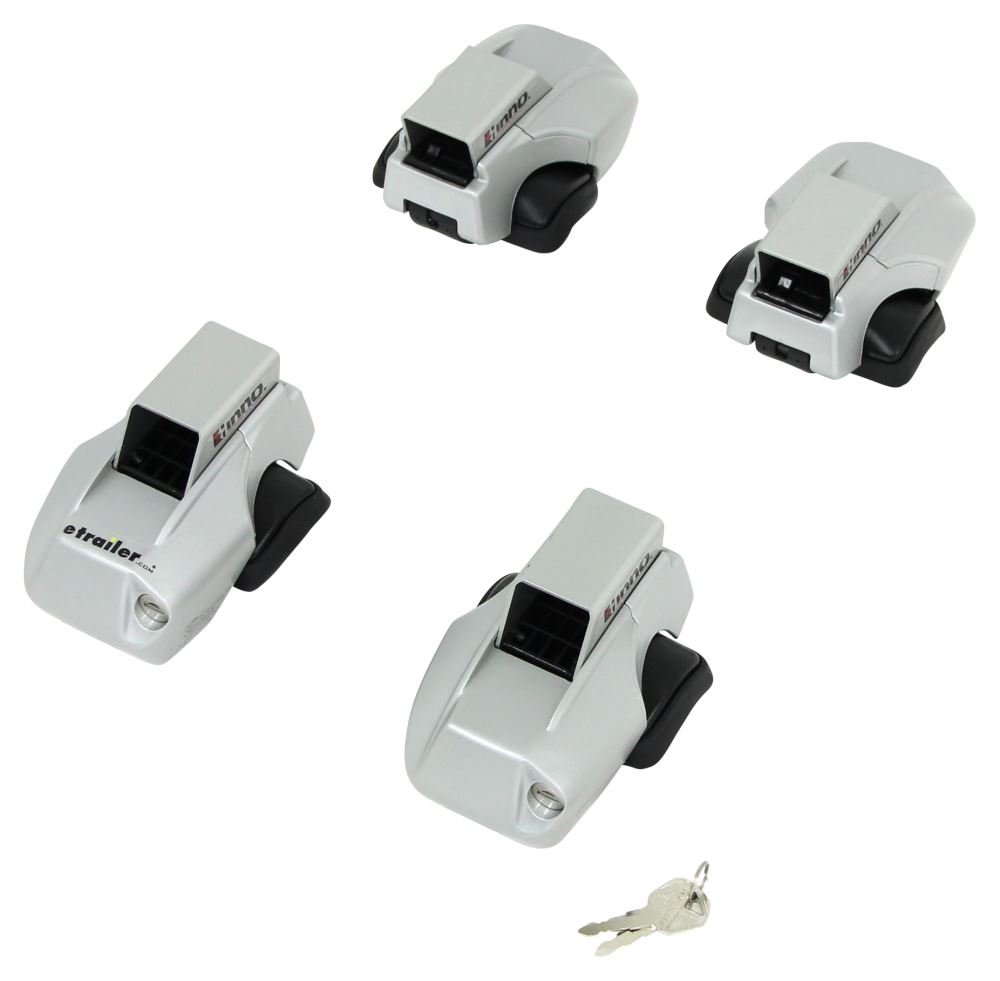
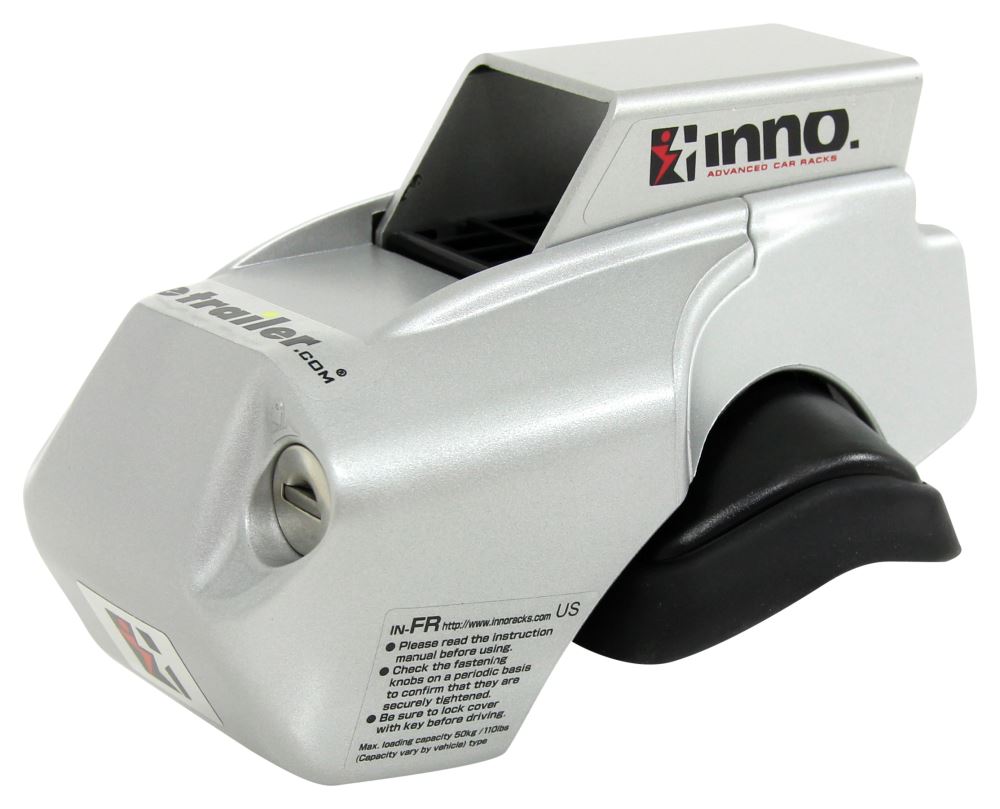
Durable feet help mount 2 Inno square bars to your vehicle's raised side rails. Rubber-coated steel straps wrap around rails and tighten with cam-action handles. Locking covers secure feet to side rails.
Features:
Specs:
Pair these feet with 2 Inno square crossbars to create an aftermarket roof rack for your vehicle with factory raised side rails. The feet install with no tools, and include locking covers to secure the system to your roof.
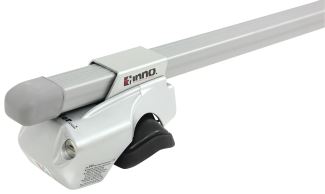
To install a foot, remove the cover on the end of the crossbar and slide foot over the bar. Tighten the foot onto the bar with the cam-action handle.
The Inno feet install easily with no tools required. Just wrap the stainless steel straps around your raised side rails and hook them into the bottoms of the feet. Then use the cam-action handles to tighten the straps on your rails. The rubber-coated straps and pads on the bottoms of the feet grip your vehicle's rails while also helping to prevent scuffs and scratches.
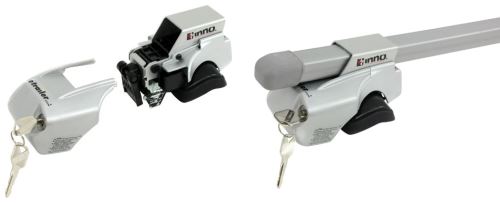
A locking cover on each foot secures the system to your raised side rails. Simply slide the cover into the guide holes on the foot, then use one of the included keys to lock the cover.
Videos are provided as a guide only. Refer to manufacturer installation instructions and specs for complete information.
Today we'll be taking a look at the Inno flexible roof rail stay system. Part number INFR. They're also available in silver with part number INFR-6. The Inno flexible roof stays are a perfect solution for adding a roof rack system to your vehicle with raised side rails. They are a tool free installation. I'll simply remove our locking cover, and underneath we have our tightening knob which helps secure our rubber coated stainless steel straps to our raised rails. Now, are stays are going to fit a variety of different sized raised rails.
We've got our straps set in the standard position, but if the rails are a little bit larger than normal we've got another position that you can put the strap in down here. To go along with our rubberized stainless steel strap around our raised rails we also have a pad on top. Both of which protect our vehicle's finish. Now that we've gone over some of the features I'll go ahead and show you how to put it together and get it installed. I've already got the front cross bar already installed on my vehicle, and for right now we are working with the 58 inch scare Inno bar here. You can find a variety of different sizes of these on our website.
You need to find which one works best for you. What we want to do is we'll take our stay. Let's go ahead and unlock it. Pull the cap off. Lift up the lever, and pull out our clamp.
We may need to loosen it up a little bit. Then once we've got that done let's go ahead and take our square bar. We're simply just going to slide it in on top just like that. Go ahead and grab our next one. Slide that one over as well. Just to be safe why don't we go ahead and take our end caps and put those on so the stays do not slide off.
Now, let's go ahead and place it on our vehicle. We'll hop up top. We want to make sure that our straps run down like I said, that way they can go underneath the rails. We'll just get that in position about where we want it. I'm feeding the strap underneath. Now, it's important to have a minimum crossbar spread of at least 20 inches. I'm going to grab my little tape measure, and we're going to go with 28 today. We're going to measure from center of the front crossbar to the center of the rear. All right, that looks pretty good. We'll run over to the other side. All right, just about got it. All right, now the next thing we want to do is we want to make sure that our stay is seated nicely on top of our rail here, which it is. Then we're going to bring our rubber strap underneath, and we're going to clamp it into this area here. You may need to loosen it up a tad more in order for that to happen. I'll go ahead and loosen that up. Just about got it here, so we'll just put that in place, and then we can tighten that down. Let's not tighten it down all the way just yet. Let's go over and do the other side. Now, the other important thing you want to make sure is that you have even bar over hang. That's going to be the distance between here and here making sure that's even on both sides. We'll go ahead and take a measurement. Looks like right here to the end of our end cap I've got eight and a half. Then over here looks like I've got seven and a half. What we're going to do is we're just going to pull that this way just a little bit. We're looking for eight inches on both sides. Yeah, eight inches. Let's go ahead and tighten those down. Now, you bar overhang will change of course depending on what size bar you have, so just make sure you have an even number on both sides when you measure that bar over hang. Then once those are secure we'll take our cap. Kind of slide it into place just like that. Then we'll lock it up. Now with our roof rack system installed we're ready to load up our favorite Inno accessory and hit the road. That's going to complete our look of the Inno flexible roof rail stay system.
Ask the Experts about this Roof Rack
Do you have a question about this Roof Rack?
Inno Accessories
Fit to this rack on your 2005 Toyota RAV4
Info for these parts were:
At etrailer.com we provide the best information available about the products we sell. We take the quality of our information seriously so that you can get the right part the first time. Let us know if anything is missing or if you have any questions.


Thank you! Your comment has been submitted successfully. You should be able to view your question/comment here within a few days.
Error submitting comment. Please try again momentarily.